Author:
Marcus Baldwin
Date Of Creation:
19 June 2021
Update Date:
1 July 2024
Content
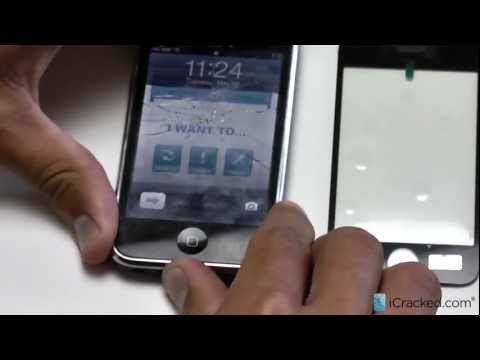
If you happen to damage your iPhone screen, the following steps will help you fix it yourself. Before proceeding with the repair, carefully read all the recommendations.
Steps
 1 Back up your iPhone data. Connect your phone to your computer, find it in the iTunes application menu and select "Sync".
 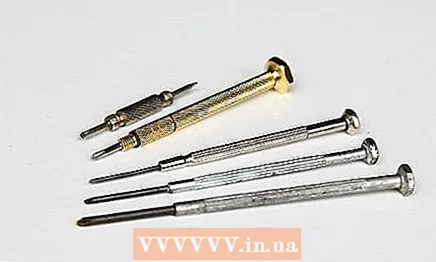 2 Prepare all the tools you will need for the repair. They can be purchased online. Search for "iPhone Screen Repair Kit" on Google and select from the options provided. You can get everything you need, except the screen itself, at tool stores. In the store, you can independently choose the tools of the required size and type. Here's what you need:
 - Replacement glass.
- A Phillips screwdriver (Phillips) with slot number 00 (2 mm).
- A utility knife, narrow spatula, flathead screwdriver, or similar tool.
- Alcohol, cotton swabs and / or hair dryer.
- Super glue or double-sided tape and scissors.
- If necessary: a small suction cup.
- If necessary: tweezers.
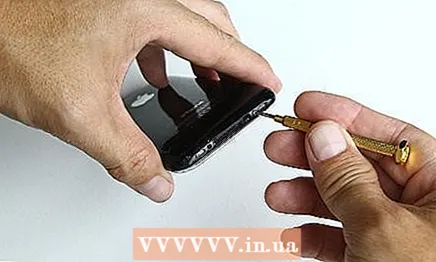 3 Locate the two screws on the bottom of the phone on either side of the USB port. Remove both screws using a 00 (2 mm) Phillips screwdriver. (It is not necessary to remove the SIM card before disassembling the phone).
 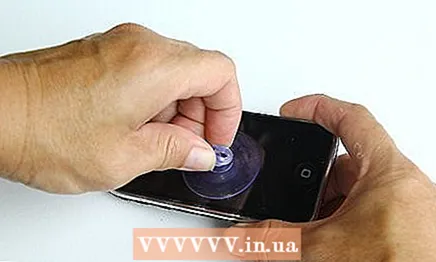 4 Take off the screen in one of the following ways:
- With a clerical knife. Insert a knife blade between the metal frame and the rubber pad and lift the screen up. Additional steps are required to completely detach the screen, so please read step 5 before performing this step.
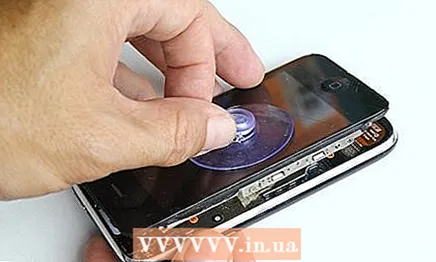
- Using a suction cup. Instead of a blade or screwdriver that can damage the rubber gasket, you can use a suction cup of the right size. Attach the suction cup directly above the Home button and gently pull upward. In this way, the glass can be removed without damaging the rubber gasket. If the glass is broken, sharp fragments can damage the gasket. In this case, be careful.
- With a clerical knife. Insert a knife blade between the metal frame and the rubber pad and lift the screen up. Additional steps are required to completely detach the screen, so please read step 5 before performing this step.
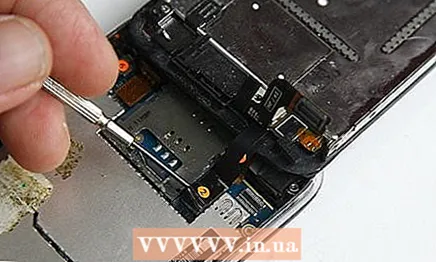 5 Find the connectors that connect the screen to the phone in the upper right corner. You will find bright orange stickers with numbers 1 and 2 on the clips. Detach the clips, if necessary, pry them off with a knife blade. (Note: sticker # 2 was lost on the phone in the picture).
 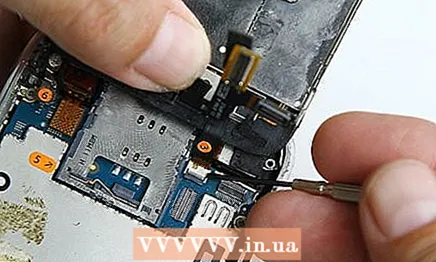 6 Locate the third connector under the # 2 retainer. It is slightly different from the first two. To detach it, you will have to lift the black clip. When you disconnect the third connector, the screen will be free. Just pull it out of the case.
 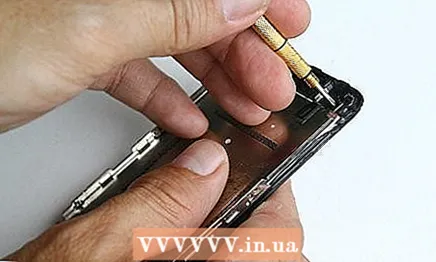 7 Remove the 6 fixing screws. There are five screws on the side rails: 3 on one side and 2 on the other. The sixth screw is located in the upper right corner. All 6 screws are the same, so there is no need to remember which hole each one belongs to. Some of these screws may be covered with black tape. This tape is not needed, you can simply cut it off with a knife.
 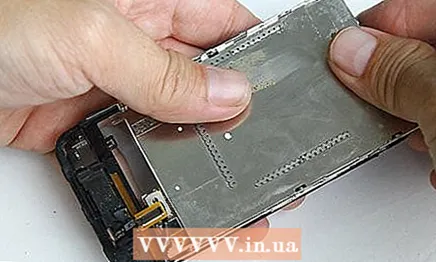 8 Separate the LCD display from the glass. Insert the blade between the planks and free the inside. Pull the LCD screen down towards the Home button to release the top edge. Do not be afraid to apply a little force, it will not deform the metal. This will free the LCD screen from the metal frame.
  9 Free the metal frame from the broken glass. This stage is the most difficult and will take some time, but it must be done carefully so that the new screen fits exactly into the frame. How to remove the glass will depend on how damaged it is, but feel free to use a little force, but be careful not to damage the frame. Use a knife or narrow spatula to remove glass fragments and glue residues. Sometimes it is recommended to use a hair dryer, but be careful, as the high temperature can deform the plastic fragments of the frame if you bend it while using the hair dryer. In this case, you will have to reheat it to get it back to its original shape. The glue can be removed with rubbing alcohol. To do this, moisten a cotton swab with alcohol and rub the remaining glue with it, and then carefully remove them with a clerical knife.
 - Do not cut yourself with a knife or glass. If you injure your finger with glass shards, read our article on how to remove the splinter.
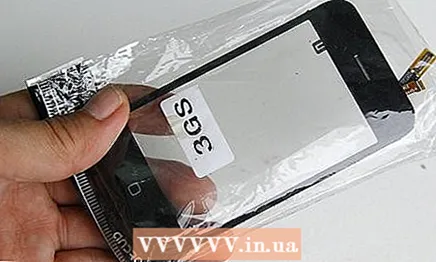 10 Prepare a new screen. If you are using double-sided tape, make sure the pieces are cut exactly to size. If you're using super glue, don't apply it too close to the Home button. Apply glue only to wide areas of black plastic at the top or bottom to prevent glue from getting onto visible areas of the screen. Wait a few minutes for the glue to harden. If you are working with double-sided tape, use tweezers to avoid dirtying the adhesive surface with your fingers. Remove the protective film from the new glass where it will come into contact with the adhesive tape.
 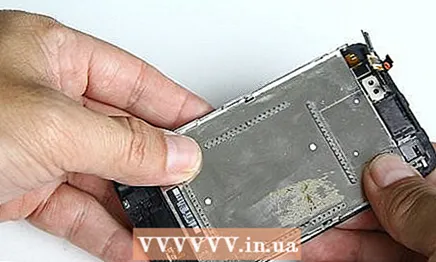 11 Start assembling your phone. Connect the glass to the LCD screen. The mounting bar is longer on one side than on the other. This will help you quickly determine the correct screen position. You may find it more convenient to insert the screen from below. This will slide the clamp into place.
 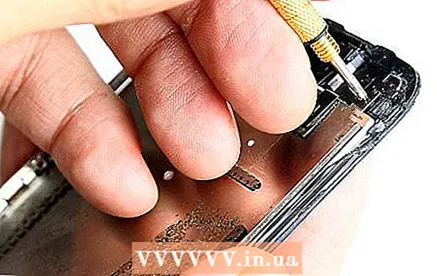 12 Screw the 6 screws back into place.
 13 Connect cable # 3 to its connector, making sure the latch is open. It will be easier to do this by pushing the # 3 connector down slightly and then holding the # 2 and # 1 connectors with your thumb. When you insert connector # 3, squeeze the black latch.
 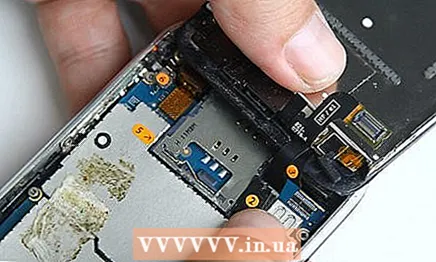 14 Insert connectors # 2 and # 1 into place. Be careful to slide the cable into the connector and do not be afraid to use a little force to push it into place.
 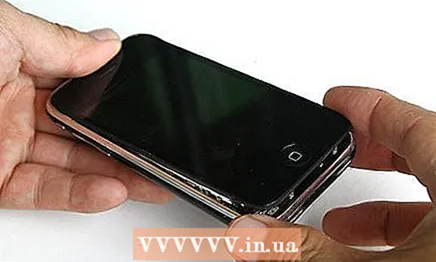 15 Install the screen into your phone. Insert the top first, the one where the connectors are located, and then the bottom. The screen should snap into place effortlessly. After making sure it is seated correctly, screw in the remaining 2 screws on the sides of the USB port.
Tips
- The phone screws are very small and can be easily lost. You can fold them into a small box or attach them to a magnet.
Warnings
- Repairing your phone yourself will void your eligibility for warranty service.
- If you are reluctant to bother with repairs or you are not confident in your abilities, contact a specialized workshop. Otherwise, you could ruin your phone.
What do you need
- A narrow flat-head screwdriver or similar tool. It will be used to remove any glue residue, so make sure it has a straight tip with no deformation.
- Small Phillips screwdriver (Phillips).
- Glass for iPhone screen.
- Super glue or double-sided tape.
- All the tools you need can be purchased online. Search for "iPhone Screen Repair Kit" on Google and select from the options provided. You can also purchase everything you need, besides the screen itself, at tool stores.


