Author:
Sara Rhodes
Date Of Creation:
11 February 2021
Update Date:
1 July 2024

Content
- Steps
- Method 1 of 3: How to find tools
- Method 2 of 3: How to write letters
- Method 3 of 3: How to Improve Your Technique
- What do you need
- Tips
Gothic script is a very beautiful type of handwriting that appeared during the Middle Ages. There are several varieties of Gothic writing, but they are all united by the general principles of writing letters. The Gothic script is very pretty and includes a number of decorative elements. Gothic calligraphy is suitable for both wedding invitations and entertainment as a hobby. Almost anyone can practice Gothic calligraphy. This is an interesting activity with many exciting challenges.
Steps
Method 1 of 3: How to find tools
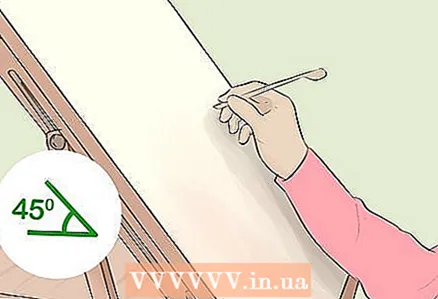 1 Work on an incline whenever possible. Working at a regular desk can restrict arm movement and put unnecessary stress on your neck and shoulders. Since Gothic script is written not only with a brush, but with the whole hand, tilting the work surface towards you will give you more freedom of movement, thanks to which the letters will be more accurate.
 - If you don't have a tilted table, try working on a thick book and place a block of wood underneath it. Try to achieve a 45 ° angle.
- If you do not have the opportunity to tilt the work surface, do not be discouraged - you can work like that. Just remember that working on an incline is easier and especially useful if you plan to write a lot.
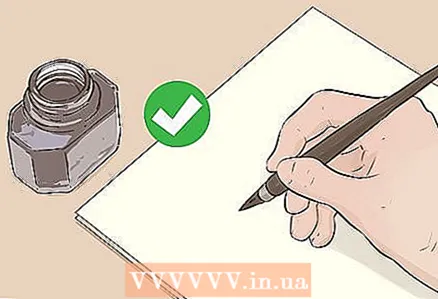 2 Choose a pen, holder and ink (ink). Any tool is suitable for calligraphy, but Gothic script is traditionally written with a flat nib, which is inserted into the holder. The pen is immersed in a jar of ink or ink. There is a small cavity inside the nib that fills with ink. When pressed, the nib releases ink onto the paper to create a line.
 - Ink is a thick and dense ink (not necessarily black) that is most commonly used in calligraphy.
- Buy a holder that is 15-20 centimeters long. This length is close to the length of a conventional ink pen.
- You can buy holders, pens, and ink online or at some office supply stores. They can also be sold in art supply stores.
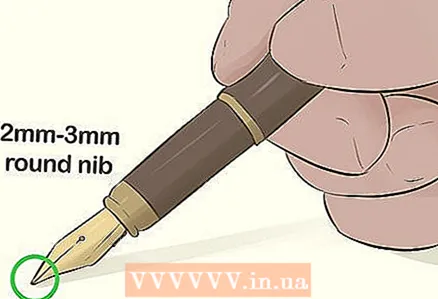 3 Choose a feather 2–3 millimeters wide of medium firmness. The nib should not be too flexible, as a soft nib will make it harder for you to get a straight and smooth line.If the nib is too small, you will not see the serifs, that is, the horizontal decorations at the top and bottom of the letter. A 2 to 3mm pen with a rounded tip of medium hardness will be the easiest to control.
 - The packaging should say "rounded". Only the very tip will be rounded, so the nib will still look pointed from a distance.
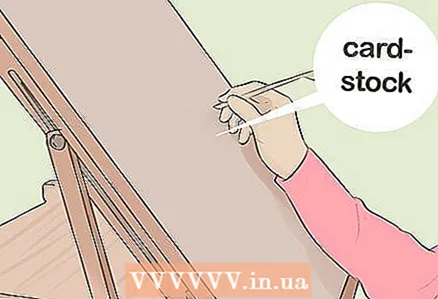 4 Prepare thick printer paper or cardboard. Most printer papers are too thin for liquid ink. Use at least 120 grams of paper per square meter for your calligraphy to keep the ink from flowing.
 - If you do not have thick paper, put 3-4 sheets of plain paper together so that the ink does not soak into the paper to the work surface.
- For the final work, use thick cardboard.
- You can also buy a dedicated calligraphy pad. Such notebooks usually have lined sheets. Look for them at your office supply store or art store.
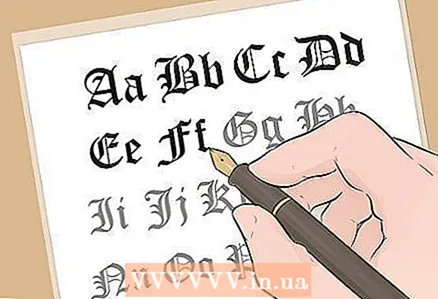
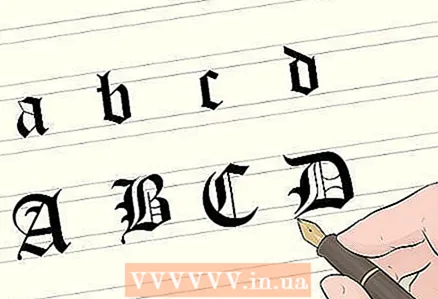
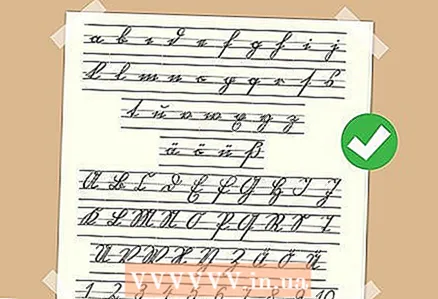 5 Print out a sample alphabet and place it next to your worksheet. There are several varieties of Gothic writing: texture, rotunda, schwabacher, fraktura and others. Browse the alphabets written in these styles on the Internet and choose the one that appeals to you the most. The easiest place to start is with a texture as it has few curved lines.
 - In texture, the letters appear rectangular and have decorative elements, and this is perhaps the most common type of Gothic. In rotunda, the letters are more rounded. There are rounded elements in Schwabacher and Fraktur, and these styles are similar to each other, however, the spelling of a number of letters in them is different.
- For example, in fraktura, capital S is similar to modern capital G, but in Schwabacher it looks more like modern S. Capital A looks almost the same in both scripts and resembles modern lowercase u.
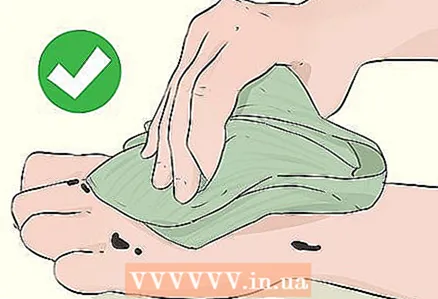 6 Place a tissue, paper towel, or rag nearby to wipe off the ink. Working with pen and ink makes it easy to stain everything around. Ink can get on your hands and on the table. You may also need to wipe the ink off the pen. To simplify the process, it is best to prepare a cloth or napkins in advance.
 - You may also need a small bowl of water, but you don't really need one.
 7 Line the paper if it is not lined. Make a short horizontal mark across the top of the paper, pen-width apart. Then draw your pencil to the bottom corner of this mark and draw another line. Repeat until you have 8 diagonal marks. Then draw 4 horizontal lines. The first line should start above the first mark, the second between the second and third, the third between the sixth and seventh, the last below the eighth.
 - At the end you should have a middle row 4 feather widths wide. The top and bottom row will be 2 feather widths.
- The middle row is called a row. Most of the letters will fit within its borders. Letters such as c, m, and o will fit entirely between the lines of the line.
- The top row will contain the top remote elements - for example, ponytails in the letters b, d, h. Descenders will be placed in the bottom row - for example, the bottom elements of the letters g, p, y.
Did you know? At the top, the line is bounded by the upper baseline, and at the bottom by the lower baseline.
Method 2 of 3: How to write letters
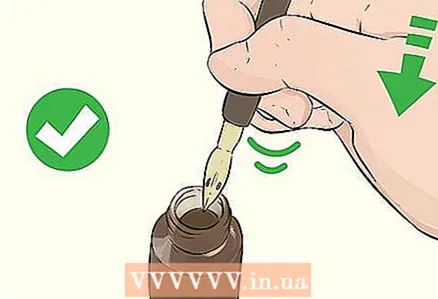 1 Dip the pen into the ink and use a firm hand to shake off excess ink. When you're ready to write, dip the nib into the ink so that it fills the reservoir with the hole. Then, without removing the nib from the can, shake the excess ink down. This will get rid of excess ink on the nib.
 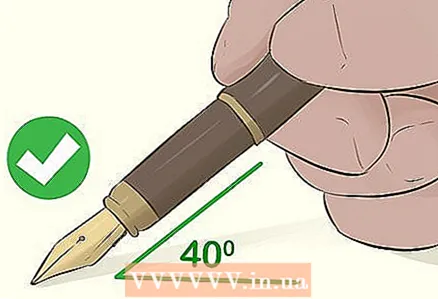 2 Bring the pen at a 40 ° angle to the paper. You don't need to measure the angle with a protractor - just practice choosing the right angle. Take the holder like a normal pen and bring the pen perpendicular to the paper.Then begin tilting the pen until it is midway between parallel and perpendicular.
 - This will make it easier to control the pen and write straight lines.
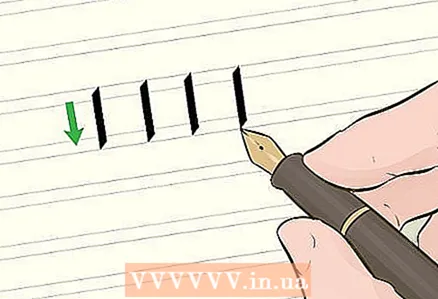 3 Practice write simple stroke down. Place the pen to the top baseline, that is, to the top border of the middle row. Then press down lightly on the nib and draw a straight vertical line downward.
 - Repeat several times, trying to leave equal gaps between the lines.
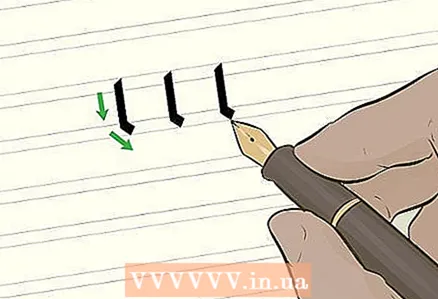 4 Add a serif at the bottom of the line. Once you've learned how to draw vertical lines, add some decoration. Draw a vertical line, but stop at the bottom baseline and drag your pen to the right without lifting it off the paper or changing the position of your hand.
 - A serif is a horizontal line about the width of a pen. If you need to rip the nib off the paper before drawing the serif line, return it to the same place. Leave no gaps.
- Practice making serifs several times.
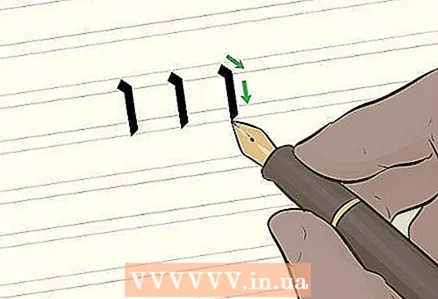 5 Make a serif at the top of the line. Many letters also have a top serif. To make a serif, place the pen on the second line from the top and drag the line to the right 1 pen width. Then, without lifting the pen from the paper, draw a line down to the very bottom line.
 - You can start the serif at the very top line.
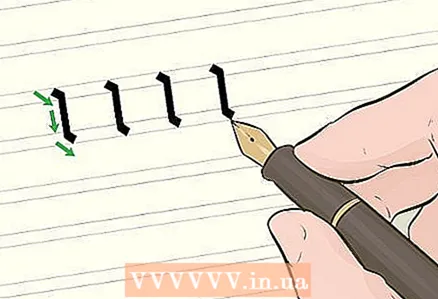 6 Practice making a serif at the top and bottom. Now that you know how to do serifs, it's time to connect the top and bottom elements. First, slide the serif at the top, lower the vertical line down, and stop just before the bottom line. Swipe the bottom notch to the right.
 - Exercise until the top and bottom serifs are the same.
- You end up with a simple lowercase i or lowercase l if you started at the top-most line.
 7 Try sketching letters before you start writing them with your own pen. It can be useful to copy letters to understand what elements they are made of. Once you've learned how to draw serif lines, place a sheet of printer paper over the example alphabet you printed earlier. Then use the pen to trace each letter, trying to replicate all the serifs and embellishments as closely as possible.
 - Practice writing one letter several times and move on to the next.
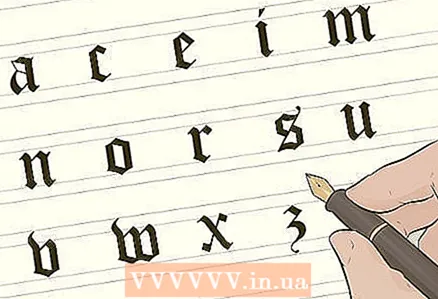 8 Learn to write letters that fit within the boundaries of the baselines. After you try to trace the letters, move on to self-writing. Learn to write letters that fit entirely between the baselines (that is, between the second and third rulers). It will be easiest to master letters consisting of straight lines: i, m, n, w.
 - You already know how to write i and l, so now move on to m. It is a simple letter as it has three straight lines and two serifs that connect them.
- The letters a, c, e, i, m, n, o, r, s, u, v, w, x, z will fit between the baselines.
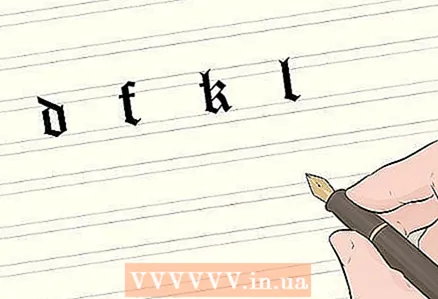 9 Learn to write descenders. The row above the top baseline is for ascenders (for example, tails at b and h). For the letter t, the top is also written above the baseline, although it is not as long as the descenders of other letters.
 - The letters d, f, k, l also have descenders.
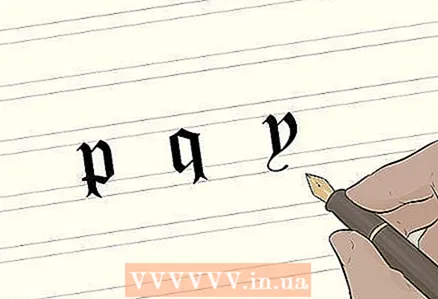 10 Learn to write descenders below the bottom baseline. Descenders (g, j) will have the bottom extending beyond the bottom baseline and ending on the bottom-most line. Sometimes decorative elements are placed in this part.
 - The letters p, q, y have descenders.
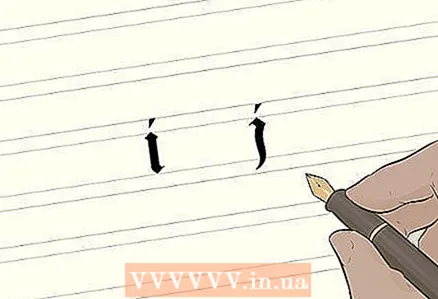 11 Learn to put special dots over the letters i and j. If you put only a point, it will be too shallow. If you draw a line, it will be too bold. Place the tip of the pen against the paper for a very fine stroke.
 - Typically, an oblique line is used that runs from left to right. However, you can experiment with this element if you are ready for it.
Method 3 of 3: How to Improve Your Technique
 1 Sit upright and do not tense your arm muscles. Correct posture (straight back, shoulders back) will allow you to control the pen better. Your letters will become neat and even. Try not to pinch your hand. If you squeeze the holder too hard, the letters will come out sloppy. In addition, it will be difficult for you to achieve the beauty and grace of letters inherent in the Gothic style.
 - Avoid lifting both feet off the floor while working.
- If you feel that your muscles are numb or if you get tired, get up and do a couple of stretching exercises.
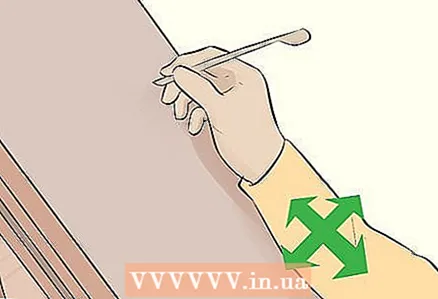 2 Move your entire arm and brush as you write. Gothic calligraphy uses broad strokes, so it's important to draw lines from the elbow, not just the brush. Your entire arm, including your wrist, should be working.
 - This will give you better control over the lines, although it will be hard to believe right off the bat. It will gradually become easier for you to write in this way.
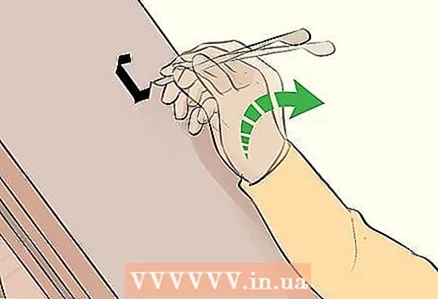 3 Take your hand off the paper between strokes. In calligraphy, each letter is usually written in several movements. To keep the serifs visible and every line sharp, lift your hand off the paper after each stroke.
 - You can do the serif along with the line without taking your hand off the paper.
 4 Practice writing lowercase first, and then move on to uppercase. Gothic uppercase letters are much more complex than lowercase ones. They have a lot of extra serifs and embellishments that can be difficult for a beginner to master quickly. First, learn how to write lowercase letters. When you start to get them, move on to the capitals.
 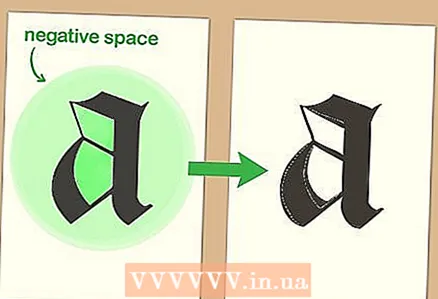 5 Compare the negative space in the same letter to identify errors. White space in the letter (for example, the hole in the letter o or the gaps between the legs of the m) allows you to determine how correctly the letter's shape was written. Compare the negative space in your letters and in the samples.
 - For example, you might notice that the negative space in your m between the left and middle feet is less than between the middle and right feet, or that your serif has dropped too low in the letter o.
What do you need
- Oblique writing surface
- Holder 15-20 centimeters long
- Flat nib 2-3 millimeters wide
- Ink (ink) and mascara
- Printer paper with 120 grams per square meter or calligraphy pad
- Ruler
- Pencil
- Paper or cloth napkins, paper towel
- Gothic alphabet
- Small bowl of water (optional)
Tips
- You can increase the line height to 4-5 pen widths if you need more space.


