Author:
Clyde Lopez
Date Of Creation:
24 June 2021
Update Date:
1 July 2024

Content
- Steps
- Part 1 of 3: How to create a bootable USB flash drive or disk
- Part 2 of 3: How to Prepare for the Installation Process
- Part 3 of 3: How to reinstall Windows 7
- Tips
- Warnings
This article will show you how to reinstall Windows 7 without an installation disc. To do this, you need a product key and a blank USB drive (flash drive) or blank DVD.
Steps
Part 1 of 3: How to create a bootable USB flash drive or disk
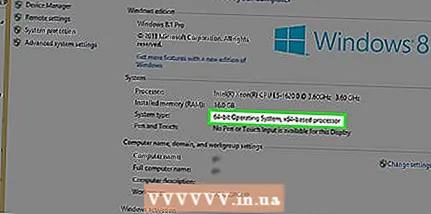 1 Find out the bit capacity of your computer. To download the correct version of Windows 7, you need to know the CPU bit (32-bit or 64-bit).
 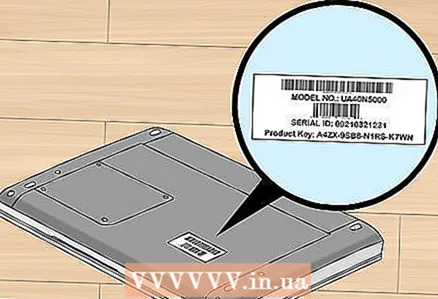 2 Find your Windows 7 product key. This is the 25-character key that you received with your copy of Windows 7. Typically, the product key is located on the bottom of your laptop or in the box with your Windows 7 installation disc.
 - If you have activated your copy of Windows 7 online, most likely you received an email from Microsoft with confirmation of activation and a product key.
- If you cannot find the product key on paper, find it on your computer using the command line or software.
 3 Select the installation method. You can install the system from a bootable USB flash drive or DVD. In the case of a flash drive, its capacity must be at least 4 GB.
 - If you are going to install from a disc, make sure you have an optical drive installed on your computer. To do this, look for the "DVD" logo on or near the drive tray.
- If your computer doesn't have a DVD drive, you won't be able to burn a DVD.
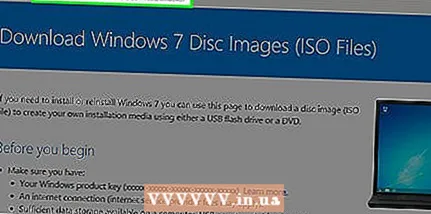 4 Open the download page Windows 7. This is the official page where you can download the Windows 7 image.
 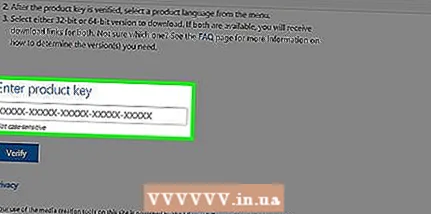 5 Scroll down and enter your product key. Find the “Enter your product key” text box at the bottom of the page; click this field and enter the 25-character product key you found earlier.
  6 Click on Check. It's a blue button below the product key text box. The product key will be verified and you will be taken to the language selection page.
 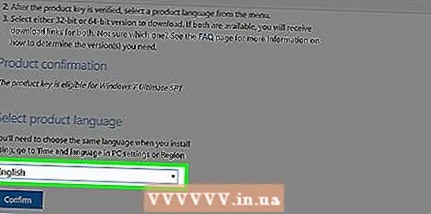 7 Choose language. Open the drop-down list "Select a language" and click on the required language.
 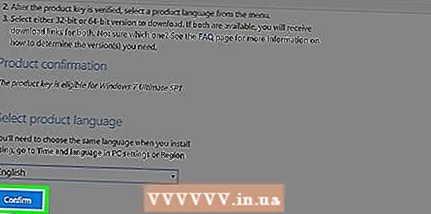 8 Click on Confirm. This button is located under the drop-down list with languages.
  9 Select the image to download. Click 64-bit or 32-bit (in the middle of the page). The version of the system image must match the bitness of the computer. The download of the system image will begin.
 - The browser may prompt you to specify a folder to download the file or confirm the download.
 10 Wait for the file to download to your computer. The Windows 7 image will boot in ISO format. When the download is complete, the ISO file can be found in the download folder (for example, in the Downloads folder).
  11 Create a bootable USB stick or disk. Then write the image of Windows 7 to the USB flash drive / disk. To do this, insert the USB flash drive or disk into your computer and follow these steps:
 - flash drive: select the ISO file, click Ctrl+Cto copy it, click on the name of your flash drive at the bottom left of the window, and then click Ctrl+Vto insert the file onto the USB stick.
- DVD disc: Select the ISO file in Explorer, click “Burn disc image” and then click “Burn” at the bottom of the pop-up window.
- Also, the ISO file can be burned to disc in Windows 10.
Part 2 of 3: How to Prepare for the Installation Process
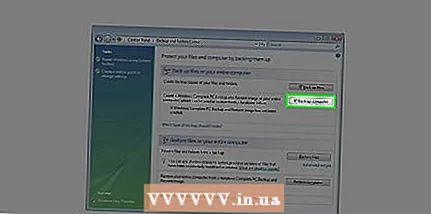 1 Back up your files. Most modern operating systems allow you to preserve user files during system reinstallation, but we recommend backing up your files in case something goes wrong.
  2 Insert a bootable USB drive or DVD into your computer.
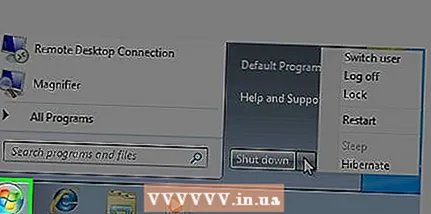 3 Reboot your computer. Click Start
  in the lower-left corner of the screen, then click the arrow to the right of the Shut Down option and click Restart.
  4 Press the key to enter BIOS. Do this before booting the system. Typically, this key is Esc, Delete or F2, but on your computer this key may be different. Press the key until the BIOS opens.
 - If you missed the moment to enter BIOS, restart your computer and try again.
- The BIOS key is displayed for a second at the bottom of the screen in the “Press X to enter startup” line.
- To find out which key to press, read the instructions (on paper or online) for your computer or motherboard.
 5 Find the Boot Order section. The BIOS interface may vary from computer to computer, but use the arrow keys to navigate to the Boot Order or Boot Options section (or tab).
 - In some BIOS versions, the Boot Order section is located under the Advanced Options tab.
- In some BIOS versions, the Boot Order section is located on the home page.
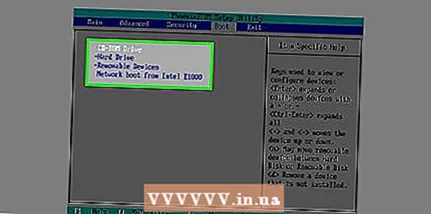
 6 Select an installation option. Use the arrow keys to select “USB”, “Removable Storage” or equivalent for a flash drive, or select “CD Drive” or equivalent for a disc. Your choice depends on whether you are going to install the system from a flash drive or from a disk.
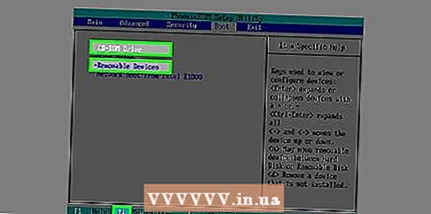
 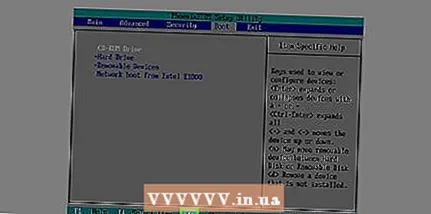 7 Move the selected option to the top of the list. To do this, press several times +... If the USB or CD option is at the top of the Boot Order list, the computer will find and recognize the Windows 7 installation file.
 - As a rule, in the lower right corner of the screen there is a list of keys with a description of their actions.
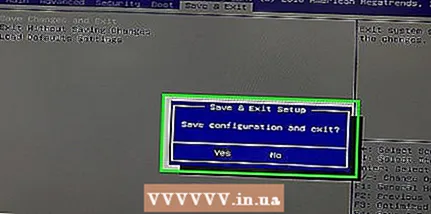 8 Save settings and exit BIOS. Click “Save and Exit” (find the corresponding key in the list in the lower right corner of the screen) and then wait for the BIOS to close.
 - You may need to confirm your decision; to do this, select “Yes” and press the key.
Part 3 of 3: How to reinstall Windows 7
 1 Press any key when prompted. The system installation process will start.
  2 Check the box next to "Accept" and click Further. This will take you to agree to the terms of use for the Microsoft software and proceed to the next page.
  3 Remove your installed copy of Windows 7. Select the hard drive where Windows 7 is installed and then click Remove.
 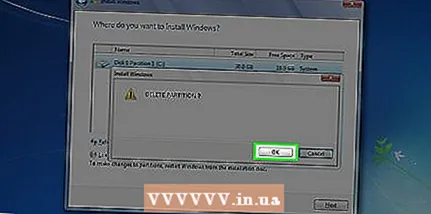 4 Click on Yeswhen prompted. The installed copy of Windows 7 will be removed from your hard drive.
  5 Select the drive to install the system, and then click Further. Click on the blank disk from which you just wiped the system.
 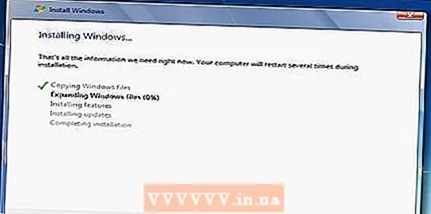 6 Install Windows 7. The installation process will take from a few minutes to an hour, depending on the speed of your computer.
 - During the installation process, the computer will restart several times.
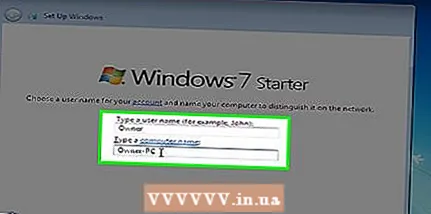 7 Enter your username and then click Further. Do this in the text box at the top of the window.
  8 Enter your password and then press Further. Fill in the following fields:
 - Enter your password (recommended): enter password;
- Password confirmation: enter the password again;
- Enter a password hint: Enter a hint to remind your password (optional).
 9 Click on Use Recommended Settingswhen prompted. Windows will adjust the security level.
  10 Wait for Windows 7 to be installed. The desktop will appear on the screen.
Tips
- When the system is installed, first of all, connect to the Internet.
- When the installation is complete, configure additional settings such as time, region, and wireless network.
Warnings
- In the BIOS, do not change any settings other than those indicated in this article.
- If you bought a computer with Windows 7 already installed, Microsoft may require you to purchase a fresh copy of Windows 7.


