
Content
- Steps
- Method 1 of 3: Disassemble the guitar
- Method 2 of 3: Treat existing paint
- Method 3 of 3: Apply new paint
- Tips
- Warnings
- What do you need
One of the limitations associated with buying a guitar, especially a budget model, is the lack of selection of available colors. If you are in the mood for a certain color, or just want to try out an old or cheap guitar with your own hands, this article will show you how to repaint it yourself. This process is not much more complicated than finishing any other wooden object (for example, furniture), but it will take a lot of effort to ensure that the color is even and does not differ in appearance from the factory one.
Be prepared to be patient. DIY guitar painting and finishing is a process that, if done properly, can take several weeks. Do not hurry. You paint your guitar so you can play it later, which means it's very important to do everything right. Follow the instructions carefully and be careful, otherwise careless work and haste will negate all your efforts.
Steps
Method 1 of 3: Disassemble the guitar
 1 Remove the guitar strings. You can open the strings using regular wire cutters. Unfortunately, there is no way to repaint your guitar with the strings stretched, so keep in mind that you will likely need to adjust the truss rod when reassembling the guitar.
  2 Unscrew the neck of the guitar. A screwed-on guitar neck is easy enough to detach - just unscrew the bolts on the back of the neck mount and unscrew the neck. The glued neck cannot be detached from the guitar, but it is usually painted the same color as the body of the guitar, so you will probably decide to repaint that as well.
 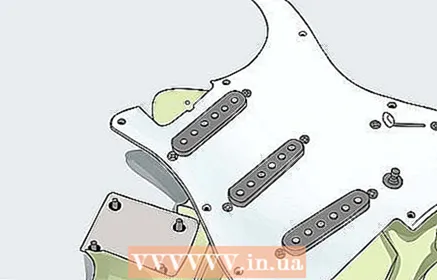 3 Remove the equipment. The output connector, pickups, bridge, regulators, belt mounts, and pickguard are usually removed with a screwdriver or wrench.On some models, the output jack and controls are wired to the pickups through holes between each cavity, so you need to cut the wires to remove each piece. Make sure you remember how they were connected so that you can rebuild the structure correctly.
  4 Pull out the bridge rivets. Some guitars do not have them, then the bridge can simply be unscrewed from the body of the guitar. Removing rivets can be difficult because they are driven into the wood. You can use a soldering iron to heat them up, thereby expanding, and then when they have cooled down, having shrunk in size, it will be easier to remove them. You can use pliers to pull them out, but they can damage the finish and ruin the look.
  5 Set all mounts and hardware aside and mark them. The guitar finishing process can take weeks to months, so make sure every screw and bolt is signed. This will prevent confusion when rebuilding your guitar.
Method 2 of 3: Treat existing paint
 1 You have two options. Sand down the current paint completely or sand it a little so that the new paint layer will sit well. If you are going to use translucent paint, or if the old paint is much darker than the one you plan to apply, you will need to completely remove the finish. Conversely, if you are using thick paint, you only need to sand the surface. Please Note: Most guitar makers agree that thick paint is inferior to thin guitar sound.
 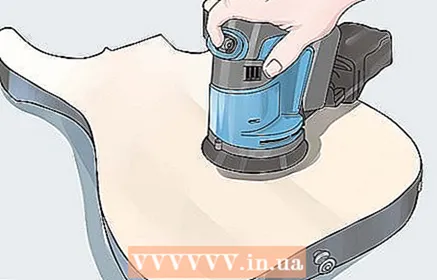 2 Use an orbital sander to remove the bulk of the finish. Use an orbital sander with coarse sandpaper and work the surface of the guitar in smooth circular motions. This technique will allow you to remove most of the varnish and paint from the guitar's surface. You may want to use a thinner, but this is a very messy and toxic process. In addition, most solvents are unable to remove the hard polyurethane used by modern guitar manufacturers.
 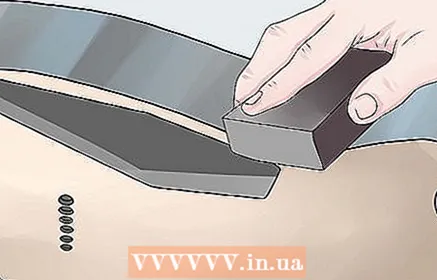 3 Use sandpaper or a sanding sponge to remove any remaining paint. For curved areas that are difficult to grind with a sander, use sandpaper wrapped around a large dowel or a small sanding pad. Coarse sandpaper is best for removing paint and varnish.
  4 Level the surface of the guitar. After using coarse sandpaper to remove the finish, sand the wood with a finer sandpaper. Sand the entire body of the guitar with medium grit (120 grit, or 10-N), and then work over the surface with fine grit (200 grit, or 6-H).
 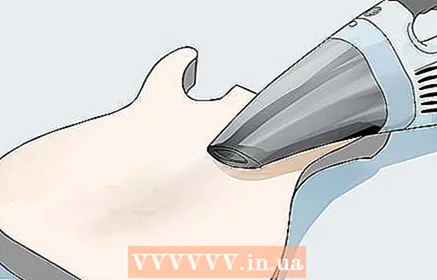 5 Remove dust from the sandpaper. A vacuum cleaner with a narrow nozzle will remove most of the dust. To remove any remaining dust, you can use a can of compressed air to blow it off, or wipe the surface with a damp or adhesive cloth.
 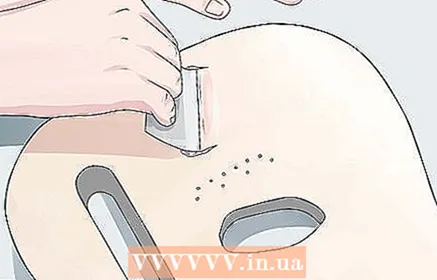 6 Apply wood filler. If you do not settle for an unpatched form, and this option is possible when you are working with mahogany and other porous species, you need to smooth the surface with filler or putty. Choose a water-based or oil-based filler that matches the paint or varnish you are using.
  7 Finally, use white spirit to completely degrease the wood. Don't touch the surface of the guitar after this step, or the sebum from your fingers will ruin the whole thing.
Method 3 of 3: Apply new paint
 1 Work where there is no dust. There are many particles in the air outside, even in good weather, that can ruin the coating - as well as insects that can be attracted by its smell!
  2 When working indoors, be sure to use a quality respirator. Safety glasses are also required.
  3 Paint where it is safe to splash on furniture or walls. A workshop, shed, garage or other similar room will do.
  4 To reduce the amount of paint splatter around, place the guitar in a large box on a portable work table (such as a folding one). Position the box with the open side to the side so that the splash of paint stays inside and so that the guitar can be easily removed and put back into the box. Cover the inner part of the box with newspapers; it will be easy to change them when they get dirty.
  5 Select the paint or stain you want to apply. For hard surfaces, use an extra strong paint such as polyurethane or nitrocellulose. Nitrocellulose is the gold standard and can be found in auto parts stores or online, but it dries up very slowly. For tinted finishes, use a water-based stain and a clear coat of nitrocellulose or polyurethane OR an oil-based stain and oil-based varnish such as Tru-Oil. Spraying paint will prevent ugly brush marks from appearing on the surface.
 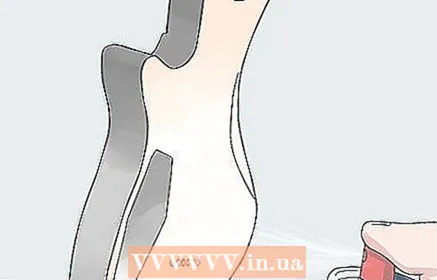 6 Apply several coats of primer / sealant. Use a primer that matches the type of paint you will be applying. It is better to apply 2-3 thin coats than one heavy coats, as this helps the primer dry thoroughly and prevents smudges.
  7 If using a solid color, apply layers of paint. Apply two thin coats of paint, keeping in between the manufacturer's recommended drying time. Wait a week for the paint to dry completely before applying the varnish.
  8 If you are using stain, apply it. First, slightly dampen the surface of the guitar to make it easier to stain and prevent stains. Apply the stain following the manufacturer's instructions and apply as many coats as necessary to get the look you want.
  9 Apply varnish to the surface of the guitar. Again, nitrocellulose is recommended. Apply each coat as thin as possible, creating a transparent guitar protective coat. You may need a dozen coats to achieve a factory-grade finish. Apply them in sets of three thin coats with a few hours between coats and a week between sets. The first set of layers should be very, very thin. After that, you can apply them a little thicker, but make sure there are no smudges.
  10 Wait. If you opted for a nitrocellulose or polyurethane finish, wait three to four weeks for the paint to cure. If you've opted for an oil-based coating like Tru-Oil, you only need to wait a few days!
  11 Buff the finish. When wet sanding on dry finishes, start with grit size 400 (M40), then 600, 800, 1000, 1200, 1500 and finally 2000 (M28 to M7). Do not skip any of the steps, otherwise small indentations, scratches and knots will remain in the varnish and cannot be reached. Do not wipe the varnish and paint coat through, especially around the edges of the guitar where the varnish layer may be thinner; for this reason so many layers of varnish are needed. Stop at this stage for a matte finish. For a mirror-like effect, use a sanding wheel and polishing paste such as 3M Finesse It. Alternatively, you can use Micro Mesh Finishing Pads - a set of fine sanding pads in grit 1500, 1800, 2400, 3200, 3600, 4000, 6000, 8000 and 12000 - they can be used to give a glossy finish without the need for expensive sanding tools.
  12 Collect your guitar. Screw on the hardware. If you had to cut any wires to disassemble the guitar, you'll need to solder them together. Now is the right time to replace the factory components, namely the resistors, with high quality ones. You can even buy a new pickguard or make your own. The assembled guitar can be cleaned and polished to a high shine with your regular polish.Now all that remains is to pull the strings, tune them, and play a wonderful new instrument!
Tips
- If the neck detaches, you can attach a long piece of wood to the base of the guitar where the neck is screwed on. This way you can easily pick up the guitar without touching the wet paint.
- Splashes and stains from a latex-based coating can be removed with soap and water, making it easy to keep your work area clean.
- To add personality to your guitar, you can apply a distinctive watermark underneath the varnish.
- For an extra smooth finish, you can apply a putty to the wood after sanding off the old paint. It helps to level porous wood surfaces so that paint and varnish look better.
- Never cut the strings! Always release them while gently releasing the pressure on the bar.
Warnings
- If you are removing old paint with thinner, be extremely careful. Put on a reliable respirator and handle outdoors. The solvent is a toxic and carcinogenic substance.
- Always wear a mask and goggles when sanding. Work in a well-ventilated area.
- Also use a paint mask or respirator when spraying paint on your guitar.
What do you need
- Guitar
- Orbital sander
- Sanding sponge
- Coarse, medium and fine grit sandpaper
- Vacuum cleaner
- Compressed air canister (optional)
- Textile
- White Spirit
- Primer
- Paint or stain
- Varnish
- Polishing paste or very fine sandpaper
- Dust mask or respirator
- Detaching pliers
- Screwdriver or wrenches to disconnect the hardware
- Soldering iron and solder


