Author:
Mark Sanchez
Date Of Creation:
8 January 2021
Update Date:
1 July 2024

Content
- Steps
- Method 1 of 3: Cutting the first piece of cornice
- Method 2 of 3: Cutting the second piece of cornice
- Method 3 of 3: Finishing work
- Tips
- Warnings
- What do you need
Architectural breaks (ceiling cornices) add a lot of visual appeal to a room, but sometimes they can be difficult to install. Working with corners is difficult for even the most experienced builder, so read the following steps to easily and correctly install the curtain rods to the ceiling.
Steps
Method 1 of 3: Cutting the first piece of cornice
 1 Work on one section at a time. Start in the least visible corner of the room, especially when installing eaves with designs. This is because it is quite easy to make the drawings match the entire perimeter of the room, but most likely they will not match in the last corner.
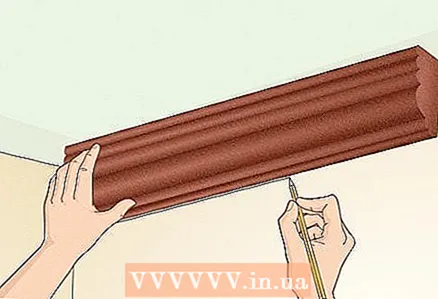
 - On the first turn, draw a line on each wall that touches the bottom of the break in the corner. It will serve as a guide when installing the cornice. To do this, attach a small piece of bummer to a corner. Run the pencil along the bottom to the corner and repeat the process on the other wall in the same way, connecting two lines.
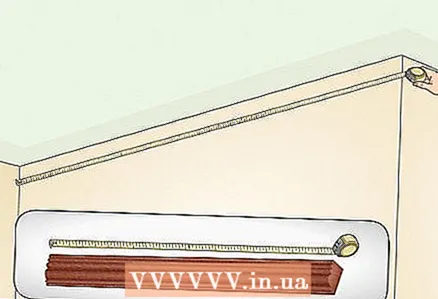 2 Measure your wall and curtain rod. Using a tape measure, measure the wall from corner to corner. Look at the corner and decide which part you start with - the left or the right.
 - Measure the first piece of eaves based on the dimensions of the wall. Mark your measurements on the underside of the two ends of the break.
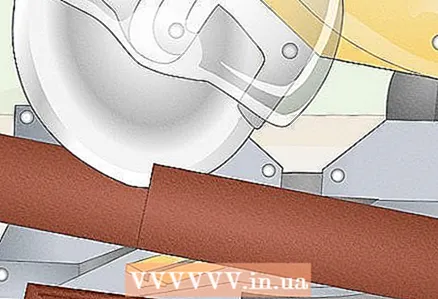
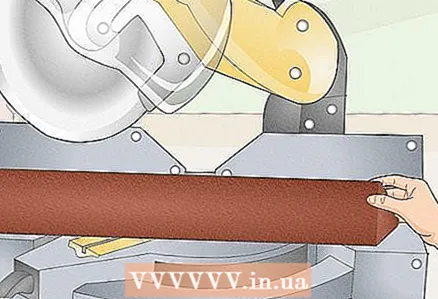 3 Prepare to cut the curtain rod. Place the bummer upside down on your sawing table. Hold it as if the table were the ceiling; side that touches the wall, facing you. This will allow you to see the measurement mark made on the bottom.
  4 For the first part of the bummer, you will need to cut it on both sides at a 90 ° angle. The bummer will be installed flush against the wall. Don't worry about the charcoal, you will cut the second part so that it fits in with the first.
Method 2 of 3: Cutting the second piece of cornice
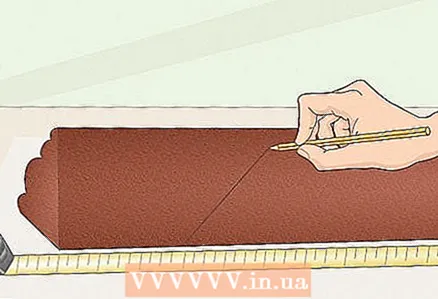 1 Measure out the second piece of the curtain rod. Make a mark on the bottom of the cornice. If you mark at the top, then your cuts will be incorrect because the bottom of the cornice should be completely flat against the corner of the wall, not the top.
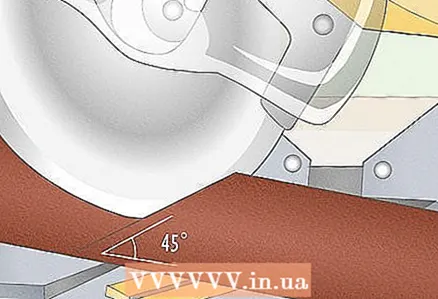
 - Set the cut level of the saw to a 45 ° angle. Assuming you started from the left, the saw should be pointing from left to right.
- Make sure the top of the eaves is facing down towards the table while the bottom of the eaves is facing you.
- Make the first cut by lowering the saw to the mark made on the cornice.
- When in doubt, cut a little more so that you can shorten it if necessary. Cutting off a short piece of the curtain rod can completely ruin the entire piece.
 2 Cut off the other end. Adjust the tilt of the saw back 90 °. Lower the saw according to your measurements, leaving a small margin just in case.
 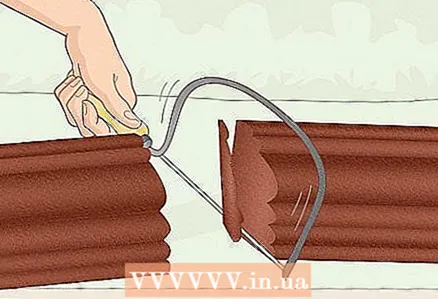 3 At the 45 ° end, use a jigsaw to cut the back. Follow the contours of the cornice and cut off the back a little. The idea is that the 45 ° cut will match the contours of the first part of the cornice.
 - Use sandpaper to remove any pits. Verify your work is correct by attaching a second piece of bummer to the first. Gaps should be kept to a minimum. Use caulking agents available to you to fill in any gaps that may be visible.
Method 3 of 3: Finishing work
 1 Repeat the above steps for the rest of the curtain rod. If you are installing a bummer in a room with 4 walls and you started with a cornice with two 90 ° corners, you will have to make one piece of cornice with two corners at 45 °.
 - The 45 ° angles must be opposite. Remember to leave an extra couple or more centimeters at first to make sure everything fits. A long piece of cornice will actually make the whole structure more comfortable and prevent cracks from forming when the house starts to sink.
- For a room with 4 walls, you should end up with: one piece of breakaway that has two ends at 90 °, two pieces that each have one end at 90 ° and the other at 45 °, and one piece that has two opposite ends at 45 °.
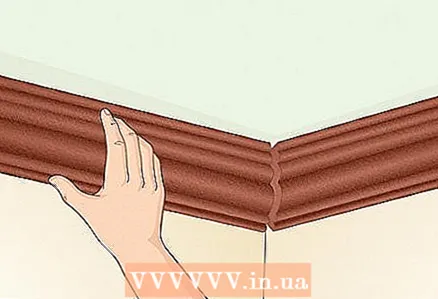 2 Attach the curtain rod. Apply adhesive along the flat edges of the fracture that touch the walls and ceiling. Also apply glue to the parts of the break that connect to each other.
 - Ask for help, especially when working with long pieces of bummer. An extra pair of hands never hurts.
- Press firmly on the end of the first break piece while gluing it in the first corner.
- Use small finishing nails to secure the curtain rod while the glue dries. Use a hammer to drive the nails deep into the cornice. This will make it easy to paint over them.
- Attach the remaining pieces of the cornice using the caulking technique to fill in any visible gaps.
Tips
- Make a few test cuts with your jigsaw to see how the corners fit together. This can save you a lot of effort and money when you actually start attaching the curtain rod.
- Do not force the curtain rod to fit perfectly against the wall. Almost all walls are not completely straight, and making your cornice fit all the curves of the wall will only accentuate any irregularities. Instead, use caulking to fill in gaps caused by imperfect walls and corners.
Warnings
- Always use caution when working with saws and power tools. Follow all safety precautions.
What do you need
- Powerful electric saw
- Jigsaw
- Sandpaper
- Roulette
- Pencil
- Polyurethane adhesive
- Finishing nails
- A hammer
- Punch for nails


