Author:
Alice Brown
Date Of Creation:
26 May 2021
Update Date:
24 June 2024

Content
The vacuum cleaner is quite unpretentious, but taking good care of the vacuum cleaner can increase its efficiency and lifespan.In addition, timely maintenance will allow you to avoid much more costly repairs.
Steps
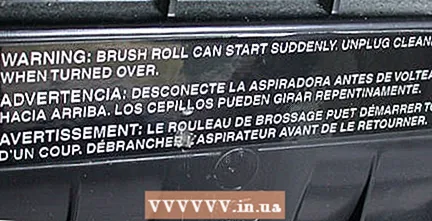
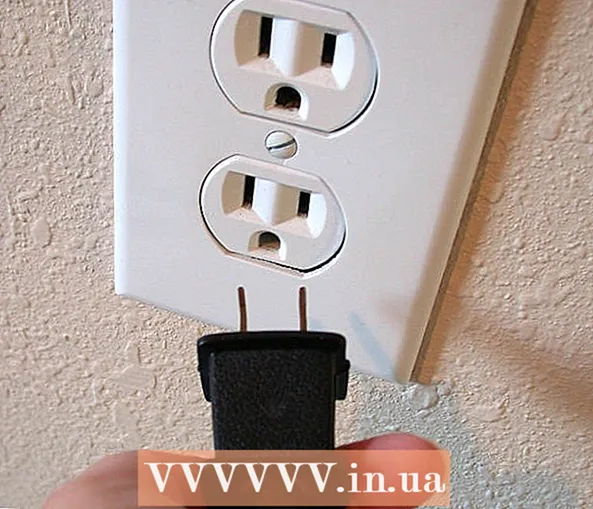 1 First turn off the vacuum cleaner and unplug the power cord from the power outlet. The vacuum cleaner can seriously injure you if it is turned on during maintenance.
  2 Check the bag regularly and change (or empty) it when filling. A bag that is only a third full can already interfere with effective cleaning. When the vacuum cleaner is operating, air passes through all the collected dust and debris, so a dirty bag will put additional stress on the vacuum cleaner mechanism or prevent it from working efficiently, or both. Look at the label on the bag and feel it to determine the fill level.
 - If the vacuum cleaner leaves dirt or hair on the floor, you should also check to see if the bag is full.
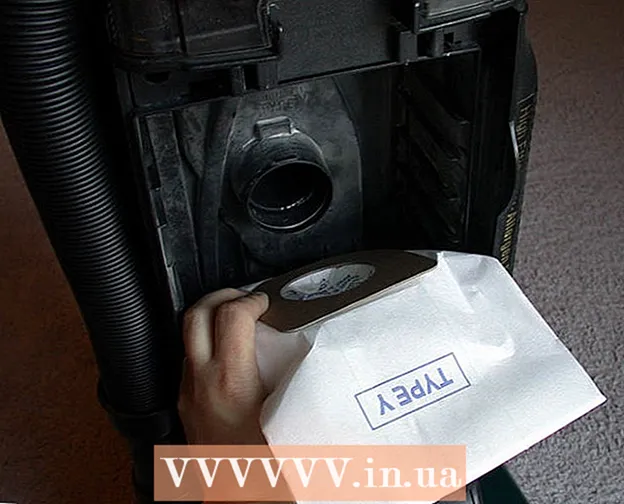 3 It is recommended to change the bag when its fullness reaches about 1/3 to 1/2 of its capacity. Check the instructions on the vacuum cleaner, bag, or user manual. Regardless of the order, make sure the bag is inserted correctly and all clips are secure.
  Use bags appropriate for your machine.
- 4 If you have a bagless vacuum cleaner, empty the dust bin frequently. In most cases, this is very easy to do.
- 5 Clean the rotating brush. If you have an upright vacuum cleaner, it has a rotating carpet brush.
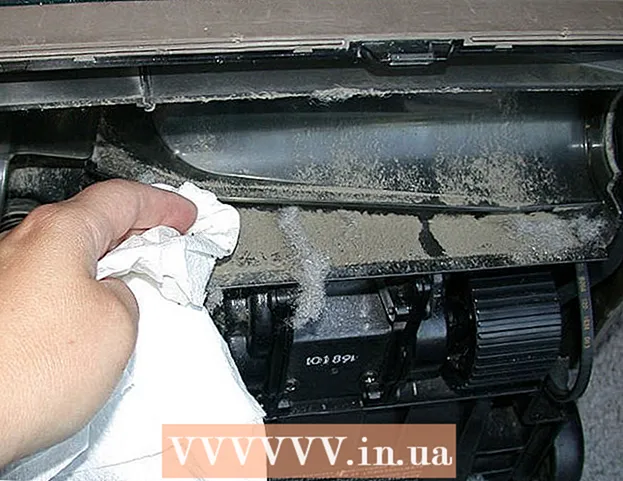
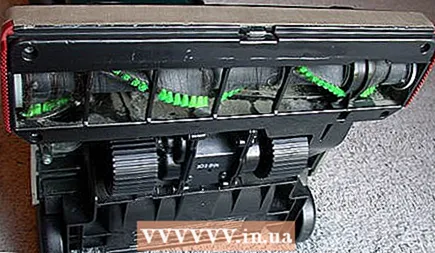 Look at the bottom of the vacuum cleaner and find a rotating brush. It is usually found at the front of the bottom. If it is clogged with hair, threads and other debris, it's time to clean it.
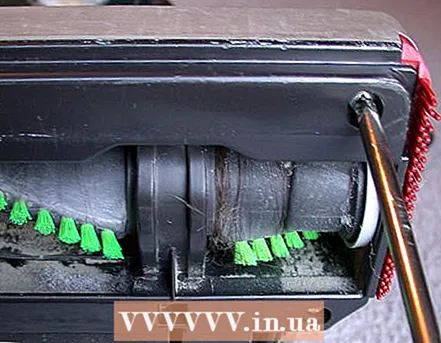
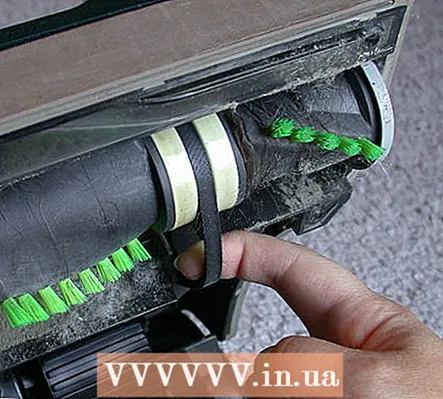
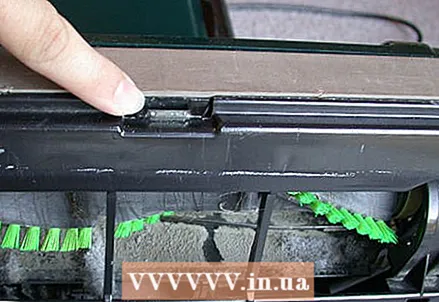 Remove the bottom panel. It can be fastened with latches or bolts. After unscrewing the bolts, do not lose them.
- Remember the direction of rotation of the brush. Usually, the drive belt is visible on one side, and there is space for the belt on the brush (on the same side). This will help you understand where the brush is turning.
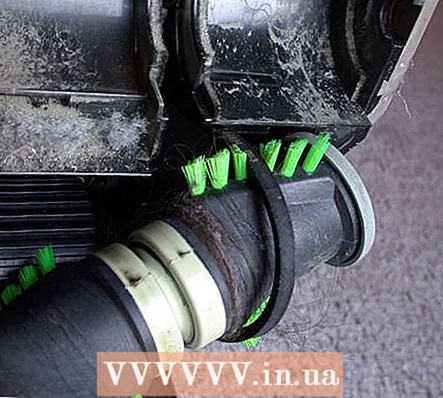
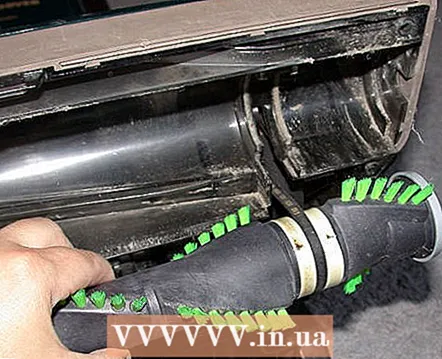
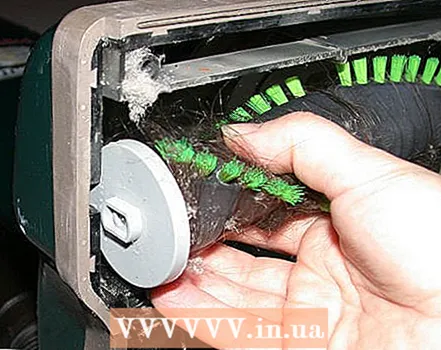 Remove the brush. Typically, it is removed from the grooves at both ends and then removed from the belt.
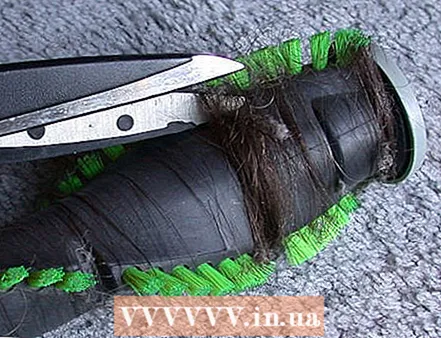 Use scissors (or just your fingers) to clean the brush. It is not necessary to clean it to a shine, but hair and threads need to be removed. Pay particular attention to the edges of the brush near the bearings and where it contacts the belt. A paring machine will help to remove the finest hairs.
- 6 Clean and lubricate the brush bearings.
- To check if it rotates easily, rotate the brush, holding it on the axis with your fingers. If it does not rotate, you need to: better clean and lubricate the bearings, replace the bearings or replace the entire brush (measures are listed in order of increasing cost).
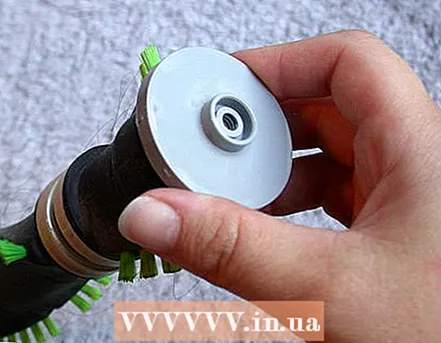 Unscrew the plugs at both ends of the brush, holding the brush by one cap first.
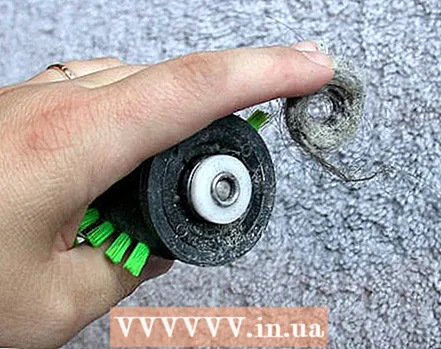 Remove all debris around and inside the bearing. Before you shoot, notice which side it was put on in order to return everything as it was.
- Unscrew the plug on the other side, holding the brush by the axle. Clean and lubricate the bearings at both ends.
- Replace the bearings (do not mix up!) And plugs.
- 7 Check the drive belt for wear and replacement.
- Remove the bottom panel in the same way as for cleaning the brush.
 Hook up the belt with your fingers. It should be taut.
- Compare it to a new belt. If it is stretched or narrower than the new one, replace the old belt.
- Check if the belt has moved. If it has come off the drive shaft or has shifted, it is most likely due to wear and tear.
 Inspect the belt for cracks, bumps, or other signs of wear.
- Change the belt every 6 to 12 months, depending on how you use the vacuum cleaner.
- Remove the rotating brush as shown above.
- Remove the belt from the drive shaft or pulley.
- Slide the new belt onto the drive shaft or pulley.
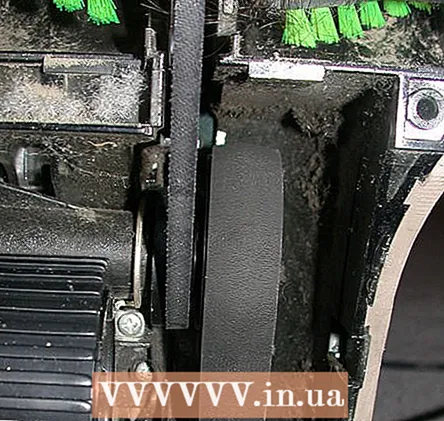
 8 Remove accumulated dust and debris from the brush housing and air duct.
- 9 Reinstall the rotating brush.
 Thread the brush through the belt. To do this, you will have to make an effort.
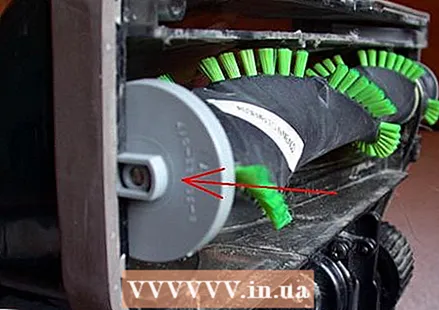 Place the brush back into the grooves. Check if the belt has fallen off the brush or drive shaft.
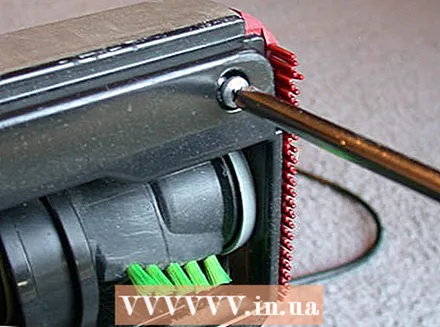 Replace and secure the panel to the bottom of the vacuum cleaner (did you lose the bolts, did you?).
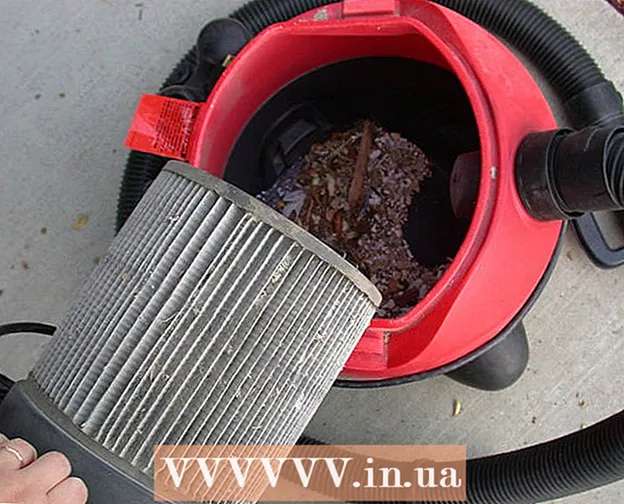
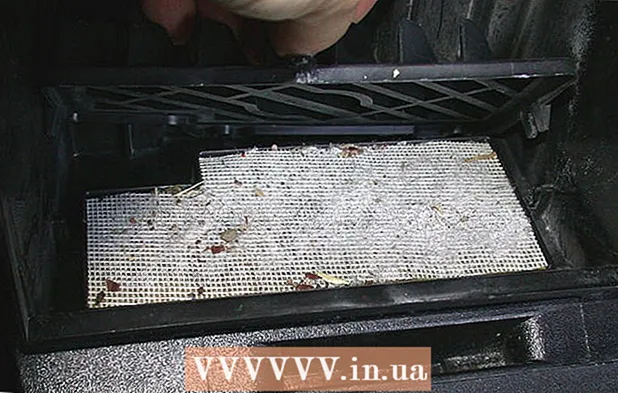 10 Replace or clean all filters on the vacuum cleaner. Most modern vacuum cleaners have exhaust filters that trap dust in the air exiting the apparatus. Check the instructions for the vacuum cleaner to see if you have such filters installed, and periodically clean and change them.
 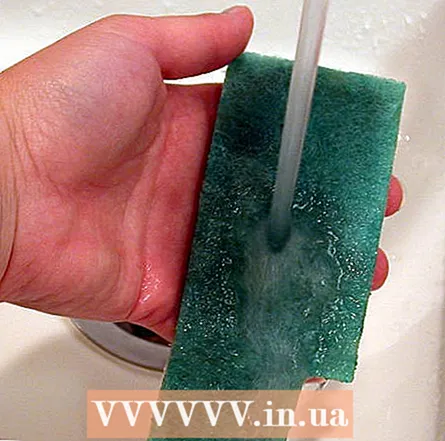 If the filter is made of foam or plastic, it can be washed. Dry the filter completely before reinstalling it.
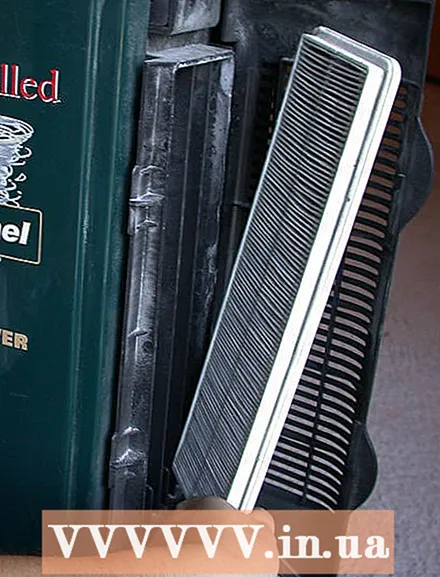 If the filter is paper or cloth, you can shake it out or knock it out (not too hard).
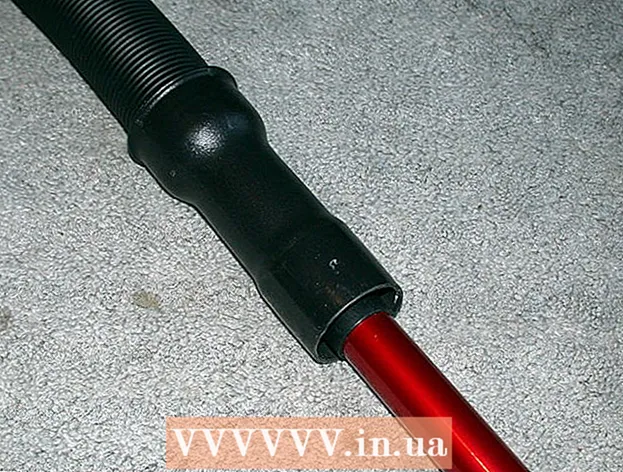 11 Check for clogged hoses. This is rare, but if you notice a dramatic decrease in vacuum cleaner pull, try gently pushing the blockage out of the hose with a squeegee or broom handle. You can also try doing this with a piece of sturdy wire (for example, by unbending a wire hanger).
 - Try not to compress the dust even more.
- Watch out for the wire! She can pierce the hose!
 12 If you have a washing vacuum cleaner.
- Clean the trash can regularly.
- Clean and replace the filters periodically, depending on how much you use the vacuum cleaner.
- Know how to set up a wet vacuum cleaner. Make sure that the vacuum cleaner is set up correctly, depending on the type of cleaning - wet or dry.
Tips
- Perform preventive maintenance to avoid damage to the vacuum cleaner.
- Do not try to suck up large objects with the machine. Use a scoop and broom to scoop up such debris.
- If you are happy with your vacuum cleaner, take good care of it and take care of it. Old vacuum cleaners are as good as modern ones because the technology doesn't change much. If you decide to change your vacuum cleaner, do your research carefully. Many modern vacuum cleaners are not very reliable.
- Never pull the vacuum cleaner with you so that the cord will pop out of the socket when it is fully extended. An electric arc is created that can damage the plug, not to mention damage the cord.
- Turn off the vacuum cleaner immediately if you hear extraneous sounds in it or it has sucked in something that should not be. A sudden change in the sound of a vacuum cleaner is often indicative of a problem. Unplug it, check and remove blockages, then plug it in and listen for the sound of it working.
- The cord of the vacuum cleaner is its weak link, so be careful with it. It is advisable not to run over it with a vacuum cleaner.
- You can find spare parts for your vacuum cleaner at a hardware store or online store.
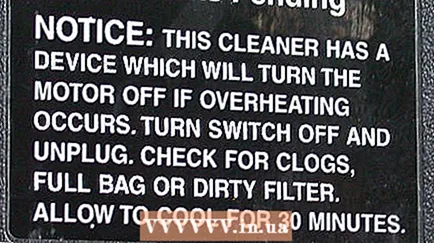 Some vacuum cleaners have built-in overheating protection. If your vacuum cleaner suddenly stops, unplug it, check the instructions and wait about 20-30 minutes. Then, check for blockages and carefully turn it back on.
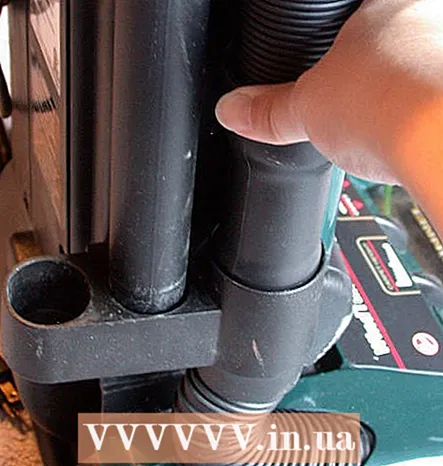 Make sure that the hose of the vacuum cleaner is correctly connected. If it is not connected tightly, the retraction capacity will decrease.
Warnings
- Do not use the vacuum cleaner outdoors and do not suck up liquids with it, if it is not designed for this!
 Always unplug the vacuum cleaner before servicing it. Moving parts can cause serious injury, especially if they start unexpectedly.
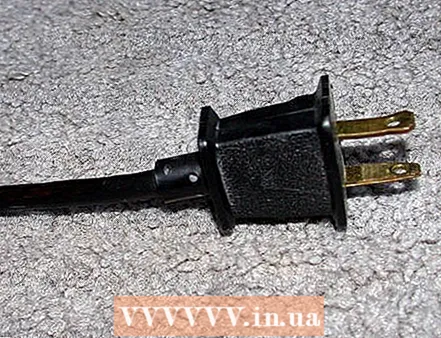 Make sure that the insulation on the cord is not damaged. If it has any tears or cuts, do not use the vacuum cleaner until the cord has been repaired or replaced.
You will need
- Vacuum cleaner
- Replacement bags (suitable for the vacuum cleaner)
- Screwdriver
- Scissors
- Dispenser (optional)
- Replaceable strap
- Replaceable filters
- Lubrication (check the instructions for what kind of lubricant to use). Do not use WD-40 as it works for a short time and then thickens and sticks together. Household machine oil (for sewing machines) is great.


