Author:
Joan Hall
Date Of Creation:
26 July 2021
Update Date:
1 July 2024
Content
- Steps
- Method 1 of 4: Cartoon Squirrel
- Method 2 of 4: Realistic Red Squirrel
- Method 3 of 4: Realistic styling
- Method 4 of 4: Cartoon Style
- What do you need
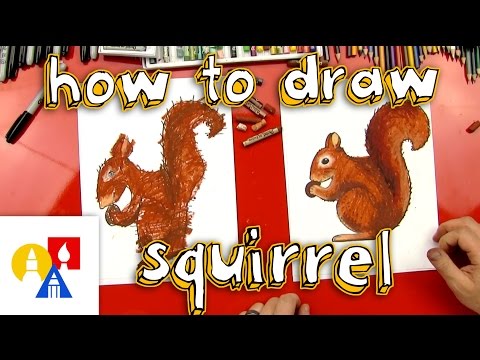
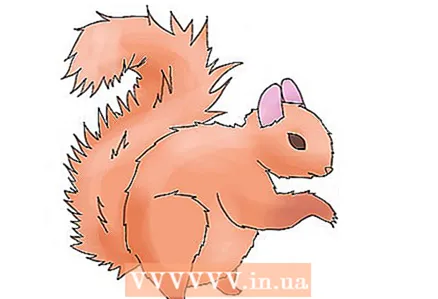
Squirrels are cute little animals! If you want to learn how to draw a cute little squirrel in a cartoon or realistic style, then follow this tutorial.
Steps
Method 1 of 4: Cartoon Squirrel
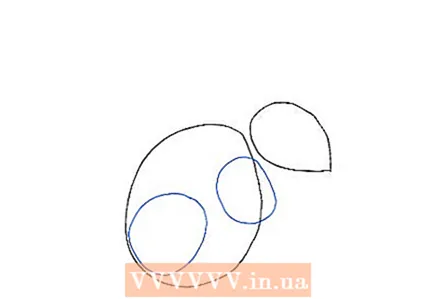
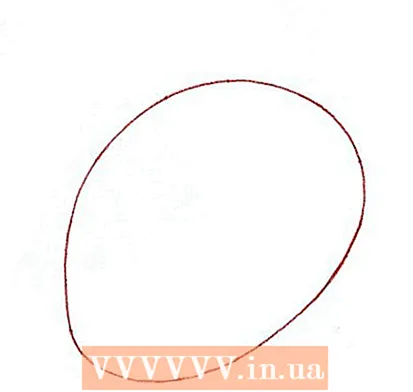
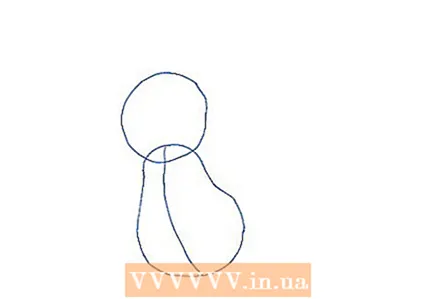 1 Draw the head and body.
- Draw a circle for the head and a pear-shaped shape just below it.
- Optional: Draw a vertical line from both ends of the pear.
- Make sure you use a pencil to sketch so that you can erase the sketching lines later to keep the drawing neat.
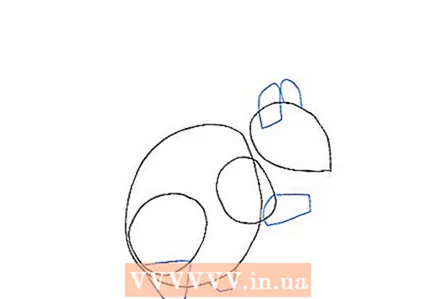
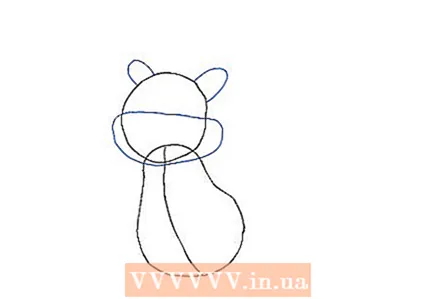 2 Add the ears and jaw.
- Draw 2 tall, pointed arches for the ears.
- Add a horizontal oval at the bottom of the head. This will be the squirrel's jaw or cheek.
 3 Add a large “S”.
- This will be the squirrel's tail.
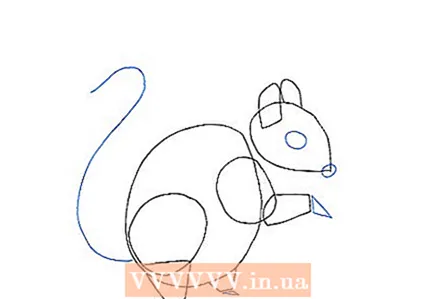
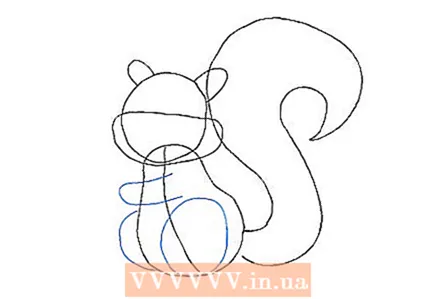 4 Add arms and legs.
- Draw a circle at the base of the pear for the squirrel's hipbone. Since the viewing angle is only ¾, only half of the other pelvic bone should be visible.
- For the arm, add an elongated U on the body.
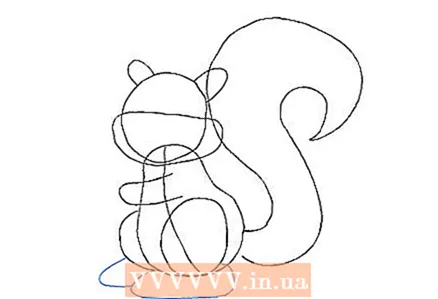 5 Add 2 sets of long ovals under each circle.
- These will be the squirrel's paws.
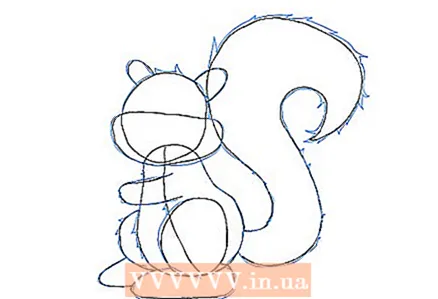 6 Use a pen to outline the sketch.
- Imagine in your head which lines and parts are overlapping and should be hidden.
- The lines may not be perfect, but the drawing should look neat when you erase the pencil lines.
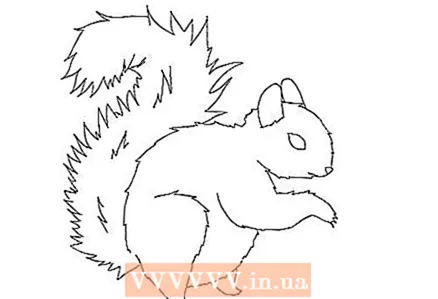
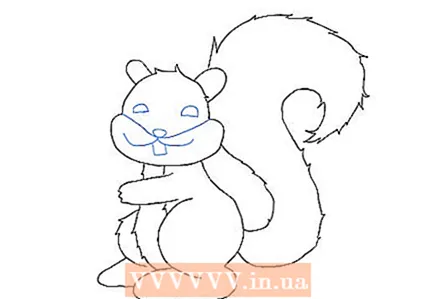 7 Erase the pencil lines and add details.
- You can add details like ears, eyes, mouth, nose and fur.
- You can also add lines to highlight the paws and fur.
 8 Color the squirrel.
- Squirrels can be of different shades, from orange to red, from dark brown to gray, depending on the breed.
Method 2 of 4: Realistic Red Squirrel
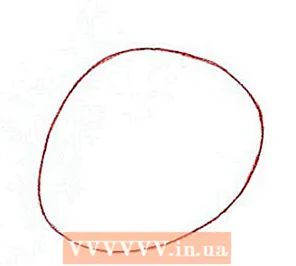
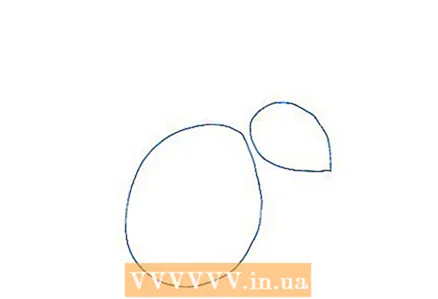 1 Draw a large circle and a teardrop shape next to it.
- This will be the head and body of the squirrel.
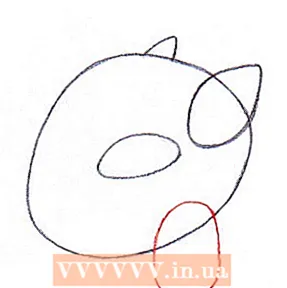
 2 Add the joints of the arms and legs.
- To do this, draw two circles. One should be larger (leg joint) than the other. The circles and the head should form an oblique row of figures.
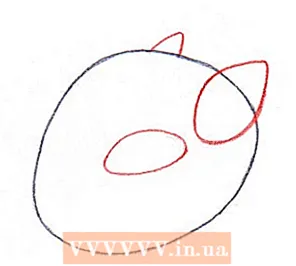
 3 Add ears and legs.
- Add two curved shapes for the ears. Depending on the breed, you can also change the ears slightly. Some squirrels have longer, pointed ears.
- For the legs, add trapezoids for each circle. There should be one trapezoid at the base of the hind thigh circle, another one connected to the arm / forepaw circle, and a small trapezoid at the body.
- The smallest trapezoid will be for the leg hiding behind the squirrel's body.
 4 Add the tail, paws and face.
- Draw a large, upside down “S” from the body. This will be the squirrel's tail.
- At the end of each trapezoid, add small triangles for the paws.
- For the face, add two small circles, one for the eyes and one for the nose.
 5 Use a pen to outline your sketch.
- Imagine in your head which lines and parts are overlapping and should be hidden.
- The lines may not be perfect, but the drawing should look neat when you erase the pencil lines.
 6 Erase the pencil lines and add details.
- You can add details like ears, eyes, mouth, nose and fur.
- You can also add lines to highlight the paws and fur.
 7 Color the squirrel.
- Squirrels can be of different shades, from orange to red, from dark brown to gray, depending on the breed.
Method 3 of 4: Realistic styling
 1 Draw a large oval shape in the center of the leaf. This will be the head.
 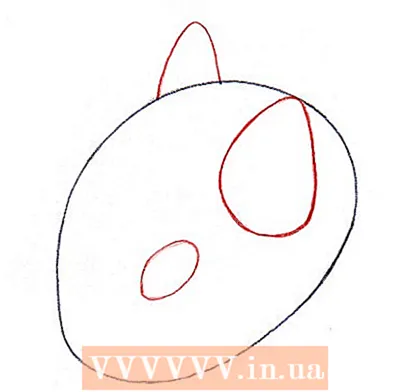 2 Draw the ears and eyes.On each side of the top of the oval shape, draw small egg shapes. Draw a smaller oval inside the oval shape.
 3 Draw a horizontal oval shape under the right side of the head. This will be the body.
 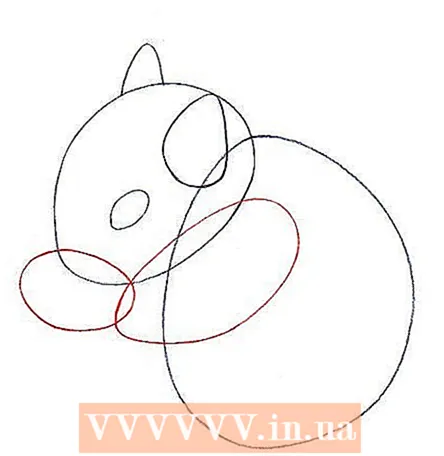 4 Draw cute little pens!Draw a large, elongated oval overlapping the small oval at the top of the body.
 5 Draw a large circle and two long, thin ovals on the body for the legs and feet.
 6 On the right side of the body shape, draw an arched, long oval. This will be the tail.
  7 Draw the outline of the cute little squirrel and add details such as eyes, long thin fingers and lots of frizzy hair all over the body.
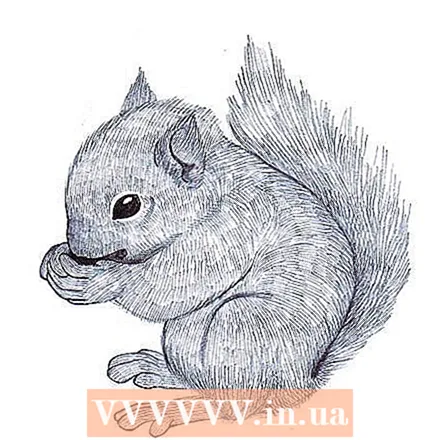 8 Carefully erase the sketch lines and outline the outline.
 9 Color in and you're done!
Method 4 of 4: Cartoon Style
- 1 Draw an oval in the middle of the piece of paper. This will be the head.
- 2 Draw two pointed ovals at the top of the head for the ears.
- Draw a thin oval inside the head. This will be the eye.
- At the bottom of the head, draw another pointed oval. This will be the mouth.
 3 Draw a vertical oval under the head for the neck.
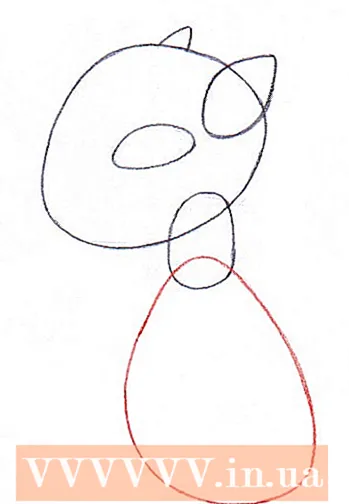 4 Draw a long oval under the neck. This will be the body.
  5 Draw a curved, long oval, ending in a small circle, for the arms and legs.At the end of the small circle, draw a larger circle. This will be the acorn for the squirrel.
 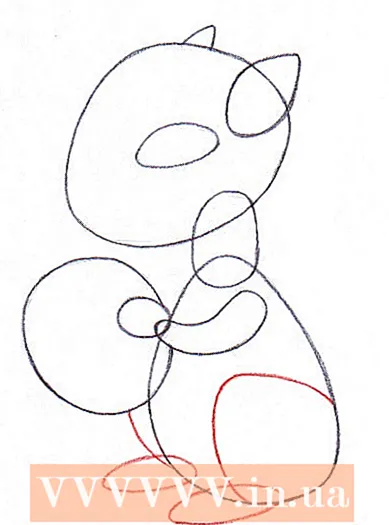 6 Draw a large circle and two long, thin ovals on the body for the legs and feet.
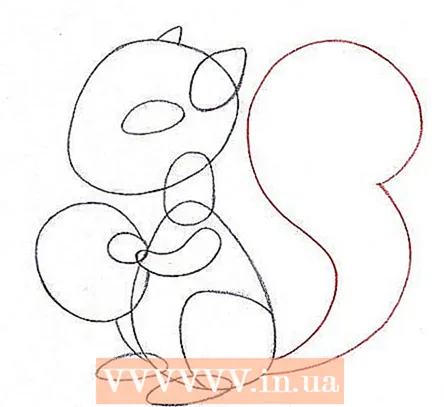 7 On the right side of the body, draw a shape that looks like a question mark. This will be a fluffy tail.
 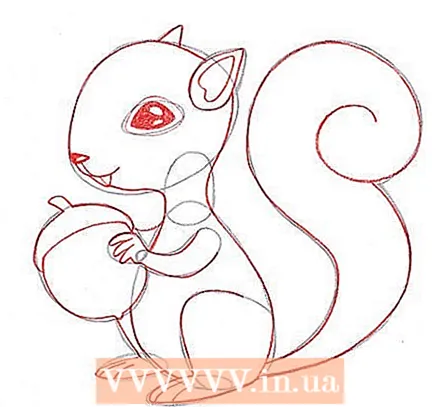 8 Trace the outline of the squirrel and add details such as an eye, a small nose, a smiling mouth with teeth, small fingers and toes.
 9 Carefully erase the lines of the sketch and trace the outline with a pencil.
 10 Color in and you're done!
What do you need
- Paper
- Pencil
- Sharpener for pencil
- Rubber
- Colored pencils, crayons, markers or paints


