Author:
Gregory Harris
Date Of Creation:
13 August 2021
Update Date:
1 July 2024

Content
- Part 2 of 3: Create Different Effects with Eyeliner
- Part 3 of 3: How to Prevent Potential Problems
- Tips
- In addition to the eyeliner, you will also need an applicator brush to achieve the effect you want. A thick brush is suitable for drawing thick, dark lines. And a thin beveled brush will give you more control and allow you to apply finer lines to the eyeliner. Look for a relatively firm brush.

Laura martin
Laura Martin is a licensed beautician based in Georgia. Has been working as a hairdresser since 2007 and has been teaching cosmetology since 2013. Laura martin
Licensed cosmetologist
Different types of eyeliner are appropriate for different occasions. Laura Martin, a licensed beautician, advises: “Liquid eyeliner is best suited for experienced makeup users who want crisp, dark lines. Gel eyeliner fits better beginnerssince it allows you to create subtle shaded lines and at the same time combine different colors’.
 2 Wash your face, pat dry, and moisturize your skin. Use a gentle cleanser and your favorite moisturizer. To prepare your skin for makeup, you need to cleanse it of impurities and sebum. Do not use moisturizers that are too oily, or the liner will not adhere well to the skin.
  3 Use a concealer or eye makeup base. A good base coat will ensure better adhesion of the gel liner to the skin, allow it to hold out longer in its place and make it brighter. Do not use fixing powder as a base under a gel liner, as the powder will clump the base.
 - Using your fingertips, apply concealer to your eyelids and around your eyes. Blend it with a sponge or your fingers.
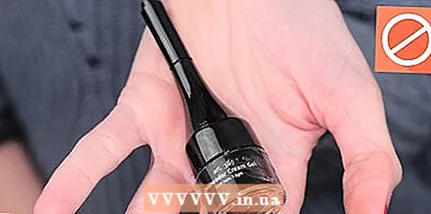
4 Dip the brush into the gel liner. Dip only the bristles of the brush into the eyeliner and wipe off excess from them on the edge of the jar. It is better to start with a small amount of eyeliner than with an excess one, since it will always be possible to add eyeliner if necessary, but removing the excess is usually much more difficult. - Using too much eyeliner at a time can cause it to collect in drops and smudge.
5 Position your head correctly. Tilt your head back slightly so that your chin is raised and protruded forward (this will help you see your eyelids better).  6 Keep the brush tilted. Do not apply the brush perpendicular to the eye, otherwise you will not be able to see what you are doing. Instead, keep it tilted so that you can clearly see how the brush touches the skin and follows your movements. 7 Gently pull the skin around the eye. Using your free hand, place a finger on your face between your temple and the eye you are going to paint. Pull the skin very gently towards the temple. This will help you apply a straight line of eyeliner to your eyelid. 8 Draw the baseline of the eyeliner along the upper lid. Close the eye that you are going to bring, but not too tightly so as not to squint. You can even just cover your eyes slightly, so that you can see what you are doing. Step back from the inner corner of the eye about a quarter of the length of the upper eyelid. Carefully draw a smooth line of eyeliner with the tip of your brush towards the outer corner of the eye, following the natural curve of the lash line. Try to draw the eyeliner line in one stroke, positioning it as close to the lash line as possible.
 - If you find it difficult to immediately draw a smooth line, first mark the points through which it should pass, and only then connect them with one stroke of the brush with the eyeliner.
Part 2 of 3: Create Different Effects with Eyeliner
- 1 Make your eyes more expressive. For a more dramatic look, make the original liner line bolder by adding an extra touch over it. Make sure that the eyeliner line tapers at the starting point at the inner corner of the eye and gradually gets thicker towards the outer corner.
- 2 Visually enlarge the eye shape. Draw the eyeliner line a little further than the outer corner of the eye, lifting it slightly upwards and thereby continuing the natural curve of the lower eyelid.
- 3 Visually enlarge your eyes. Only apply eyeliner to the corners of your eyes. Start from the middle of the upper eyelid and draw a line to the outer corner of the eye. Make it thicker towards the corner. Move the lower eyelid in the same way and connect the lines at the corner of the eye.
- 4 Draw arrows. Arrows (or cat eye makeup) will visually enlarge the eyes and give the makeup a more dramatic effect. Using the tip of your brush, draw a triangle-shaped arrow extending beyond the outer corner of the eye and continuing with the natural curve of the lower eyelid. This triangle should taper towards the tip of your eyebrow and widen at the outer corner of your eye.
- Tilt the arrow slightly towards the temple. It should be approximately on the line connecting the wing of the nose and the tip of the eyebrow.
- The length of the arrow should not exceed half the distance between the outer corner of the eye and the tip of the eyebrow.
- Paint over the triangle completely with eyeliner and smoothly connect it to the original eyeliner line along the lash line of the upper eyelid.
Part 3 of 3: How to Prevent Potential Problems
- 1 Erase your mistakes and smudged areas of the eyeliner immediately. Use a cotton swab or cosmetic sponge to wipe off any mistakes you make right away so that the eyeliner doesn't dry out. If necessary, first moisten a cotton swab with baby oil or makeup remover.
- Remember that when using the makeup remover, you are also washing your foundation, foundation and any other makeup, so you will need to touch up a little.
- 2 Work with a steady hand. A shaking hand is likely to cause unsightly and uneven lines, resulting in a messy makeup. If necessary, rest your elbows on the table while applying the liner.
- 3 Remember to wash your brush after use. Wash it in warm water and soap and let it dry naturally before using it again. This will keep bacteria free and keep the brush clean, making it easier for you to apply makeup.
 4 Don't share your makeup with anyone. This is especially true for items such as lipstick and eyeliner, as they can introduce foreign pathogenic bacteria into your body through your mouth or eyes.
 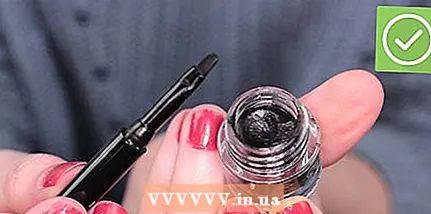 5 Use only fresh cosmetics. With prolonged application of cosmetics with the same brush, bacteria begin to develop on it, which can cause inflammation.In addition, the cosmetics themselves can deteriorate and lose their properties over time, especially after the initial opening. Depending on the eyeliner you use, you will probably need to use it for three to six months.
  6 All is ready! Hopefully, you've managed to create the look you want.
Tips
- Due to its thick consistency, gel liner should be applied before applying mascara and eyeshadow. This protects it from clumping and allows you to achieve the most effective make-up.
- Gel liner can stain clothes, so be sure to keep a special face towel on hand to help you clean up any accidentally spilled or smudged eyeliner.
- Remember that mastering the art of applying gel eyeliner takes patience and practice, so don't be discouraged if you don't get the results you want right away.
- Please note that most eyeliners are not intended to be used on the inner line of the lower eyelid (above the lower eyelashes).


