Author:
Eric Farmer
Date Of Creation:
4 March 2021
Update Date:
1 July 2024

Content
- Steps
- Method 1 of 5: LunaPic Online Service
- Method 2 of 5: Windows
- Method 3 of 5: Mac OS X
- Method 4 of 5: iPhone
- Method 5 of 5: Android device
- Tips
- Warnings
In this article, we'll show you how to reduce or increase the size of an image file (pictures, images, photos), measured in kilobytes (KB). To immediately change the size in kilobytes, use the free online service LunaPic. To change the size in kilobytes by changing the size of the picture in pixels or centimeters, use free programs in Windows or Mac OS X, as well as free applications on iPhone or Android. Remember: when you decrease the size of the graphic file, the resolution of the picture will also decrease, and increasing the size will not lead to an increase in the resolution (the picture will become “pixelated”).
Steps
Method 1 of 5: LunaPic Online Service
 1 Go to address https://www140.lunapic.com/editor/ in a web browser. LunaPic is a free online photo editor that allows you to resize photos in kilobytes.
 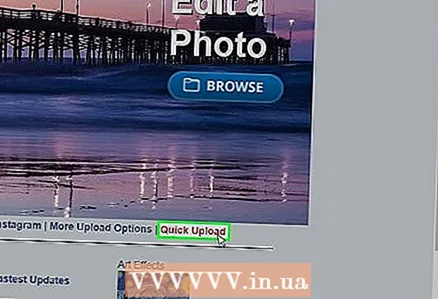 2 Click on Quick Upload (Fast loading). This link is on the right side of the page.
  3 Click on Overview. You will find this gray button in the center of the page. An Explorer or Finder window will open.
  4 Select the image you want to resize. To do this, in the Explorer or Finder window, find and click on the desired picture or photo. If necessary, go to the folder with the image: to do this, click on it in the left pane.
  5 Click on Open. You will find this button in the lower right corner. The photo will be uploaded to the LunaPic website.
  6 Click on Set File Size (Specify file size). You will find this option in the list of options above the uploaded image.
 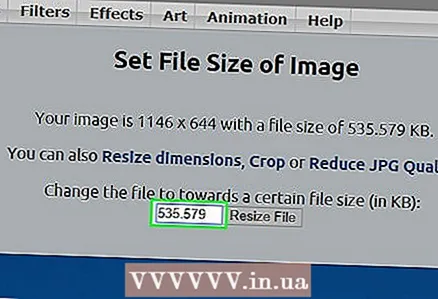 7 Enter the file size in kilobytes. Double click on the text field with a number above the loaded image - the number will be highlighted. Now enter the new file size.
 - To increase the size, enter a larger number (than the number in the text box). And vice versa.
 8 Click on Resize File (Resize file). This gray button is to the right of the number field (the new size in kilobytes). The size of the graphic file and the size of the picture will be changed.
  9 Click on Save (Save). You will find this option on the left side of the page. The picture will be saved as a JPEG file.
 - If necessary, scroll down the page to find the “Save” option.
- Alternatively, you can tap Facebook, Imgur, Pinterest, Google Photos, or Twitter to post your image to one of these services.
Method 2 of 5: Windows
 1 Open the start menu
  . Click on the Windows logo in the lower left corner.
  2 Enter paint. This will search for Paint.
  3 Click on Paint. It's at the top of the Start menu. Paint will start.
  4 Open the picture in Paint. For this:
 - click on "File" in the upper left corner;
- click "Open" to open the file browser;
- click on the desired image;
- click "Open" in the lower right corner.
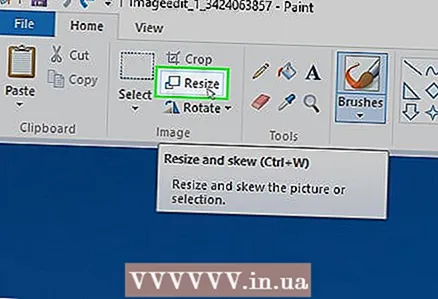 5 Click on Resize. This option is marked with a rectangle icon and is located on the toolbar (at the top of the window) under Image. The Resize and Skew window appears.
 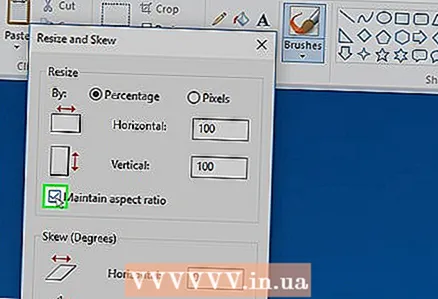 6 Install
  y "Maintain Aspect Ratio". It's at the bottom of the window. This will prevent the picture from stretching vertically or horizontally when it is resized.
  7 Enter the new dimensions for the picture. Use one of the following options:
 - Check the box next to the "Percentage" option. Now enter a number (as a percentage) in the Horizontal box or in the Vertical box.
- Check the box next to the Pixels option. Now enter the size in pixels (for example, 800 x 600) in the Horizontal field or in the Vertical field.
 8 Click on OK. You will find this button in the lower right corner. The picture will be resized.
  9 Save the file. For this:
 - click on "File" in the upper left corner;
- click "Save As" in the menu;
- in the line "File name" enter a new file name;
- click on "File Type" (optional);
- choose one of these formats:
- GIF - suitable for web graphics. A small file will be created.
- BMP - suitable for web graphics. A small file will be created.
- Jpeg - suitable for photos published on the Internet. A small file will be created.
- PNG image - suitable for web graphics and small graphic files. A large file will be created.
- Tiff - suitable for images that need to be stored and edited. A large file will be created.
- click "Save".
Method 3 of 5: Mac OS X
 1 Open Finder
  . Click on the blue and white face icon in the dock (at the bottom of the screen).
  2 Find the photo you want to resize. To do this, in Finder go to the folder with the photo. Use the left pane to open shared folders.
  3 Open the photo in Viewer. It is the main program for viewing pictures in Mac OS X. To open a photo in Preview, simply double-click on it. If Viewer is not your main image viewer, follow these steps to open a photo in Viewer:
 - right click on the image. If you are using a Magic Mouse or trackpad, click with two fingers;
- click "File";
- click on "Open with";
- click View.
 4 Open the menu Tools. You will find it in the menu bar at the top of the screen.
  5 Click on Customize size. It's in the Tools menu.
  6 Select a unit of measure. Open the menu next to the "Height" and "Width" fields, in which the "Percentage" option is selected by default. In this menu, you can select the options "Pixels", "Inches", "Centimeters" and others.
  7 Enter a new number in the Width or Height field. Use any of these fields to resize the image. If you selected the Percentage option, specify the percentage by which the image will be resized. If you selected the option "Pixels", "Inches" or another, enter the number that will be the new size of the picture.
 - Check the box next to "Scale proportionally" so that the image is not distorted when it is resized.
- You can also open the menu at "Fit In" and select the size of the image to quickly resize it.
 8 Click on OK. This button is in the lower right corner. The photo will be resized.
  9 Open the menu File. It's in the menu bar at the top of the screen.
  10 Click on Save. This option is located on the menu. The file will be saved on your computer with the new dimensions.
 - To save the picture in a different format, open the "File" menu, click on "Export", click "Format" and select one of these formats:
- Jpeg - suitable for photos published on the Internet. A small file will be created.
- JPEG-2000 - a small file with excellent picture quality and high compression will be created.
- OpenEXR - suitable for compressing video files.
- PNG image - suitable for web graphics and small graphic files. A large file will be created.
- Tiff - suitable for images that need to be stored and edited. A large file will be created.
- To save the picture in a different format, open the "File" menu, click on "Export", click "Format" and select one of these formats:
Method 4 of 5: iPhone
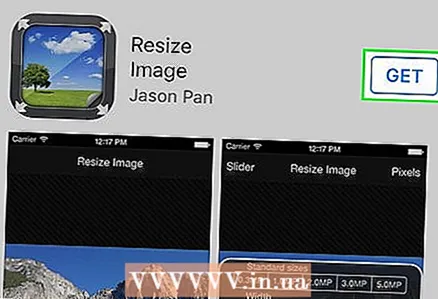 1 Install the free Resize Image app from the App Store
  . For this:
 - launch the App Store;
- tap "Search";
- click on the search bar;
- enter resize image;
- tap "Find" on the keyboard;
- scroll down the search results to "Resize Image".
- tap "Download" next to "Resize Image";
- Click on the Touch ID sensor or tap "Install" and then enter your Apple ID;
- wait for the app to install.
 2 Run Resize Image. Click "Open" in the App Store or click on the icon for this application on the home screen. The icon looks like a photo with a tree and clouds.
 - If Resize Image asks if you want to receive notifications, click Allow or Don’t allow.
 3 Tap Photos. You will find this option in the lower left corner.
  4 Click on Photo Library (Photo library). The photos in the device memory are displayed.
  5 Tap an album. The photos stored in it will be displayed.
  6 Click on the photo you want. It will open in the main Resize Image window.
 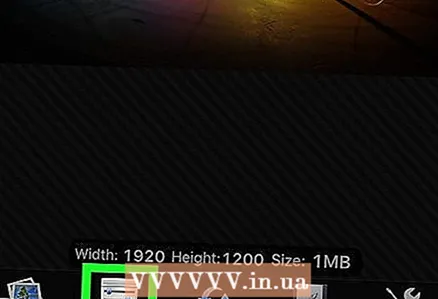 7 Tap Settings. This option is marked with an icon that looks like sliders on a gray background at the bottom of the screen (to the right of the Photo icon). A window will open in the center of the screen.
  8 Resize the picture. To do this, drag the slider near "Width" or "Height" to the left to decrease the size of the photo, or to the right to increase the size.
 - If the "Keep aspect ration" slider is green
 , the picture will not be distorted when it is resized.
 - You can also click on one of the Standard Sizes tabs at the top of the window to quickly resize the image.
- If the "Keep aspect ration" slider is green
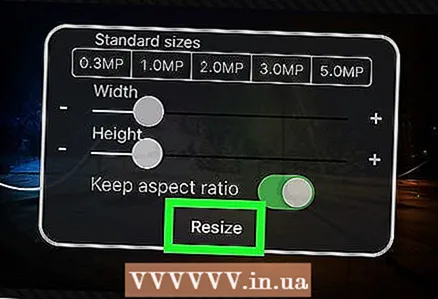 9 Click on Resize (Resize). You will find this option at the bottom of the window. The image will be resized.
 - If you receive a warning that resizing the picture will cause the application to crash, tap Yes.
 10 Tap “Save”. This option is marked with a floppy disk icon at the bottom of the screen.
  11 Click on the chamomile icon. The modified picture will be sent to the "Camera Roll" album.
  12 Click on Ok. The window in the center of the screen will close.
Method 5 of 5: Android device
 1 Install the free Photo Resizer HD app from the Play Store
  . For this:
 - launch the Play Store;
- click on the search bar;
- enter photo resizer hd;
- tap “Photo Resizer HD”;
- click "Install";
- tap "Accept";
- wait for the app to install.
 2 Launch Photo Resizer HD. Click "Open" in the Play Store or tap the application icon on the home screen. This icon looks like four arrows on a blue background.
  3 Tap Gallery (Gallery). You will find this option in the center of the screen. The Gallery application starts.
  4 Tap the photo you want to resize. The photo will open in Photo Resizer HD.
  5 Tap "Resize". This option is marked with a diagonal arrow icon. A menu will open.
 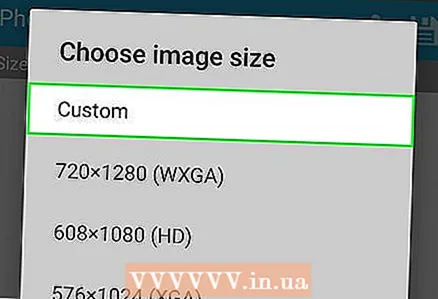 6 Click on Custom (Arbitrarily). You will find this option at the top of the menu.
 - Also in the list you can choose one of the ready-made sizes to quickly resize the photo.
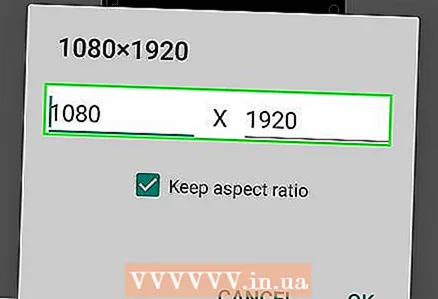 7 Enter the new image size in the text box. There are two boxes for horizontal and vertical dimensions. You can use any of these fields to resize the photo. Click on the text box and then enter the number you want. For example, if you see “300” in a field, replace that number with “150” to halve the file size. Enter "600" to double the file size.
 - Check the box next to "Keep aspect ratio" so that the picture is not distorted when its dimensions are resized.
 8 Tap OK. You will find this button at the bottom of the menu. The image will be resized.
  9 Click on the icon that looks like a floppy disk and is located in the upper right corner. The modified photo will be saved in the Gallery application with the new dimensions.
Tips
- If you increase the size of the picture (for example, from 500 x 500 to 800 x 800), the file size will also increase (and vice versa).
- If you resize the file in Paint (Windows), the new size may not appear in Explorer. In this case, press the key several times. F5to refresh the Explorer window.
Warnings
- Changing the size of the picture leads to a change in its quality and resolution. The quality will not remain the same if you change the size of the picture.


