Author:
Mark Sanchez
Date Of Creation:
27 January 2021
Update Date:
1 July 2024
Content
This article will show you how to change the background of an image on Windows using Paint and Paint 3D. You cannot create a transparent image in Paint, so you will have to paint the background green and then replace it with another image. In Paint 3D, you can cut out a portion of an image and then make that portion of the background.
Steps
Method 1 of 2: Paint
 1 Find the image whose background you want to change. You can use any image, but it is better to work with a picture with a higher resolution.
  2 Click on the image with the right mouse button. A menu will open.
  3 Please select To open with. It's in the middle of the menu. A new menu will open.
  4 Click on Paint. This option is in the new menu. The image will open in Paint.
  5 Select the Pencil tool. It's in the Tools section at the top of the screen.
 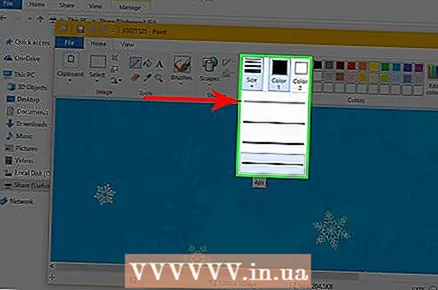 6 Change the thickness of the Pencil tool. Open the Weight menu and select the widest line.
  7 Double click on the bright green square. It's in the upper-right side of the Paint window.
  8 Carefully trace the area of the image you want to keep. This will create a border between the image, which will not change, and the background, which will be colored green.
 - To zoom in, click on the "+" sign in the lower right corner of the window.
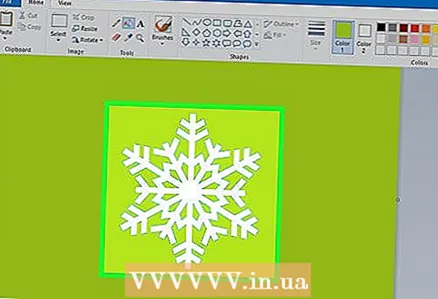 9 Use a light green color to paint over the background. Your actions will depend on the image; for example, if the left side of your picture is mostly the background, select the rectangular drawing tool, click Fill, click Solid, click Color 2, and then double-click the light green option. Now hold down the left mouse button and drag your pointer over the background to retouch it with the big green square.
 - When you're done, the background should be green.
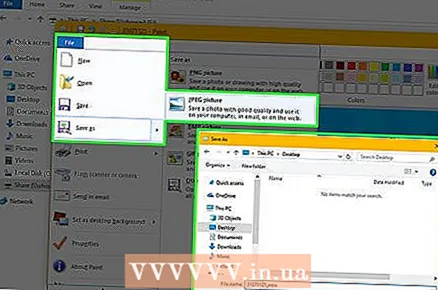 10 Save the image as a new file. For this:
 - click "File";
- select "Save As";
- click "JPEG";
- enter a file name and select a folder to save (for example, "Desktop");
- click "Save".
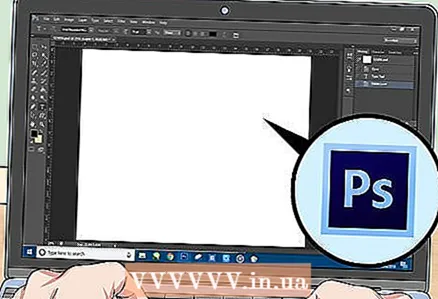 11 Use another program to replace the green background. Unfortunately, in Paint, you cannot replace a glowed background with another image; for this you need a graphics editor (for example, Photoshop) or a video editor.
 - The entire background is painted in one color, so when you replace it, the desired image will appear on the new background.
Method 2 of 2: Paint 3D
 1 Open the start menu
  . Click on the Windows logo in the lower left corner of the screen.
 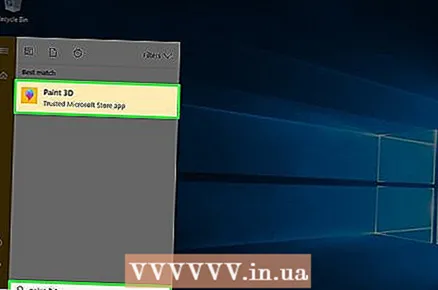 2 Start Paint 3D. Enter paint 3d from the Start menu, and then click Paint 3D at the top of the Start menu.
  3 Click on Open. This button is in the middle of the Paint 3D window.
 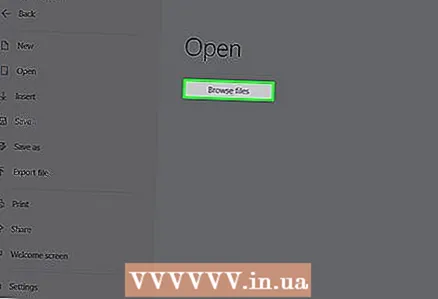 4 Click on Overview. It's in the middle of the window. A new window will open.
 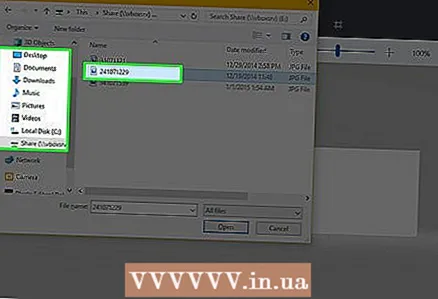 5 Select an image. Navigate to the folder with the desired picture, and then click on it to select.
  6 Click on Open. It's in the lower-right corner of the window. The image will open in Paint 3D.
  7 Click on the tab Canvas. It's a grid of squares icon in the upper-right side of the Paint 3D window. A side panel will open on the right.
 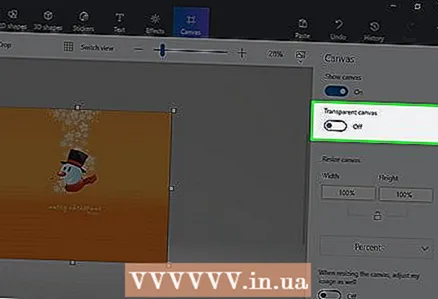 8 Click on the gray slider next to Transparent Canvas
  . It's in the right pane. The slider turns blue
  .
.  9 Click on Magic selection. You will find this tab on the left side of the Paint 3D window.
  10 Drag the edges of the canvas inward to surround the object. In this case, the final image will only need to be slightly edited.
 - Drag the edges of the canvas as close as possible to the part of the image that you want to keep.
 11 Click on Further. This button is on the right side of the page.
 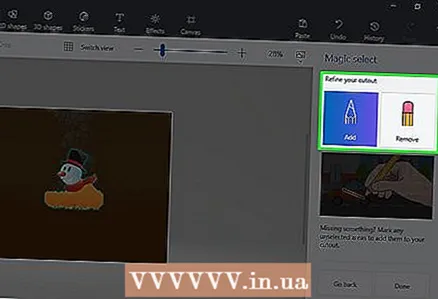 12 Add or remove fragments that you want to keep or delete. Any color (not shaded) portion that is framed will be preserved when you crop the image. If the sections that you want to keep are shaded, or if the sections that you do not need are not shaded, follow these steps:
 - Add: Click on the Add icon at the top of the right panel, and then draw a path around the section you want to save.
- Delete: Click on the Delete icon at the top of the right panel, and then draw a path around the section you want to delete.
 13 Click on Ready. This button is on the right side of the page.
  14 Cut the selection to the clipboard. To do this, click Ctrl+X... The selected section disappears from the Paint 3D window.
  15 Click on Menu. It's a folder-shaped icon in the upper-left corner of the window.
  16 Open the background image. Follow these steps:
 - click "Open";
- click on "Browse Files";
- click "Don't Save" when prompted;
- select the image you want to use as a background;
- click "Open".
 17 Paste the cutout onto a new background. When the background image opens, click Ctrl+Vto paste the clipped portion of the original image onto a new background.
 - Resize the original image if you want; to do this, hold and drag one of its corners inward or outward.
 18 Save the image. To save your project as an image, follow these steps:
 - click "Menu" (folder-shaped icon) in the upper left corner of the window;
- click on "Save As";
- click "Image";
- enter a name for the image and select a folder to save (for example, "Desktop");
- click "Save".
Tips
- There are many services (free and paid) that can replace the green background with another image.
Warnings
- When the image is enlarged in Paint, do not use the scroll wheel of the mouse to avoid ruining the image.


