Author:
Virginia Floyd
Date Of Creation:
13 August 2021
Update Date:
1 July 2024

Content
- Steps
- Method 1 of 10: Downloading software updates
- Method 2 of 10: Repair Adobe installation and files
- Method 3 of 10: Remove faulty plugins
- Method 4 of 10: Delete the contents of the cache
- Method 5 of 10: reinstalling the program
- Method 6 of 10: Updating your graphics driver
- Method 7 of 10: ClearType Text Tuner
- Method 8 of 10: Install Microsoft Updates
- Method 9 of 10: Disable Disk Compression
- Method 10 of 10: Resolving Problems Handling Temporary Content
- Tips
Has your computer been the victim of crashes in Adobe Acrobat or Adobe Reader? They freeze too often, and you do not know how to prevent this? In this case, in order for these programs to work as they should, it is necessary to correct errors in the Windows operating system.
Steps
Method 1 of 10: Downloading software updates
 1 Eliminate compatibility issues. Download and install the latest updates to ensure that the features and components of the program are compatible with your system.
 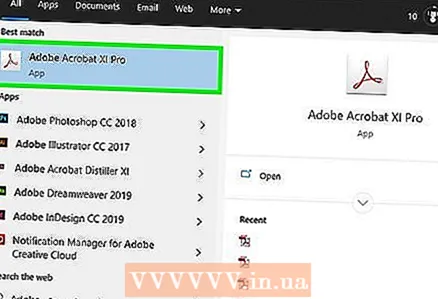 2 Launch Adobe Acrobat / Adobe Reader.
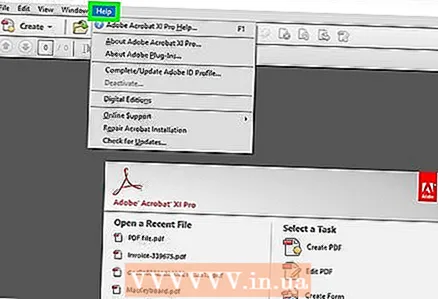 3 Open the "Help" section of the menu.
 4 Select Check for Updates.
Method 2 of 10: Repair Adobe installation and files
 1 Try reinstalling the program. Application files can become damaged over a period of time. The required DLL / ActiveX file can be deleted, renamed or moved. Reinstalling the app may fix this problem.
 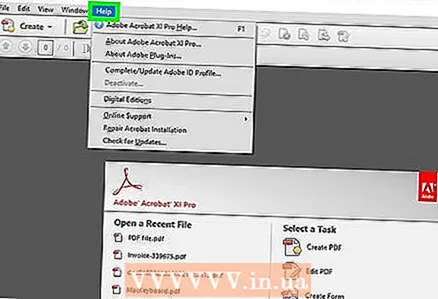 2 Open the Help menu.
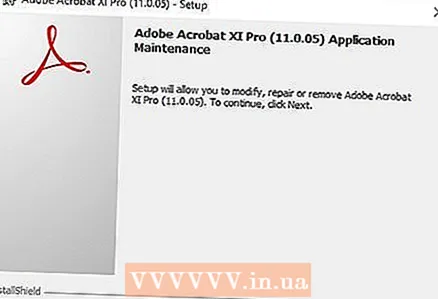
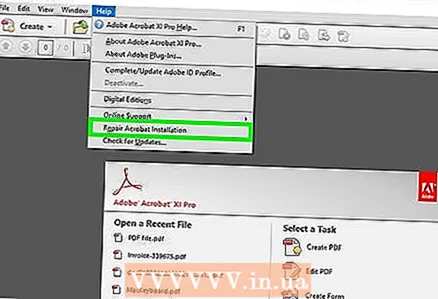 3 In Adobe Acrobat, select Repair Acrobat Installation. In Adobe Reader, select the Repair Adobe Reader Installation option.
  4 Fix problems on Windows. Remove residual Windows files using RegInOut System Utilities.
Method 3 of 10: Remove faulty plugins
 1 Plugins are of two types:pre-installed and third-party. You may have recently installed new plugins. The source of problems may lie in the incorrect operation of one of them.
  2 Double click on the "Computer" shortcut on the desktop.
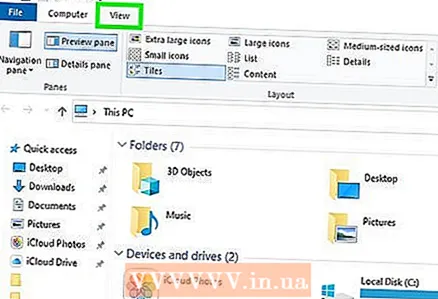 3 Click the View tab on the Control Ribbon.
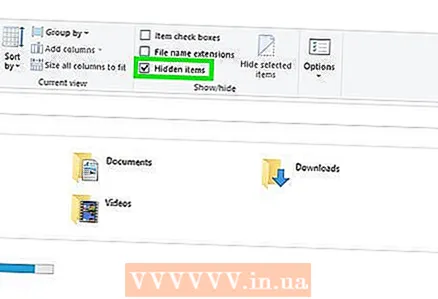 4 Check the box next to Hidden Items.
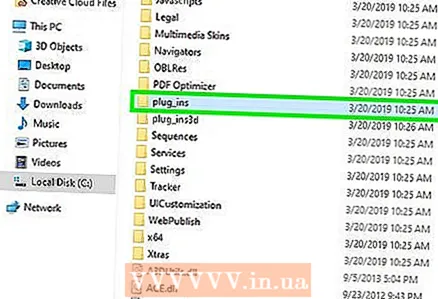 5 If Adobe Acrobat crashes, open:C: Program Files (x86) Adobe Acrobat 11.0 Acrobat plug_ins, and in the case of Adobe Reader, C: Program Files (x86) Adobe Reader 11.0 Reader plug_ins.
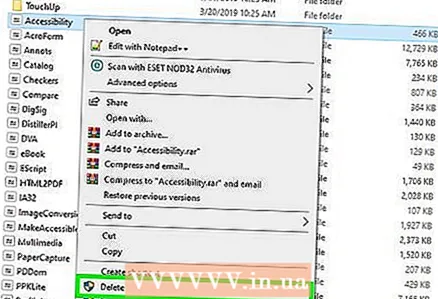 6 Remove any installed third party plugins.
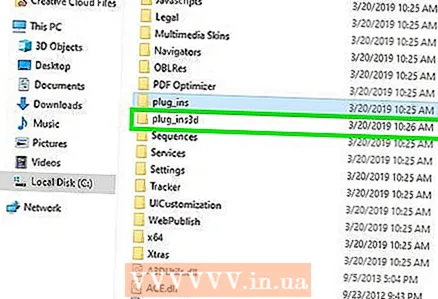 7 If Adobe Acrobat crashes, open:C: Program Files (x86) Adobe Acrobat 11.0 Acrobat plug_ins3d, and in the case of Adobe Reader, C: Program Files (x86) Adobe Reader 11.0 Reader plug_ins3d.
 8 Remove any installed third party plugins.
Method 4 of 10: Delete the contents of the cache
 1 Delete the contents of the cache. The contents of the cache are overwritten each time the program is started. Since these are temporary files, the likelihood of cache corruption is much higher. Delete the contents of the cache and rerun the program.
  2 Close Adobe Acrobat.
 3 If you haven't already, enable the display of hidden files and folders. (Steps # 2-4 "Remove faulty plugins" above).
 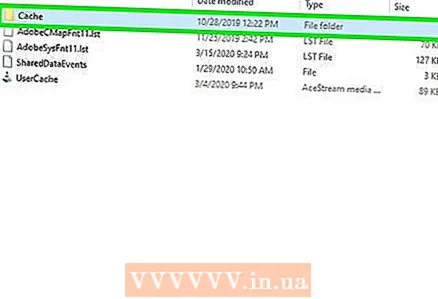 4 Open the folder:C: Users [UserName] AppData Local Adobe Acrobat Cache.
  5 Delete all contents of this folder and any existing subfolders.
Method 5 of 10: reinstalling the program
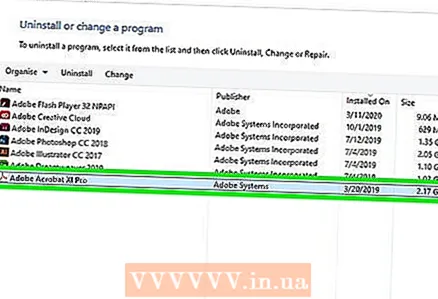 1 Remove the program. Then download and install the latest available version from the internet. Perhaps this will solve your problem.
  2 Press the Windows key + X keyboard shortcut.
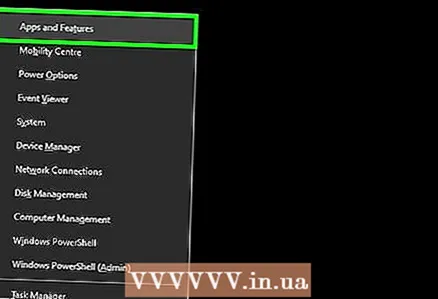 3 Select Programs and Features.
 4 Choose Adobe Acrobat or Adobe Reader. For example: Adobe Acrobat XI Pro or Adobe Reader XI (11.0.09).
 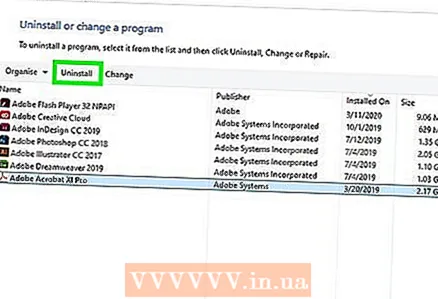 5 Click Remove.
 6 Follow the instructions of the uninstall wizard. Reboot your computer.
 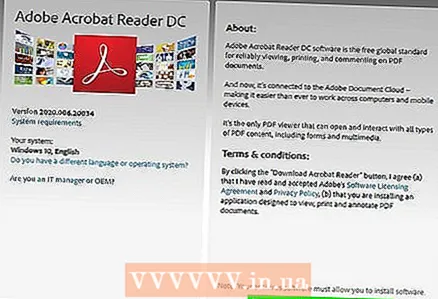 7 Visit the Adobe official website to download the latest version of the program.
Method 6 of 10: Updating your graphics driver
 1 Update your driver. How often do you update your graphics driver? Updating your graphics driver might fix your problem.
  2 Press the Windows key + X keyboard shortcut.
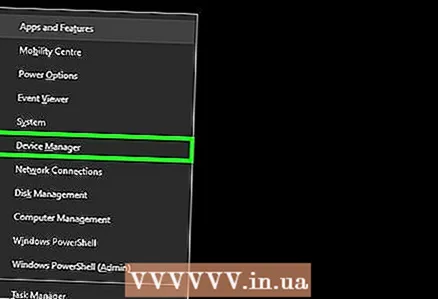 3 Select "Device Manager".
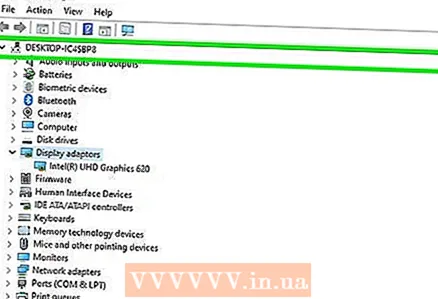 4 Expand the top tab.
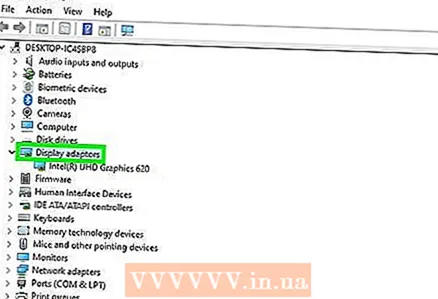 5 Expand the Display Adapters tab.
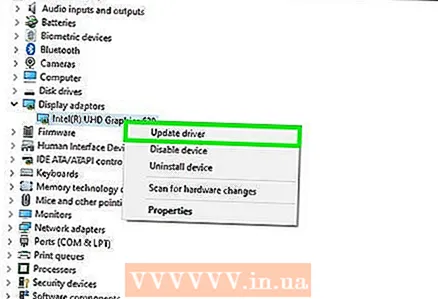 6 Right click on the graphics card. For example, Intel® HD Graphics. Select Update Drivers.
  7 Follow the instructions on the screen. Reboot your computer.
Method 7 of 10: ClearType Text Tuner
 1 By default, ClearType is disabled. Check the status of the function in the system. Include the ClearType text as follows:
 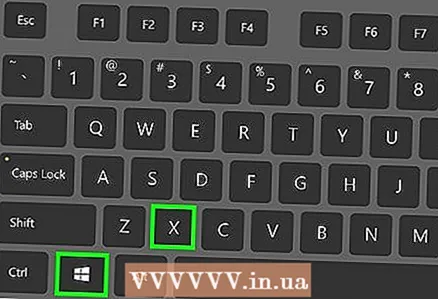 2 Press the Windows key + X keyboard shortcut.
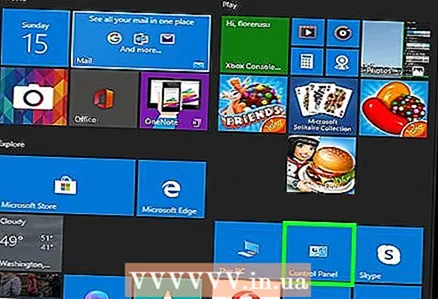 3 Select "Control Panel".
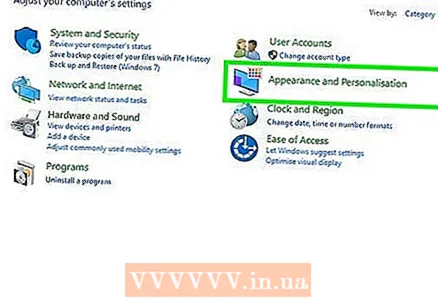 4 Click Appearance & Personalization> Display.
 5 Select Customize ClearType Text in the left pane.
 6 A new "ClearType Text Tuner" window opens.
 7 Check the box next to Enable ClearType.
 8 Click Next. Follow the directions in the setup wizard.
Method 8 of 10: Install Microsoft Updates
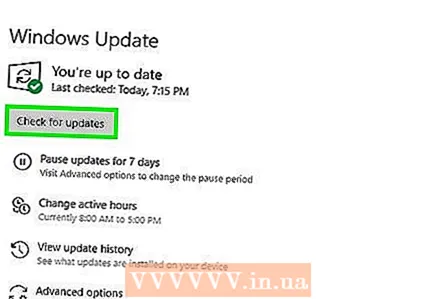
 1 Make sure your computer has the latest Microsoft updates.
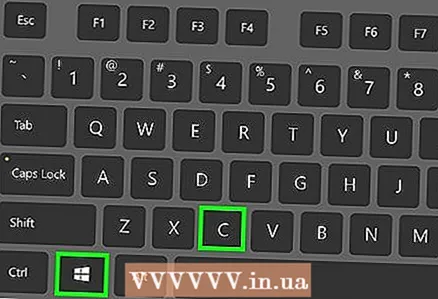 2 Press the Windows key + C keyboard shortcut to open the Charms bar.
 3 Click Search.
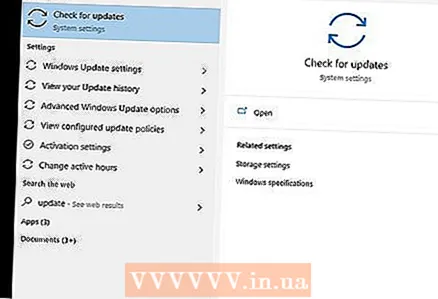 4 Enter "Update".
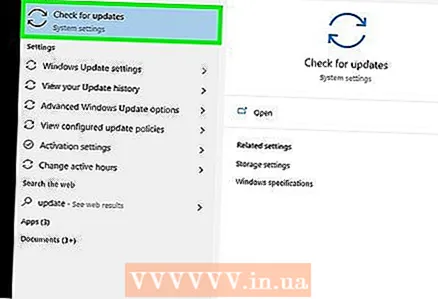 5 Click on the settings icon.
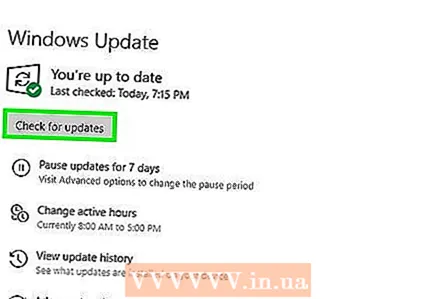 6 Click Check for Updates. Follow the instructions in the app.
Method 9 of 10: Disable Disk Compression
 1 Check if the disc compression function is enabled. Compressing the disk slows down the reading of the file's contents, which can lead to freezes in Adobe Acrobat and Adobe Reader.
  2 Double click on the "Computer" shortcut on your desktop.
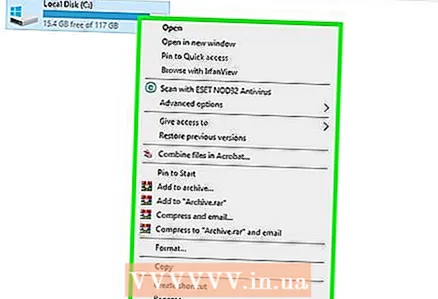 3 Right click on drive C:.
  4 Select Properties.
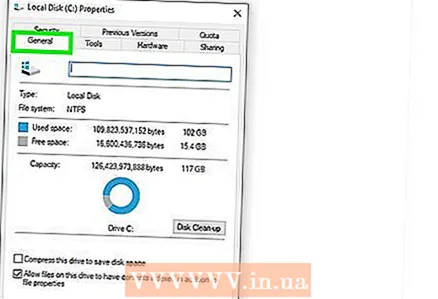 5 Click the General tab.
 6 Clear the Shrink this disk to save space check box.
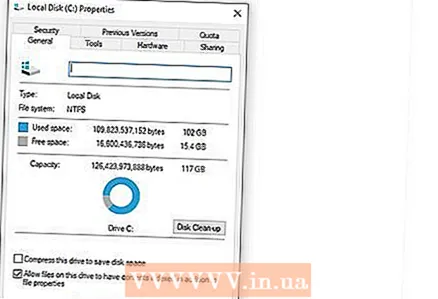 7 Click Apply or OK.
Method 10 of 10: Resolving Problems Handling Temporary Content
 1 Make sure the path specified in the environment variables is the same as in the temporary files folder. If they are different, provide the correct path or create a new folder.
 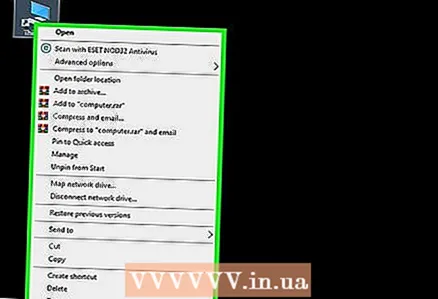 2 Right click on the "Computer" shortcut on the desktop.
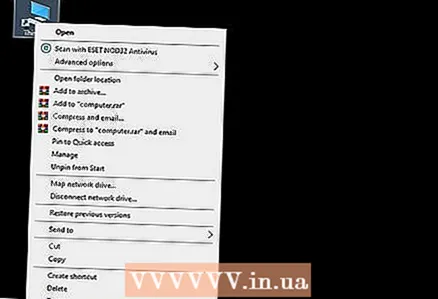 3 Select Properties.
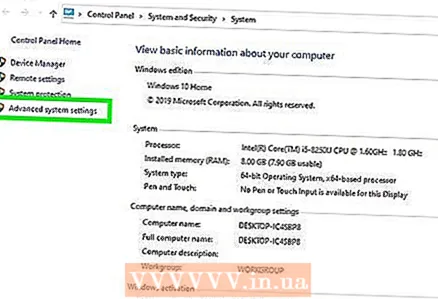 4 Select Advanced System Settings in the left pane. A new System Properties window will open.
 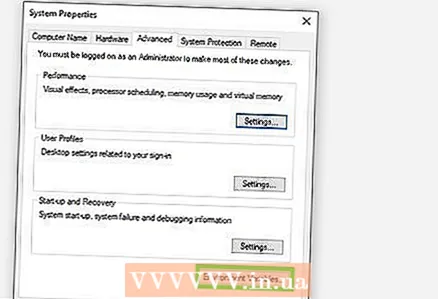 5 Click on the "Environment Variables" button on the "Advanced" tab.
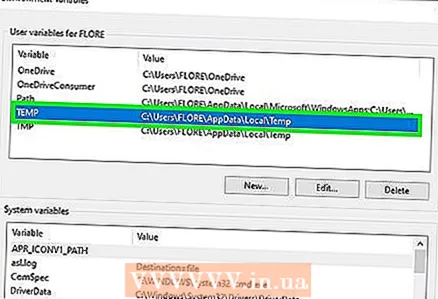 6 Select the "Temp" variable in the "User Environment Variables for ..." category.
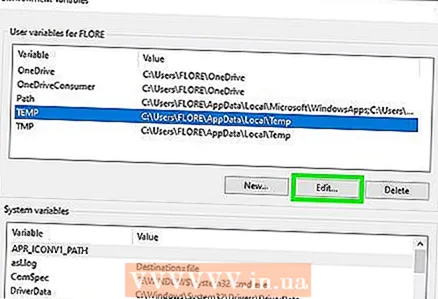 7 Click Change.
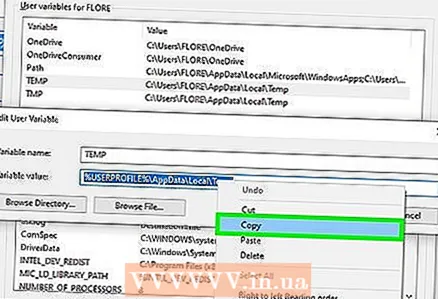 8 Copy the value of the variable into Notepad.
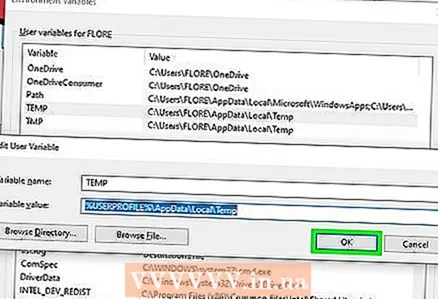 9 Click OK twice.
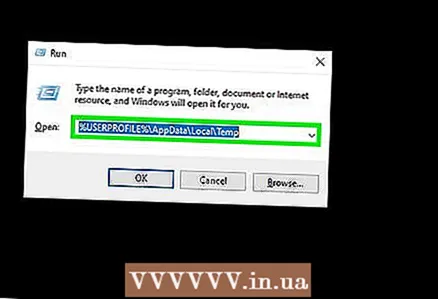
 10 Press the Windows key + R keyboard shortcut.
 11 Paste the path from Notepad.
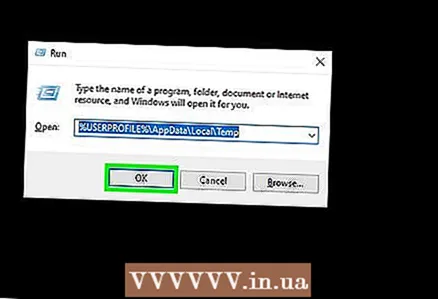 12 Click OK.
 13 Does this path exist? If not, then it is most likely the wrong path or the folder for temporary files was accidentally deleted. In this case, create a folder with the same name.
Tips
- Be sure to close all open programs during the reinstallation or upgrade process.


