Author:
Virginia Floyd
Date Of Creation:
14 August 2021
Update Date:
1 July 2024
Content
- Steps
- Method 1 of 5: Using the Power and Eject buttons
- Method 2 of 5: Using an additional disk
- Method 3 of 5: Reconnecting the Power Supply
- Method 4 of 5: Using a knife or wood chip and tape
- Method 5 of 5: Using a plastic card and a screwdriver
- Tips
Almost all car owners with cars equipped with CD players face the same problem - stuck discs. Since they are installed inside the car itself, they can only be reached from one side, unless, of course, you are ready to remove and disassemble the player itself. A stuck disc in the player is a rather annoying problem. Fortunately, there are several options for dealing with this type of headache. However, notice that if you do something wrong, you could damage the player (or the disc will remain inside). In any case, the advice in this article does not replace the authoritative opinion of an automotive expert.
Steps
Method 1 of 5: Using the Power and Eject buttons
 1 Switch off the vehicle. Some players have a "force-eject" feature designed specifically to eject a disc when other methods fail. Since in this method there is no need to get inside the player itself, we recommend starting with it - in any case, you do not lose anything. First of all, switch off the car if you have not already done so.
 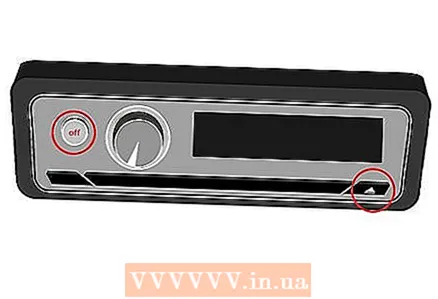 2 As soon as you turn off the engine, simultaneously press the "power" button and the "eject disc" button on the player and hold them for ten seconds. If your player supports the "force eject" function, the disc will pop out at the same time.
 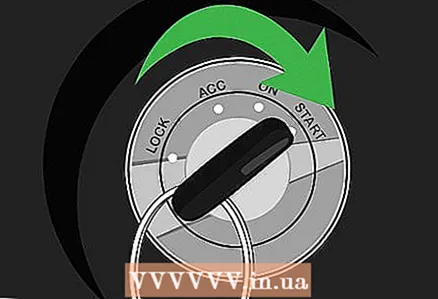 3 If that doesn't work, start the car again. Some CD players may not work while the machine is turned off. When starting the engine, also try pressing and holding the same power and force-eject buttons.
  4 Take a look at the player's instructions. In general, pressing the above buttons at the same time is the same force eject command for all players, however some CD players may use different buttons to eject a jammed disc. Check the instructions that came with the player - there should be information about the functions that will allow you to eject the disc.
Method 2 of 5: Using an additional disk
 1 Take a blank or just unnecessary disc. This method requires you to insert a second disc into the player. In order not to spoil the disc, take out a blank disc or any other disc that you no longer really need.
 - Turn on your player before starting. If for this you need to start the car, do so.
- Note: this method, like several others mentioned in this article, runs the risk of damaging both the stuck disc and the player itself. Be careful when inserting any foreign objects into the player. If you doubt your abilities, then it is better to contact the masters.
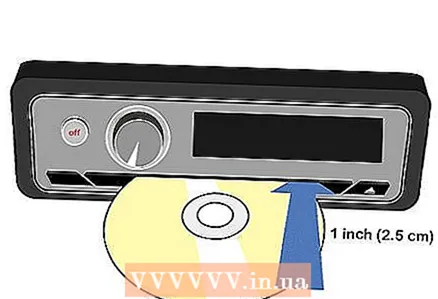 2 Insert the second disc into the opening 2-3 cm. This disc should be on top of the jammed one. You can feel the stuck disc by sliding over it with whatever you have in your hand.
 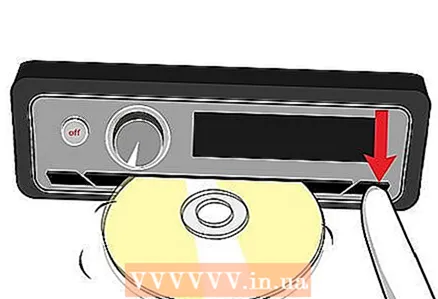 3 While gently rocking the disc, press the Eject button. By doing this, you encourage the jammed disc to forcefully affect the mechanism of the player, which is responsible for ejecting the discs. When you feel that the jammed disc has started to come out, make sure that it does not get caught between the other disc and the edge of the disc opening.
 - If that doesn't work, try slipping a disc under the jammed disc while gently lifting it up. Turntables can have different ejection mechanisms, so sometimes upward pressure on the disc may be more effective than the other way around.
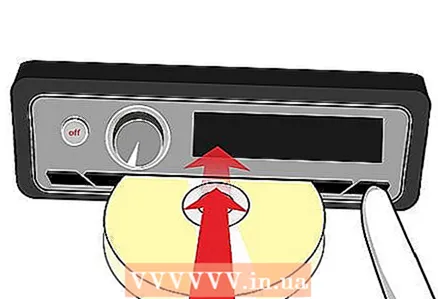 4 Press down lightly on the disc. Sometimes pressing lightly will cause the disc to pick up speed. If the turntable is closer to the top surface of the dashboard, repeat all steps of this method by pressing or tapping on the dashboard area neat but firm.
- Observe: Despite the potentially successful result, extreme care must be taken when tapping, as it can damage the sensitive parts in the center of the panel. This method is not recommended if a GPS navigator or something similar is installed between the player and the top of the panel.
Method 3 of 5: Reconnecting the Power Supply
 1 Record all radio and audio settings. This method is useful if the disc cannot be retrieved because the CD player will not turn on. The method consists in disconnecting and reconnecting the power supply of the player.At the same time, most players lose all radio and audio settings and return to the default settings. If you enjoy listening to music in your car, be sure to write down your personal settings so that you can restore them later.
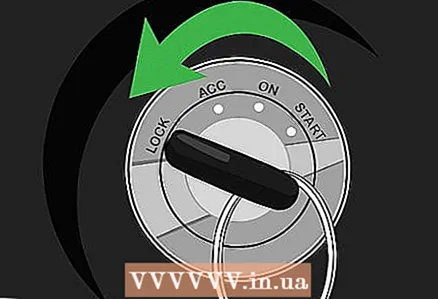
 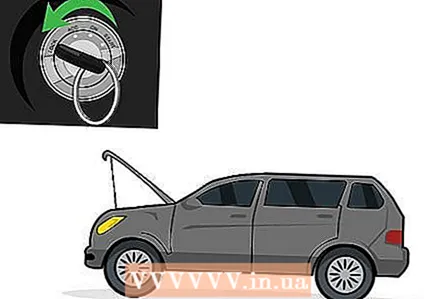 2 Stop the car and open the hood. When working on the electrical system of your vehicle, take all precautions to avoid electric shock. After stopping the car, remove the keys from the ignition switch, open the hood to access the battery.
 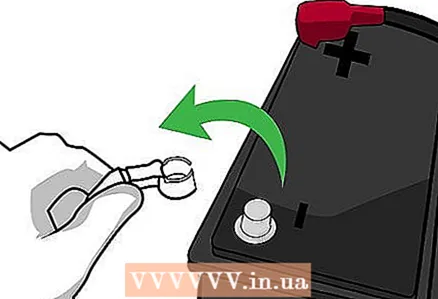 3 Disconnect the negative terminal of the battery. The negative terminal of the battery is black, the positive terminal is red. In some cases, you may need a small wrench or pliers for this to loosen the nut and disconnect the wire.
 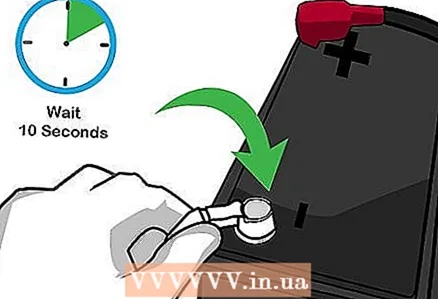 4 Wait 10 seconds, then reconnect the terminal. Then start the car and try to remove the disc as usual. Disconnecting and reconnecting the power to the CD player may reset it to its factory settings, which may restore the eject function.
 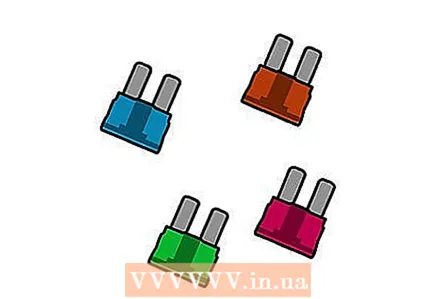 5 If the player still does not turn on, replace the fuse. Please refer to the user manual. Often the fuse box is located behind the dash on the driver's side. Disconnect the battery. Remove the protective cover from the fuse box, replace any player fuse that may have blown.
Method 4 of 5: Using a knife or wood chip and tape
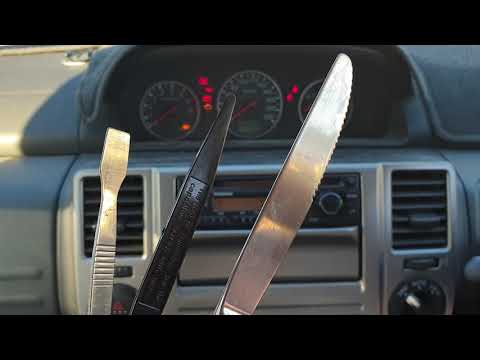
 1 Be careful not to get an electric shock. Insert a long flat knife or similar object directly into the player. Metal knives conduct electricity, so if you have a suitable piece of wood or plastic (like a popsicle stick), use it. If not, make sure the player is disconnected from the power sources, turn off the car, turn off the player and disconnect the negative terminal from the car battery.
 - Note: as well as the other methods described in this article, this method carries the risk of ruining the stuck disc or the CD player itself. If you don't want to risk your property, take your car to a professional for repair.
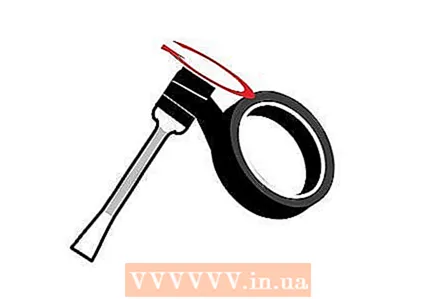 2 Wrap tape (sticky side out) around the edge of a spatula (or similar object). The tape must be strong, Gorilla tape will work well for good results. The spatulas are usually tapered, so the tape should not slide off. If you are using a different shape, such as a popsicle stick, first glue the tape to the item, then wrap it around a few times, turn the tape over, and spin it a few more turns to adhere firmly to the item.
 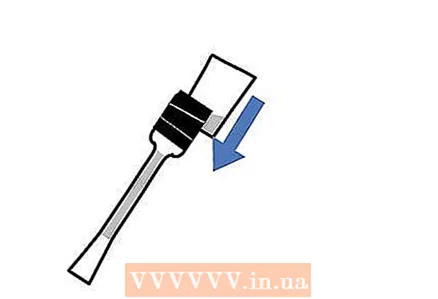 3 Glue a piece of tissue paper to one side of the knife. A knife wrapped in duct tape will be difficult to fit into the player. The paper will help smooth one side of the knife. Glue printer paper or colored paper to the knife and cut it with scissors to fit the knife.
 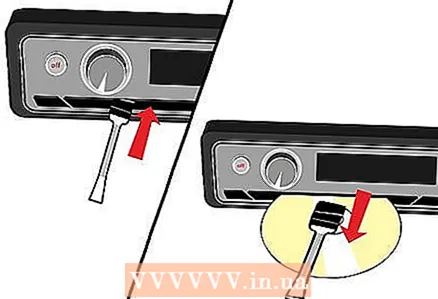 4 Insert the knife into the player, sticky side down. Move the knife until you feel the knife touch the edge of the disc. Press lightly on the knife until it sticks to the disc. When you feel the knife sticking, try to gently lift and remove the disc.
Method 5 of 5: Using a plastic card and a screwdriver
 1 Observe electrical safety precautions. As mentioned earlier, disconnect the CD player from all power sources and make sure there is no electrical charge. Switch off the car, turn off the player, disconnect the negative terminal of the battery.
 - Note: Using this method incorrectly may scratch or otherwise damage the disc or player. As always, be careful, and if in doubt, consult a professional.
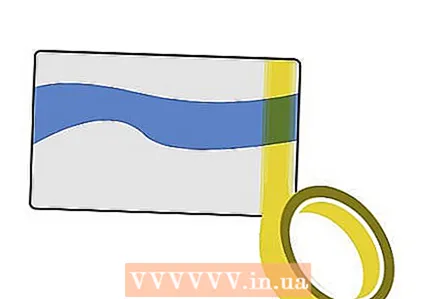 2 Get a hard plastic card such as a driver's license or credit card. In this case, you need a thin but solid card. It is advisable to use an invalid card, one that you do not mind losing or breaking. Glue a piece of double-sided tape to the narrow edge of the card.
 - You can also use single-sided tape by sticking it to the card, twisting and wrapping it around the card several times.
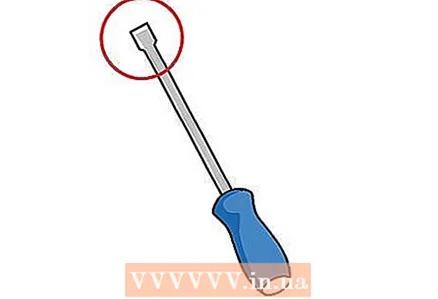 3 Take a thin flat screwdriver. This method is similar to the trowel method described above, but the difference is that you use a screwdriver to help the card stick to the disc. You will need a fairly short, thin, flat screwdriver. The thinner the better, since it must be partially inserted into the disc opening.
 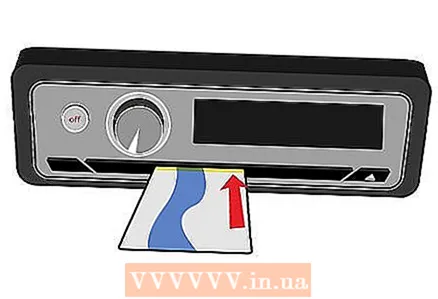 4 Slide the card through the slot OVER the jammed disc (sticky side down). You may need a screwdriver to guide the card so that it goes directly over the disc and sticks only when it goes into the opening 1.5–2 cm.
 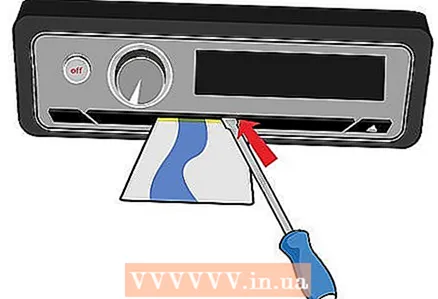 5 Slide a screwdriver over the card and gently press it onto the card. This will allow the tape glued to the bottom of the card to stick to the top of the stuck disc.
 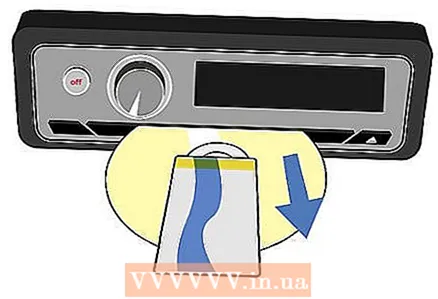 6 Remove the screwdriver and slowly pull the card outward. The disc should come out together with the card. If it doesn’t work, do it all over again.
Tips
- Take double-sided tape and butter knife. Place the duct tape on the knife and push it under the jammed disc. Gently push up and out.
- If you constantly face this problem, it will be useful to keep a transparent plastic disc with you, which usually lies in the upper part of a package of 25 or more discs.


