Author:
Virginia Floyd
Date Of Creation:
6 August 2021
Update Date:
1 July 2024
Content
In Google Maps, you can find the location of a specific organization and add information about it, such as opening hours, contact phone number, website, and more. To add your organization's location to Google Maps, you must register with Google Places. You will then need to provide your location information and confirm your details by phone or mail. It can take up to 2 weeks for Google to review and publish location information. Currently, you can add up to 100 individual addresses, or download an address information spreadsheet if you need to add more than 10 addresses at once. If you want to start adding addresses to Google Maps today, see step 1 to get started.
Steps
 1 Go to the website Google Places for Organizationsto sign up for Google Places or sign in with your Google Account using your existing username and password.
- Click on the "Register" button if you do not have a Google account and fill in the required fields such as username and password to create an account.
 2 Select the country where your organization is located. Enter the phone number of the organization in the special field, then click "Find information about the organization".
 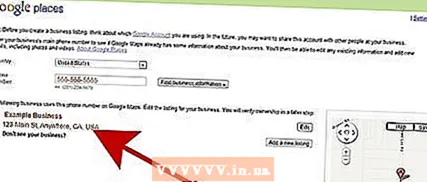 3 Google Places associated with the number you entered will appear below the phone field. Select the edit option from the Google Places list to begin the process of filling in the information.
 - If there is no address associated with your phone number in Google Places, a page will open where you can enter your business information.
- If there is no address associated with your phone number in Google Places, a page will open where you can enter your business information.
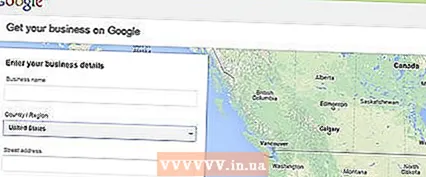
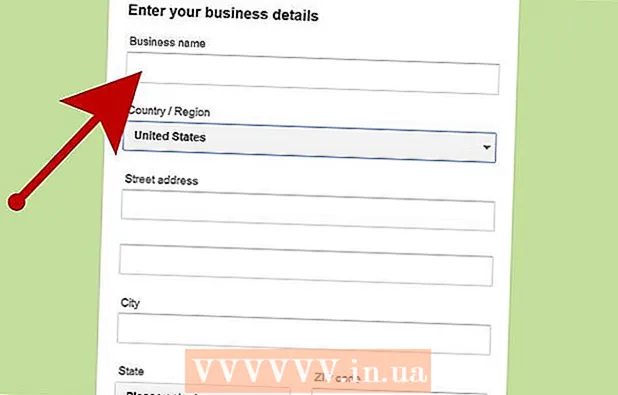 4 Enter information about your organization in the appropriate fields
 - basic information
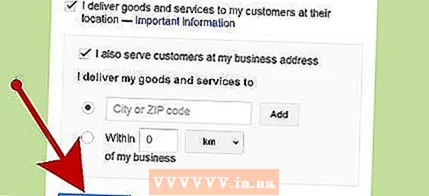
- Service area and location settings
- Opening hours
- Payment Methods
- Photos
- Video
- Additional Information
- You can correct the inaccurate position of the location marker by clicking on "Correct location" on the right below the map.
 5 Review the entered information for any inaccuracies and click "Save" at the bottom of the page.
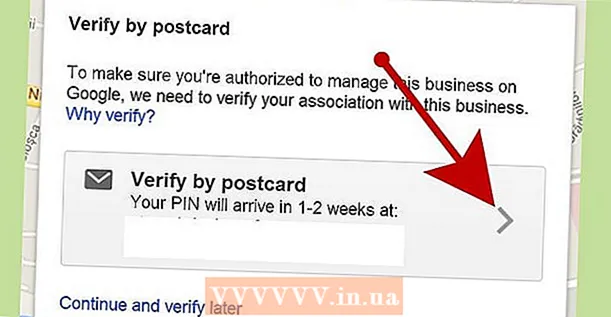 6 Select the method by which the entered information will be verified in Google Places
 - By phone (recommended)
- By mail
- Click Finish
 7 You will be redirected to the Google Places Bar page.
- If you have chosen the phone verification option, you will be called immediately. Make a note of the verification code.
- If you chose the check by mail option, you will receive a postcard in 2-3 weeks
 8 In the special field on the Google Places panel, enter the code you received by phone or mail for verification.
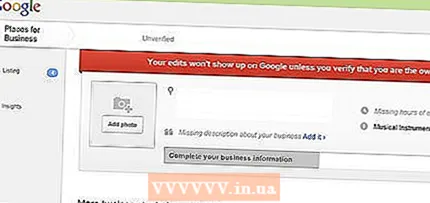
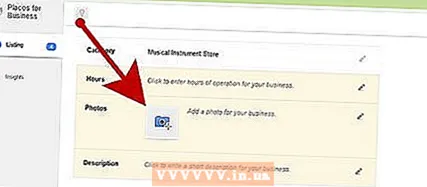 9 Ready! You will be prompted to edit the organization's location or return to Google Maps.
 - You can always go to the Google Places panel to update the information.
Method 1 of 2: Adding more than 10 addresses
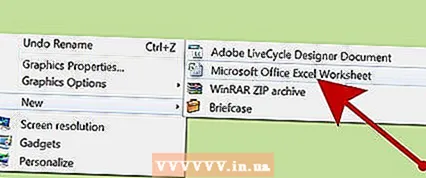 1 Open or create a new table using your existing application.
- Google Places supports loading tables in the following formats: .txt, .xls, .csv,, tsv, .ods, and .xlsx.
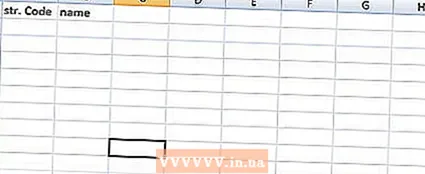 2 Enter the names of the first 9 columns in the following order: Code, Name, Address, City, State (area), Postal code, Country code, Main phone, Category.
  3 Enter information about the organizations in each column, using one line per organization.
- In the Code column, enter a unique identifier for each location in your organization. For example, if all your organizations are cafes with the same name, label them as Cafe1, Cafe2, etc.
- Use no more than 60 characters when entering the Code and Name.
- Use up to 80 characters when entering the Address, City, and State (Province) fields.
- Check the formatting of your table, make sure zip codes starting with "0" are correctly displayed and recognized by the table creation program.
- In the telephone number, add parentheses around the area code so that the format matches the following example: (555) 555-5555.
- For each organization, enter no more than 5 Categories separated by commas. For example, if you have a cafe that sells books, you can specify "Restaurants, Shops."
 4 After you finish entering your organization information, save your spreadsheet and return to Google Places.
 5 After logging into Google Places under your account, click on the "Bulk Upload" button.
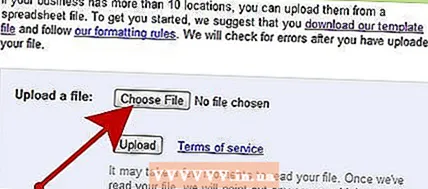 6 Click on the "Select file" button and navigate to the previously saved file with the table.
 7 Click on the Upload button, then Post New Locations, after Google uploads your spreadsheet.
- If Google finds errors in your spreadsheet, such as missing information or incorrect format, you will receive a detailed error message. Make the necessary changes and select "Check Again for Errors" before attempting to load the spreadsheet again.
 8 You will have to wait at least 1 hour for Google to add all the information from your spreadsheet to your Google Places account before you can begin the verification process.
Method 2 of 2: Complete the verification process
 1 Select the verification method that Google will use to contact you and send you a PIN.
- Options could include verifying by phone, text message, or sending a postcard to the address you provided.Google may give you all of these options to choose from, depending on the address and phone number provided.
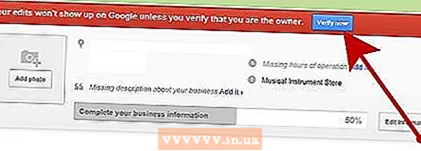
- 2 After you receive your PIN, enter this verification code into the corresponding field on the Google Places website.
- If you chose the postal checkout option, you will receive a postcard from Google within 2-3 weeks. Go to Google Places, enter your username and password, and click on the "Verify Owner" link to complete the verification process.
- 3 To publish your information to Google Places, click the "Finish" button.


