Author:
Gregory Harris
Date Of Creation:
16 August 2021
Update Date:
22 June 2024
Content
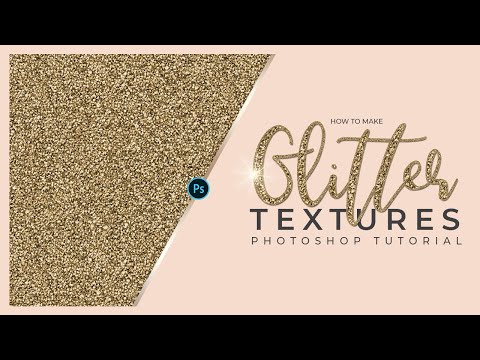
Make it all sparkle! After reading this article, you will learn how to use the glitter effect for images and texts using Photoshop.
Steps
 1 Create a new document. Set the width and height to 1500x1500 pixels and set the resolution to 300. Take any gray color from the palette and add a new layer to the layers panel.
 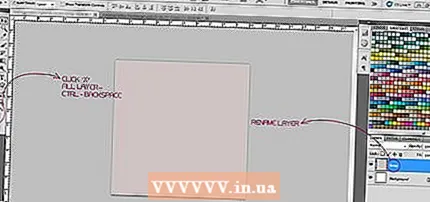 2 Fill the new layer with gray. Before doing this, press X on your keyboard to send the gray color to the background. To fill the layer, press Ctrl + Backspace.
 - You can rename the layer, or you can leave everything as it is.
 3 Let's filter the layer to create a sparkle effect. Bring the layer to the front again with the X key. Then go to Filter> Texture> Grain to apply the first filter. Set the filter intensity to 60, contrast to 50 and type to Sprinkles.
  4 Apply a second filter by going to Filter> Pixelate> Crystallize. Adjust the filter to 3-5% depending on how fine you want the glitter to be.
  5 After applying the filters, copy the layer and change its state to Multiply. Rotate the copied layer using the Ctrl + T combination, which rotates the layer 180 degrees.
  6 Repeat the previous step again. You should have three layers - the original one and two copied ones.
  7 Connect the three layers. Select them and press Ctrl + E.
 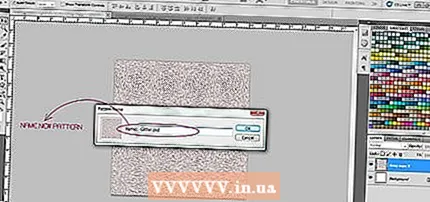 8 Now you can add your new effect to the library. To do this, go to Edit> Define Pattern and name the new effect.
  9 After adding the effect to the library, add it in text mode as well. Open a text editor and choose any font.
 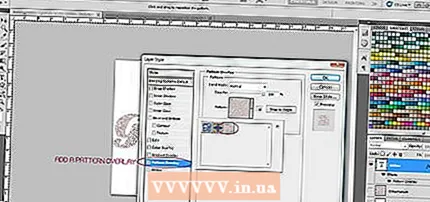 10 To apply a new effect, right-click on the layers panel. Click on Blending options to bring up a dialog box. Click on the dialog box and on Pattern overlay, then select the resulting effect.
 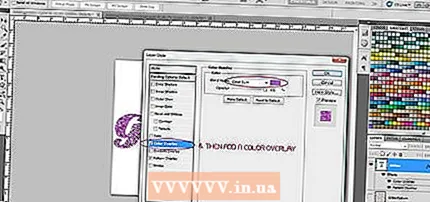 11 To color in the new effect, click on the Color overlay and choose any color you like. Change the Color overlay to Color burn.
  12 You are done.
- 13


