Author:
Alice Brown
Date Of Creation:
28 May 2021
Update Date:
1 July 2024
Content
A pedicure is easier than a manicure, for the obvious reason: you have both hands free. So do not be afraid, it is not as difficult as you think. Just follow these simple steps.
Steps
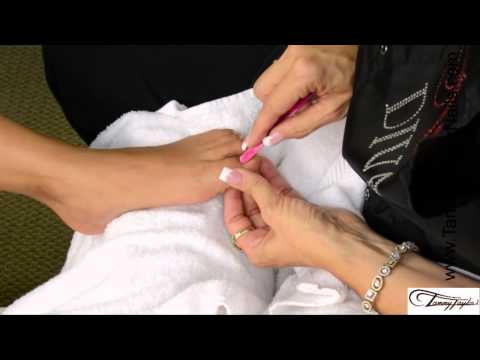
 1 Wipe off old nail polish. Wipe off old polish before doing anything. Painting a new coating over an old one or touching up half-peeled varnish is not the smartest idea. If you find it difficult to get to the polish in the corners of your nails, use cotton swabs.
 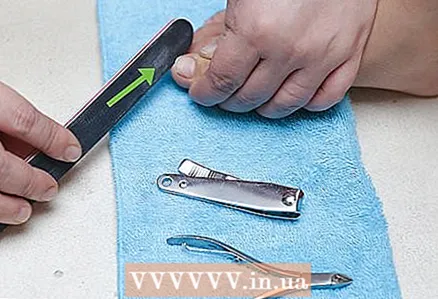 2 Polish your nails. Toenails are usually rougher than fingernails, as they are constantly chafed by socks and shoes. Smooth out irregularities and protrusions with a buffing buff. Polishing removes the remnants of the old pedicure, and your new one will last longer and look better. Also, if you apply a base coat later, you will protect your nails from the effects of the varnish.
 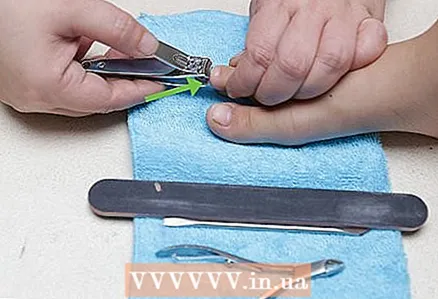 3 Trim and file your nails. Leave the nail approximately 1 mm long from the nail plate. Then file to shape the nails as desired. You can make square or round nails, but not pointy ones as they can break easily and you can scratch someone.
 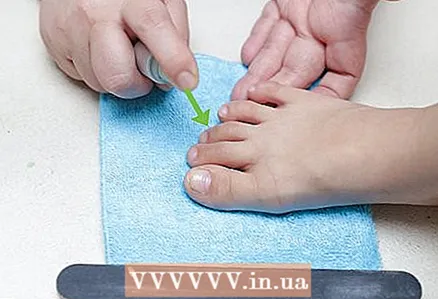 4 Dip your feet in warm water (you can also use additional products to soften your skin and nails). You need to rinse off any remaining nail polish remover (as it can turn into gas under your nail polish when heated, and the surface will be in bubbles) and soften the cuticles.
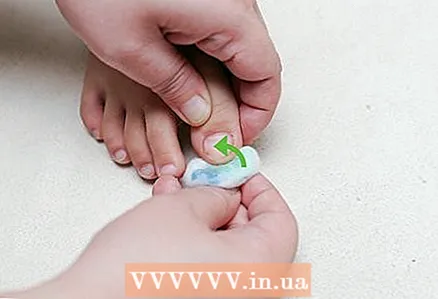
 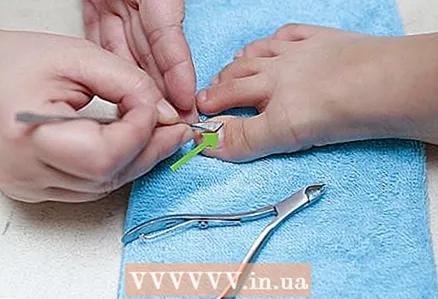 5 As soon as the nails have softened, move the cuticle with a stick and, if necessary, cut it off with nippers. Once removed, you can apply cuticle cream. Wipe off any cream that has gotten on your nails.
 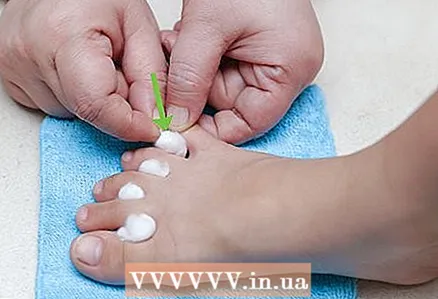 6 Divide your toes to simplify the rest of the procedure.
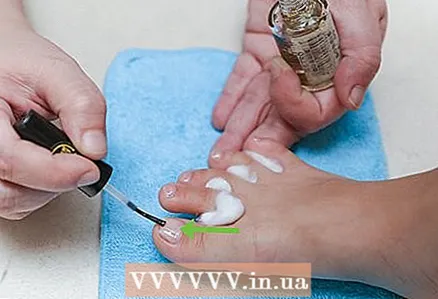 7 Apply base coat. This can be the last step if you want natural looking nails. You will need a high calcium basecoat.
  8 Choose a color. It has a huge impact on how you feel and perceive your nails. The red color will look good the next day after you get out of the shower and look at your nails. The moment you apply nail polish, such a pedicure may seem more mature. It is also more difficult to remove and can be messy if your hand is not full. If you don't want to look too grown-up or struggle to apply polish evenly, pink and coral are always the perfect shades for you. Alternatively, you can paint your nails rainbow colors. But be careful not to make them tasteless.
 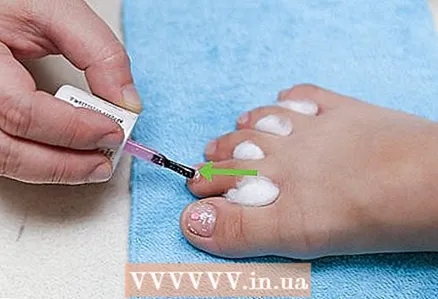 9 It's time to paint your nails. This is the most important point, so be aware of the pressure with which you apply pressure to the brush. Do it slowly, strokes should be even, do not rush. Apply a light thin layer and leave to dry for 10 minutes.
 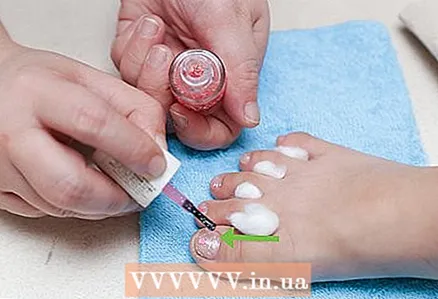 10 Apply a second coat if you don't want the color to be too pale. Varnish in the same way as the first time: with slow, even strokes. The second layer can be tricky. If you go beyond the boundaries of the first layer, that's okay. If you make a blot, take a cotton swab and dip it in nail polish remover. Then wipe away the blot with it. If you accidentally remove too much polish and see the surface of your nail, paint over it. You can do as you like. But you will have to wait 20 minutes before proceeding to the next step.
 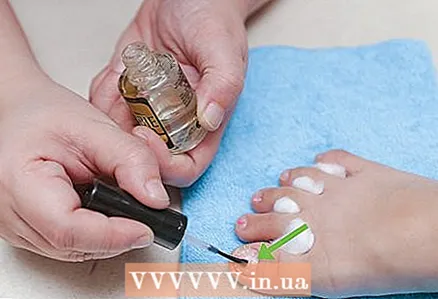 11 Apply the fixer. It preserves your pedicure and prevents the polish from peeling off. This is the least that you can do for yourself after you have completed the whole difficult part of the procedure. Choose a fixer from a brand you trust. Sally Hansen is the exclusive brand in mainstream cosmetics stores, OPI is the more exclusive brand. The main thing is not to buy a fixative from the first person you meet in the bazaar.Apply one coat of fixer, let it sit for 20 minutes, remove the spacers between your fingers and marvel at the fruits of your hard work.
Tips
- Find a color that suits your skin tone.
- Buy a good nail polish. Cheap varnishes are usually of inferior quality.
- Be careful! Do not apply the varnish too far outside the nail (on the skin).
- Choose a color that suits your mood.
- If your varnish hardens quickly, store it in the refrigerator. This will prevent the varnish from thickening and you won't have to shake it. If that doesn't work (as is the case with cheap varnishes), roll the bottle between your palms or turn it upside down and vice versa until the varnish is mixed. Never shake the jar of chemicals, even if the varnish is cured.
- Try to take care of your nails not only when you paint them. You need to use cuticle cream, cut and file nails regularly - then nail care will be much easier and more enjoyable.
- Try interesting patterns if you're in the mood. It's like a French manicure, but not so serious.
- If you have fungus under your nails, see a dermatologist.
Warnings
- The fumes from the nail polish remover can harm you, so be sure to cover it when not in use. If you feel like you are painting, washing and reapplying the same polish for 4 hours, as it does not seem perfect enough for you, you are under the influence.
- If you have athlete's foot, you need to treat it first, as nail polish remover will cause a stitching sensation. Plus, it doesn't matter how beautiful your pedicure is if your skin flakes between your toes.
- Do not paint your nails if you have an open gaping wound in the middle of the nail plate. Varnish won't help you.
What do you need
- Nail polish
- Nail polish remover
- Cotton balls
- Nail file
- Nippers
- Cuticle cream
- Cuticle stick
- Cotton swabs (optional, but convenient)


