Author:
Marcus Baldwin
Date Of Creation:
20 June 2021
Update Date:
1 July 2024

Content
- Part 2 of 4: Straight Razor Shaving
- Part 3 of 4: Using the Straight Razor Strap
- Part 4 of 4: Sharpening the razor
- Tips
- Warnings
- What do you need
 2 Rub shaving oil into your skin. A good shaving oil can make your next shave easier. Look for ready-made shaving products that contain natural oils, such as jojoba oil, coconut oil, olive oil, or sunflower oil. These oils will help soften the hairs without interfering with the movement of the shaver. 3 Dampen a shaving brush with hot water. Fill a bowl or mug with hot water. The water must be hot to soften the bristles of the brush. Let the shaving brush soak in the water for one or two minutes. Then remove it from the water and with a sharp movement of your wrist, shake off excess water from the shaving brush.
 - The highest quality shaving brushes are made using badger hair. Boar bristle brushes are cheaper, and synthetic brushes are considered the lowest quality.
- Of course, the lather can be applied to the face with your hands, but it will be much more convenient to work with a shaving brush.
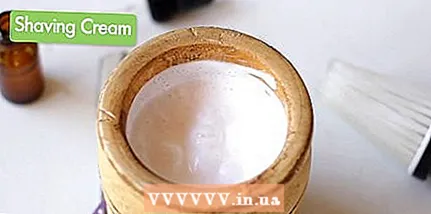 4 Fill a mug with shaving cream or lather. Empty the previously used water from the mug or bowl. Place some shaving cream or a cap of lather in it. Shaving soap is a cheaper option and is made with a mixture of fatty vegetable oils and glycerin. Shaving cream is similar in functionality to soap, but it is best to choose a cream that contains essential oils such as jojoba oil or coconut oil.
 - Refrain from using regular shaving gels and foam. While they can be used too, they won't provide you with a close shave like quality shaving soaps and creams.
5 Use a shaving brush to beat the lather. Place a damp shaving brush in a mug. Whip it with lather or cream. The longer you beat the product, the thicker the foam will become. 6 Apply the whipped lather to the overgrown stubble on your face. Scoop up the foam with a shaving brush. Using a circular shaving brush, spread the lather over the entire area you need to shave, making sure not to miss a single hair. Once you have enough lather on your face, use a few extra strokes to remove excess lather from your face. Part 2 of 4: Straight Razor Shaving
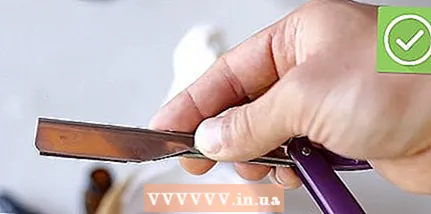 1 Squeeze the neck of the razor between your thumb and the next three fingers. Although the razor has a wooden or plastic handle, you do not need to grasp it. Instead, place your thumb under the neck of the razor (which links the blade to the handle). In this case, the index, middle and ring fingers should be located on the other side of the neck. Finally, place your pinky finger over the shaver shaft protruding from the handle on the opposite side of the razor neck.
 - This is the basic grip of the razor and many people adjust it over time to provide more comfort and better control over the razor.
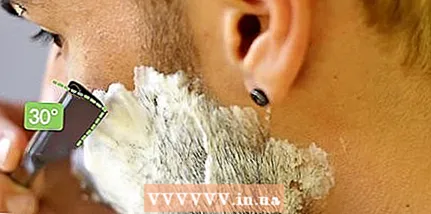 2 Place the blade against the skin at a 30 ° angle. The blade must not be applied parallel or perpendicular to the skin.It should be directed towards the skin at a slight angle. In this case, the protruding razor handle should be somewhere near your nose.
 - 3 Stretch your face with your other hand. Start on one side of your face. With your free hand, pull the leather here to straighten and smooth it. Do this for each area you shave for a smoother shave with fewer accidental cuts.
- 4 Shave your cheeks in the direction of hair growth. While holding the razor at the correct angle, start shaving from the top of your cheek. Since the hair will grow down here, also move down towards the lower jaw and chin. Use gentle, controlled downward strokes of the shaver. Rinse the blade and resume where you left off. Rinse the shaver after every shaving stroke. Shave your face on both sides.
- Even experienced razor razors make mistakes at times. At the very beginning, you will definitely cut. Do not despair. After cutting, press down on the skin for a few minutes or apply styptic powder to the cut.
- 5 Shave your chin and upper lip. The easiest way is to shave your chin while continuing to move away from your cheeks. The skin in this area is easy to cut, so work in short, gentle strokes towards the bottom of your chin. Tighten your lips as you shave the area around them.
- 6 Shave your neck and jaw area. All other areas are shaved in the same way as the cheeks. Tilt your head back, pull the lower jaw up with your free hand and start shaving the submandibular area with downward razor strokes. After shaving the skin just under the jaw, work your way down to the neck.
- 7 Reapply the lather on your face and a second time run across it with a razor across the direction of hair growth. This time the razor will move from one side to the other. Do not press down on the razor as hard as before. Move from your ears to the center of your face. Rinse the shaver after each stroke on your face.
- If you are just learning how to shave, consider making your second face pass also a downward razor. This will help you get in the habit of holding the razor without creating the additional risk of cuts.
- 8 Reapply the lather to your face and shave against hair growth. Rinse again with hot water and apply cream or lather to your face. A third razor pass across your face will give you the smoothest shave result. Start from the bottom of your neck. Be extremely careful not to cut yourself.
- 9 After shaving, rinse your face with cold water. Cold water will moisturize your skin and close your pores. You can also use an aftershave lotion or balm that contains hazel or laurel water to relieve irritation. Apply with a tapping motion rather than rubbing it into your skin.
- 10 Dry the razor. Wipe the razor blade with a soft tissue or toilet paper. It is important to remove all moisture from the blade so that it does not rust. Keep the shaver away from moisture and steam.
- If you want to put the shaver away for long-term storage, first lubricate it with oil, such as camellia oil.
Part 3 of 4: Using the Straight Razor Strap
- 1 Hang the strap over the furniture. The strap strap for the straight razor will have a hook for attaching to a stable surface such as a headboard or a handle on a bathroom cabinet. After every shave or sharpening, the razor needs to be straightened on the strap. The straightener flattens the edges of the blade for a more comfortable shave.
- The linen side of the strap is good for straightening the razor blade between shaves. Use the leather side of the belt after sharpening.
- 2 Place the razor blade on the farthest end of the strap. Pull the belt tight with your free hand. Bring the razor blade to the farthest end of the strap.Hold the razor by the neck with the sharp edge away from you.
- 3 Slide the blade over the strap towards you. Make sure the belt is tight or you end up with a dull razor. Run the blade along the entire length of the belt, pressing it against the belt. Apply light pressure to the shaver and keep it attached to the strap.
- 4 Turn the shaver upside down and slide it back and forth across the strap. Roll the razor to the other side over the blunt edge of the blade. Do not flip the razor over a sharp edge or touch the strap with it. The sharp edge of the blade should now be facing you. Run the razor across the strap the other way in the same way as you did before.
- 5 Repeat the above steps until you straighten the blade. Typically, you will need to slide the razor over the strap about 30 times, or 15 times in both directions. Be aware that straightening the blade on a belt cannot be overdone. At the very beginning, move slowly and carefully. As you develop the skill, you will begin to do this faster and you will find that straightening the blade on a belt takes almost no time.
Part 4 of 4: Sharpening the razor
- 1 Wipe and lubricate the whetstone. First wipe the grindstone with a towel to remove any residual dirt from it. Then brush the stone with cold water, oil, or shaving foam. This will protect it from overheating and chipping off particles that could damage the razor blade.
- In hardware stores, you can look for a 4000/8000 grit double-sided whetstone. Avoid using the cheap sharpening stones you normally use to sharpen knives to sharpen your razor.
- A dedicated ceramic razor sharpening stone can be purchased through a website such as eBay. It will not be as rough as regular whetstones.
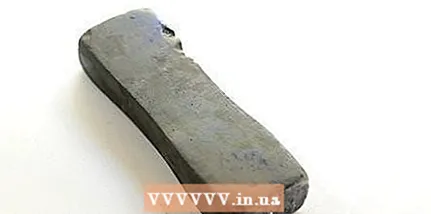 2 Place the sharpening stone with the coarser side facing up. Find the coarser side of the grindstone (and higher number in the markings). It is with its help that you will give the razor blade the necessary sharpness.
 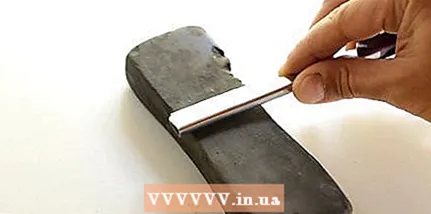 3 Place a rock in front of you and place the blade flat against it. Start sharpening work at the shorter side of the grindstone. Place the razor against the stone so that both the sharp edge and the neck touch the stone. The sharp edge of the blade should be facing away from you. Place your fingertips on the neck of the razor. Use the fingertips of your other hand to control the position of the blade on the grindstone.
 - 4 Run the blade along the whetstone. Using your fingertips, drag the razor blade towards you over the sharpening stone. Apply moderate pressure to the shaver while sharpening. If the blade is longer than the width of the sharpening stone, you will have to move it along the length at the same time while driving. Start from the lower end of the blade (at the neck). As you sweep the blade towards you, slide it towards the outer end of the blade.
- 5 Turn the razor over to the other side and slide it backwards over the sharpening stone. Do not touch the stone with the tip itself. Instead, simply tilt the razor so that the sharp edge is facing you. Move the razor away from you over the grindstone using the same steps as before.
- 6 Continue sharpening until the razor is sharp enough. You will need to slide the razor over the grindstone about 10 times in each direction. You can check the sharpening by lightly touching the blade to the moistened nail. If the blade cuts into the nail and does not get stuck, then it is sharp. Do not continue sharpening the already sharp blade, or you will damage it. Remember to straighten it with the strap before using it again.
- The razor blade will stay sharp for 6-8 weeks. Straighten the razor with a strap after each use to keep it sharp until you need to sharpen it again.
Tips
- For beginners, it is best to start using a 15 cm razor. It allows you to strike a balance between control and precision.
- A good straight razor shave requires a certain amount of skill that will come to you over time. The first attempts to shave may not be very pleasant and may be accompanied by cuts. However, keep working on yourself and when you're ready, learn to walk with the razor across your face two or three times.
- Use styptic powder if you cut yourself. It can be purchased at the pharmacy.
- Replace your razor if it starts to catch or irritate your skin. Men with sparse or short beards can usually get by with a single razor, but those with thicker beards will have to renew their razor more often.
Warnings
- Never try to catch a falling razor. Precisely because the straight razor is so sharp and slippery, it’s better for her not to shave in her bathroom.
- On the third pass against hair growth, take extra care on sensitive areas of the face, such as the area above the upper lip. It is very easy to cut the skin there.
- Do not use the razor to cut. Long strokes with a razor razor can be used quite effectively by experienced users, but beginners should be familiar with short strokes first.
- Fold down the razor before going anywhere with it. Never move around with an open razor in your hands.
What do you need
- Grindstone
- Razor strap leather strap
- Straight razor
- Shaving cream or soap
- Bowl, mug, or small bucket
- Shaving brush (preferably made from badger hair)
- Mirror
- Hemostatic powder in case of a cut
- Hot and cold water


