Author:
Eric Farmer
Date Of Creation:
3 March 2021
Update Date:
27 June 2024
Content
Ceramic tiles in a shower stall can be damaged or destroyed over a period of years. This can include damage to the seams, or even individual tiles can crack, causing water to seep through the walls or an area of the floor where water can damage the subfloor or lower levels. This guide will help you troubleshoot these problems.
Steps
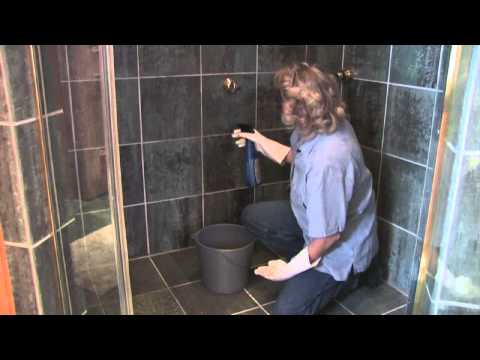
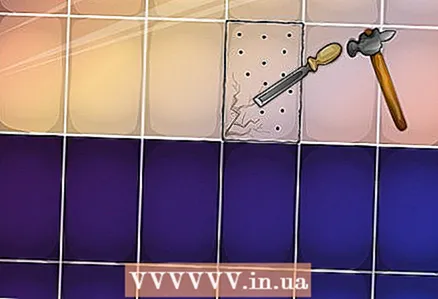
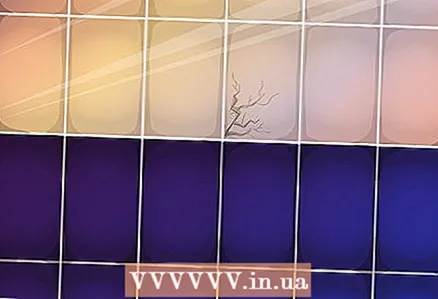 1 Remove the damaged tiles together with the tile adhesive (cement under the tiles). You may need to break the tiles into small pieces and remove them. The biggest problem is that you can easily break some of the adjacent tiles.
 - Using a seam saw or other tool, remove the grout from the tile joints that surround the damaged tile (s). Be careful not to cut through any membrane waterproofing under or behind the tiles.
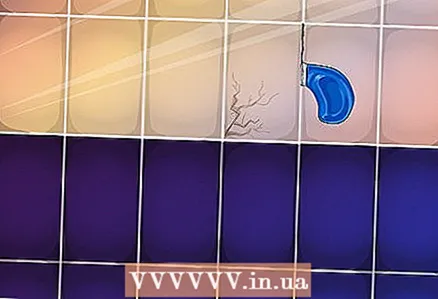
- Using a brick drill bit, drill a hole in the middle of the tiles to be removed. For larger tiles, it may be necessary to drill multiple holes to break the tile and remove it. Again, be careful not to drill too deep, or the underlay and / or any waterproofing membrane may be damaged.
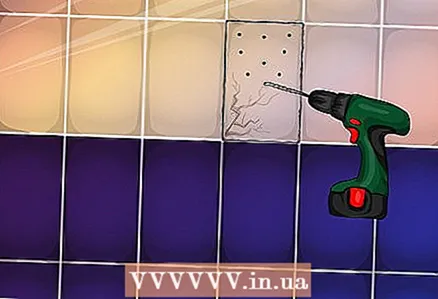
- Use a chisel to break the tile (s) into small pieces.
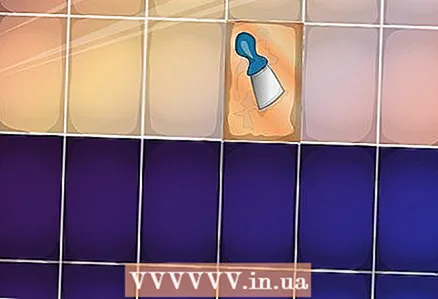
- Peel off the grout or tile adhesive behind the tile you removed. You will need a smooth, clean surface to place the new tile (s).
- Using a seam saw or other tool, remove the grout from the tile joints that surround the damaged tile (s). Be careful not to cut through any membrane waterproofing under or behind the tiles.
 2 Make sure no waterproof membranes are damaged prior to the procedure. You may need to repair rubber or vinyl membranes to ensure there are no leaks under the tile you are replacing, and the methods for doing this vary depending on the membrane used.
 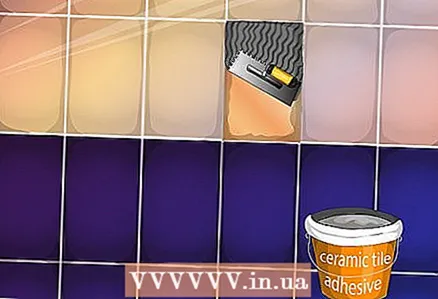 3 Purchase some kind of tile adhesive or tile grout and apply it to the substrate with a notched trowel. For minor repairs, you may need to use a putty spatula to apply this material.
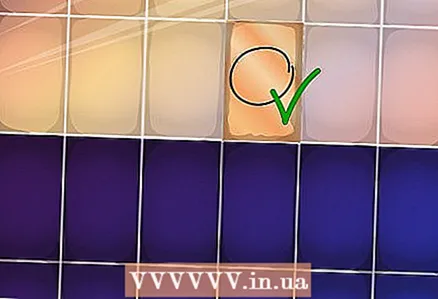
 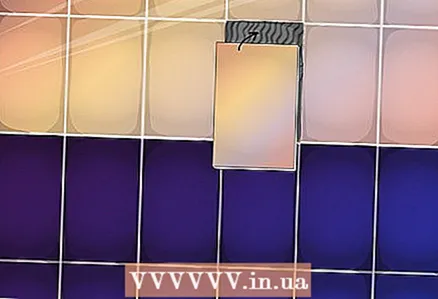 4 Replace the tile by pressing firmly against the adhesive or grout so that it adheres well to the material. Make sure that the joints around the tile are uniform and that the surface of the tile (s) just installed is flush with the surrounding tiles.
 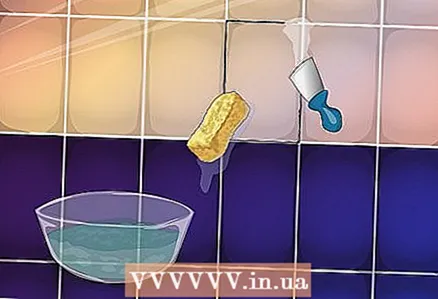 5 Wait for the tile adhesive to dry, then seal up the joints that surround any newly installed tiles. Use a sponge and plenty of water to scrub excess grout from the tile surface. Once this material has dried and cured, it is difficult to remove.
  6 Use a good, waterproof sealant or putty to repair any joints that cannot be primed, such as metal trim or openings for appliances.
Tips
- Find extra spare tiles before starting this project. Matching tile colors and sizes can be challenging.
- Avoid damaging adjacent tiles by smashing the tile you intend to replace into small pieces using a hammer and chisel or a steel stamp.
- Read and follow the manufacturer's instructions for the materials you purchased to make this repair.
Warnings
- If there is a membrane under the old tile, do not destroy it (do not make holes in it).
- Wear leather work gloves when handling broken ceramic tiles.
- When you break broken tiles, you can damage the tiles around it. Take extra care to protect other tiles in the shower and take care of your tools. A heavy hammer in the shower stall can easily break a few more tiles. Even very experienced workers can damage some adjacent tiles easily, do it slowly as you remove the broken tiles.
- Wear safety goggles when breaking damaged ceramic tiles.
- If there is no membrane underneath the old tile, it is a good idea to coat the surface with a little liquid insulation.
What do you need
- Replacement tiles
- Grout
- Glue
- Hand tool


