Author:
Bobbie Johnson
Date Of Creation:
2 April 2021
Update Date:
26 June 2024

Content
In this article, we will show you how to create a Google Gmail, Microsoft Outlook and Yahoo! Mail.
Steps
Method 1 of 3: Gmail
 1 Go to the page http://www.gmail.com in a web browser. To do this, you can use any web browser on your Windows or macOS computer. Gmail is a free email service from Google.
 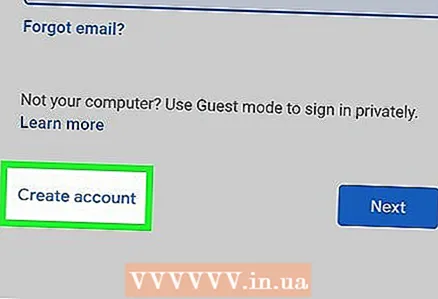 2 Click on Create an account. This button is in the middle of the page; it will appear if you have never signed in to your Google Account in a web browser. A form for creating a new account will open.
 - If you are already logged into a different account, click on the circular profile image in the upper right corner, and then click Add account. Click "Use another account" under the list of accounts. Then click "Create Account".
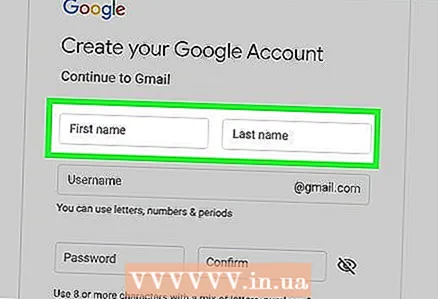 3 Enter your first and last name. Do this on the top first lines.
 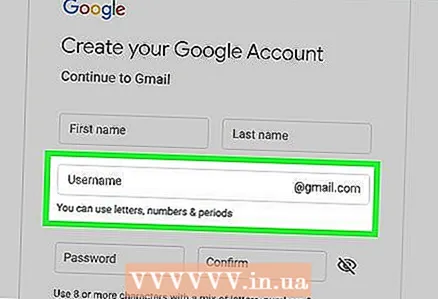 4 Enter a unique username. Do this on the second line (below the first and last name). The username will go into the email address. For example: [email protected].
 - If your chosen username is already taken, Google will alert you and suggest alternatives.
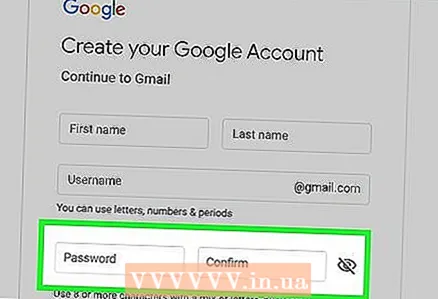 5 Create and confirm a password. Enter your password in the "Create a password" and "Confirm password" lines. A strong password must be at least 8 characters long and contain uppercase and lowercase letters, numbers, and special characters.
  6 Click on Further. This button is at the bottom right of the page. The next page of the form will open.
 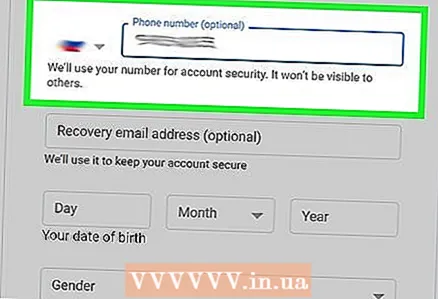 7 Enter your phone number (optional). If you want to add a phone number to your account, enter it in the line at the top of the page. Click on the flag icon (left) and select your country. The phone number is used for security purposes only and is invisible to other users.
 - You don't need to enter a phone number or alternate email address, but we recommend that you enter at least one.
 8 Enter your alternate email address (optional). Do this on the second line (under the phone number). If you forget your password, a password reset email will be sent to this email address.
 - You don't need to enter a phone number or alternate email address, but we recommend that you enter at least one.
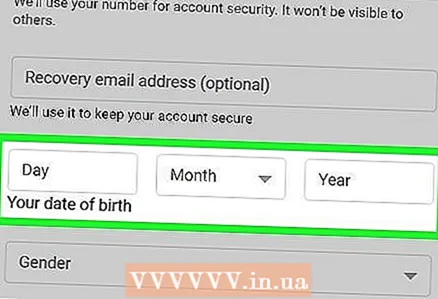 9 Enter your date of birth. Select the month of birth from the drop-down menu. Then enter the day and year of birth in the two adjacent fields. Some Google products can only be used from a certain age. Therefore, please indicate the exact date of birth.
 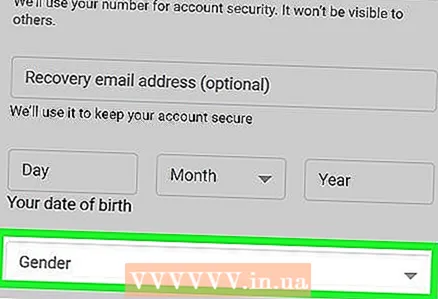 10 Please enter your gender. Do it in the menu under the date of birth. You can select Male, Female, Not Specified, or you can select Advanced and then enter your gender.
 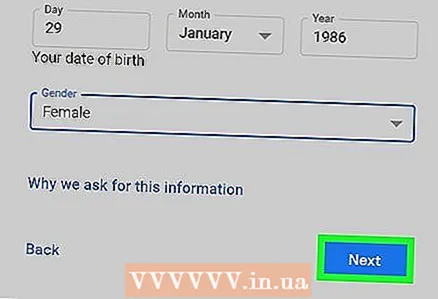 11 Click on Further. This button is at the bottom of the page.
 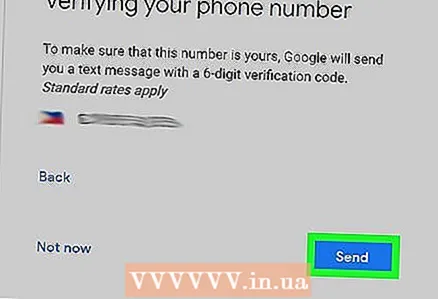 12 Click on send. This button is at the bottom of the page. If you entered a phone number, a text message with a verification code will be sent to it, with which you will confirm this number.
 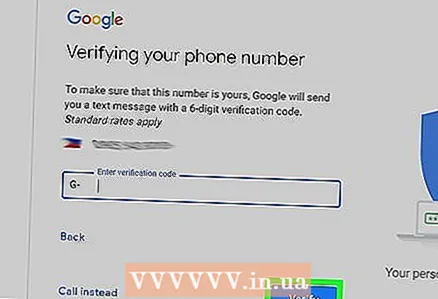 13 Enter the verification code and press Confirm.
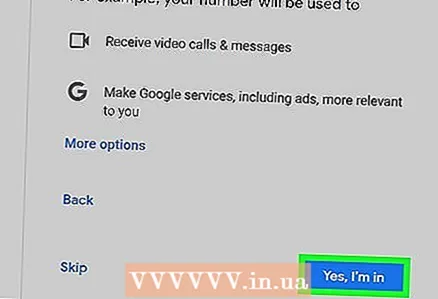 14 Click on Yes or Skip. If you'd like to add a phone number to your account so you can use it with other Google services, click Yes. If you prefer not to disclose this information, please click Skip.
 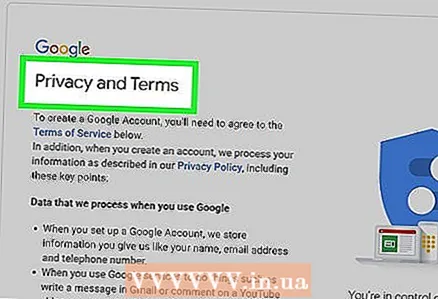 15 Check out the Gmail Usage Policy. On the page that opens, you will find information about what data Google collects and how it is used.
 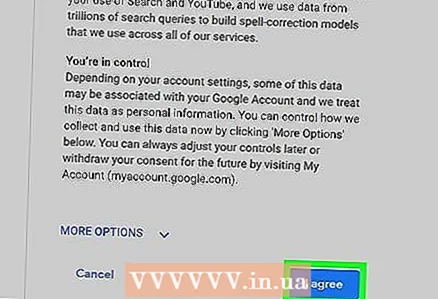 16 Scroll down and tap Accept. This button is under the Gmail Terms of Service. This is required to register for a Gmail account. Once you click the specified button, your Gmail inbox will be created and you will be logged into it.
Method 2 of 3: Outlook
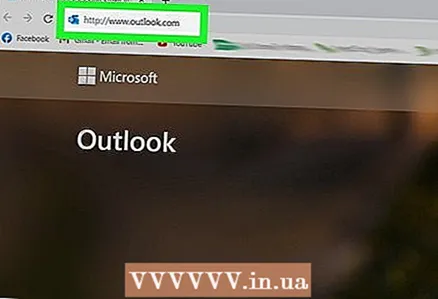 1 Go to the page http://www.outlook.com in a web browser. To do this, you can use any web browser on your Windows or macOS computer. Outlook.com is a free email service from Microsoft.
  2 Click on Create a free account. This option is located at the bottom of the page.
 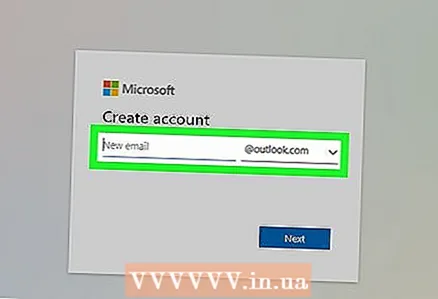 3 Enter a unique username and click Further. In the "Create Address" line, enter a unique username. The username will go into the email address. For example: [email protected]. Now click "Next".
 - To get the [username] @ hotmail.com email address, click the arrow at the end of the username line and select @ hotmail.com from the menu.
- If the username you selected is already taken, Microsoft will alert you and suggest an alternative.
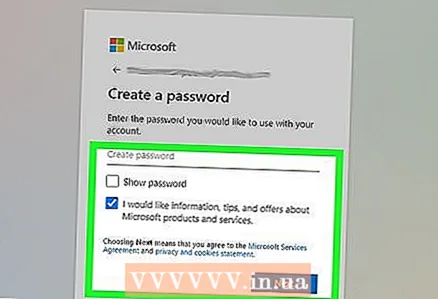 4 Create a password and click Further. Enter your password in the "Create Password" line, and then click "Next".
 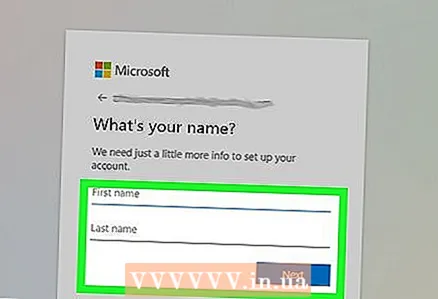 5 Enter your first and last name and press Further. Do this on the "First Name" and "Last Name" lines. Then click Next.
  6 Please enter your country. Open the menu and select the country you are in.
 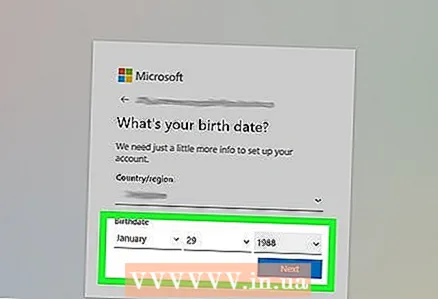 7 Enter your date of birth and click Further. Select your date of birth from the Month, Day, and Year menus, and then click Next.
 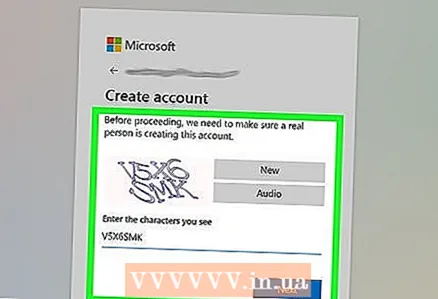 8 Enter the letters of the verification code and press Further. Enter the letters you see in the picture in the corresponding line. This will confirm that you are human.
 - If you can't read the letters in the image, click New to view another image, or click Audio to listen to the letters.
- 9 Click the icon
 . You will be taken to the next page.
 - 10 Select your language and time zone and click the icon . From the drop-down menu, select your language and time zone, and then click the indicated icon.
- 11 Select a theme and click on the icon . To choose a theme, click on one of the color or pattern circles you like. Then click on the indicated icon.
- 12 Create a signature and click on the icon (optional). The signature will be automatically inserted at the end of each letter. Enter your signature in the appropriate text box. To change the font style and size, as well as add an image, use the options above the caption field. Then click on the indicated icon.
- 13 Select a calendar (optional). The page displays calendars of events (such as sports). If you are interested in something, click on the calendar. Now click on the right arrow icon.
- 14 Enter your mobile phone number and click on the icon . Do this on the appropriate line. Click on the flag icon to select a country. Then click the right-pointing arrow icon.
- If you are going to use the free Outlook app on your smartphone, click Install App when you enter your mobile phone number.
- 15 Click on Proceed. This is the final step in the Outlook mailbox creation process.
Method 3 of 3: Yahoo! Mail
- 1 Go to the page https://www.yahoo.com in a web browser. Yahoo! is a popular search engine and media site that offers a free email service.
- 2 Click on Mail (Mail). It's in the upper left corner.
- 3 Click on Create an account. This option is located at the bottom right of the window.
- 4 Enter your first and last name. Do this on the "First Name" and "Last Name" lines.
- 5 Enter a unique username. Do this on the second line (below the first and last name). The username will go into the email address. For example: [email protected].
- If the selected username is already taken, Yahoo! will warn you about this and suggest an alternative.
- 6 Create a password. Enter the password in the "Password" line. A strong password must be at least 8 characters long and contain uppercase and lowercase letters, numbers, and special characters.
- 7 Enter your phone number (required). Do it in the line "Mobile phone number".
- If necessary, select the country code from the menu to the left of the phone number.
- 8 Enter your date of birth. Select the month of birth from the drop-down menu. Then enter the day and year of birth in the two adjacent fields.
- 9 Indicate your gender (optional). Do this on the Gender line.
- 10 Click on Proceed. This button is at the bottom of the page.
- 11 Click on Send confirmation code. A confirmation code will be sent to the specified mobile phone number.
- 12 Launch text messaging apps on your smartphone. The confirmation code will be sent via SMS - find it and find out the confirmation code.
- 13 Enter the verification code and press Confirm. This will verify your phone number and create an account.
- 14 Click on Proceed. This button will appear when the account is created. You will be taken to your mailbox.


