Author:
Lewis Jackson
Date Of Creation:
8 May 2021
Update Date:
1 July 2024
Content
This wikiHow teaches you how to make a white background transparent in Microsoft Paint. On Windows 10, the computer comes with an updated MS Paint (named Paint 3D), and you can remove the background with just a few clicks. On previous Windows versions, we will not be able to save images with a transparent background in Paint. However, you can crop the subject in the picture and paste it in another background.
Steps
Method 1 of 2: Use Paint 3D
. This option is in the right pane below the "Canvas" heading. The background color is turned off, but you may not immediately notice it.

. This option is at the top of the right pane. Now only the selected part of the image will be visible against a gray background.
below the ″ Select ″ option. This button is in the vertical toolbar at the top of Paint. A drop-down menu will appear.
below the ″ Select ″ option again. This menu will open again.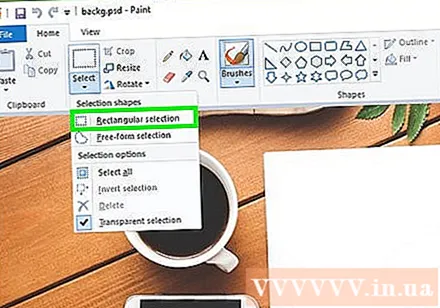
Click Rectangular selection (Rectangular selection). This option is at the top of the menu. The Rectangular selection tool allows you to draw a rectangle around an object to select it.
Select the part of the photo you want to keep. Click and drag the mouse around the entire object, then release. A dotted rectangular frame will appear around the area you selected.- Any objects in the selection that do not match the color in the "Color 2" box will be preserved. If the background is not quite white (such as there is a shadow or other object in the background that you don't want to keep), select Freeform selection (Free-range) so you can outline the part of the image to keep.
Click Copy (Copy). This option is in the "Clipboard" panel near the top left corner of Paint. The selection will be copied.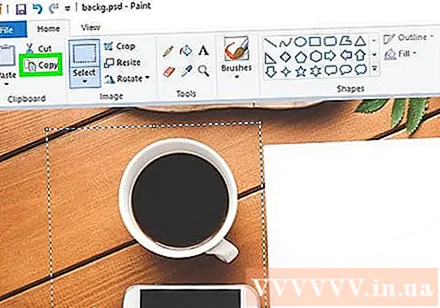
Create or open a new file. Now that the selection has been copied, you can open a new picture to paste in. Paint will prompt you to save or cancel changes to the current picture before the new picture opens.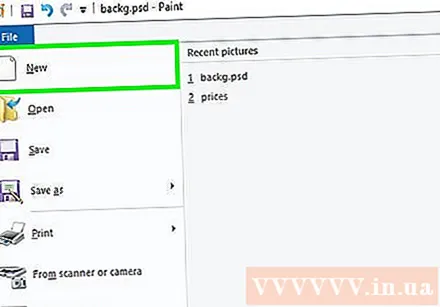
- Click File in the upper right corner.
- Click new to create a new file, or select Open to open another available image.
Click Paste (Paste) near the top left corner Paint. The selected portion of the previous photo is pasted in the new photo.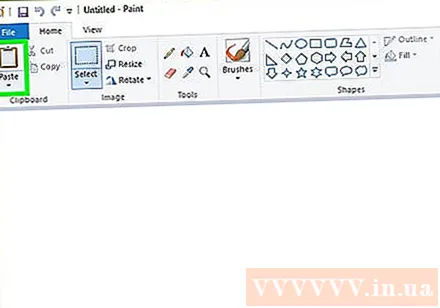
- Click and drag the pasted selection to move.
- There may still be some white markings around the edges of the pasted image. Read on to find out how to fix it.
Click Color 1. This box is next to the palette at the top of the screen.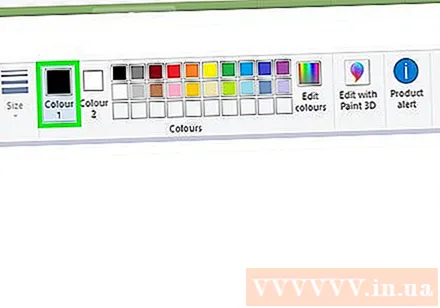
Click the dropper in the toolbar.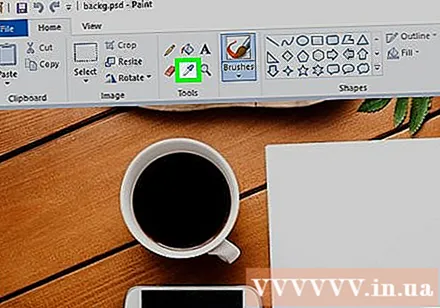
Click the background next to the white border. If there is still a white patch around the border of the picture you just pasted, click the background next to the white patch to choose a color directly behind the white border. This way you will be able to paint over the white border to match the selected color.
Click on the brush tool. This is the brush icon to the right of the "Tools" panel at the top of the Paint window.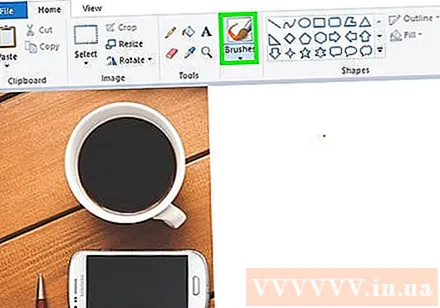
- You can click the down arrow below the brush to select other brushes.
Paint over white border. Use the brush tool to paint over remaining white borders around the object you pasted.
- Zoom in and try not to overlay the subject.
- If the background is not a single color, you may need to use the dropper tool multiple times.
- Click the drop-down menu below options Size to resize the brush. Use a larger brush to fill most of the rest of the white stroke, then zoom in and switch to the small brush for details.
- Finds white parts of the picture that the Transparent Select tool did not copy. Use the brush tool to color those parts.
- If you accidentally paint over the image, you can click Ctrl+Z to undo.


