Author:
John Stephens
Date Of Creation:
26 January 2021
Update Date:
1 July 2024
Content
The face is a basic part of the human body and can express many levels of emotions. Faces are at the center of portraits or drawings of people, so each stroke has a significant impact on the emotion shown in the portrait. Knowing how to properly paint your face is a big step towards becoming a great artist. This article will show you techniques for drawing some face shapes.
Steps
Method 1 of 3: Mature female face
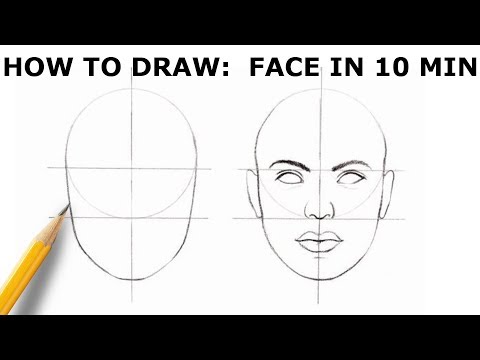
Draw a blurred outline for the face. The head is never round but oval, similar to an egg, so outline an oval that tapers downwards.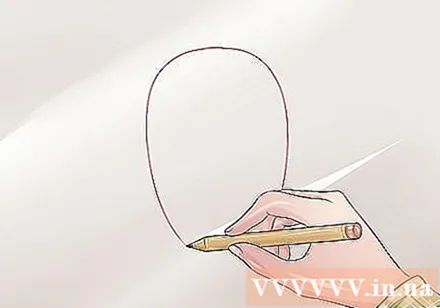
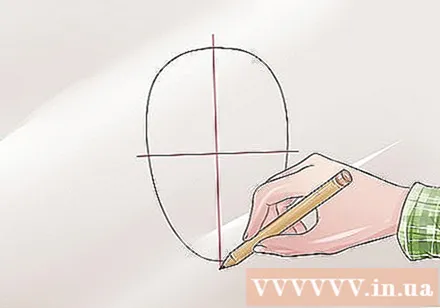
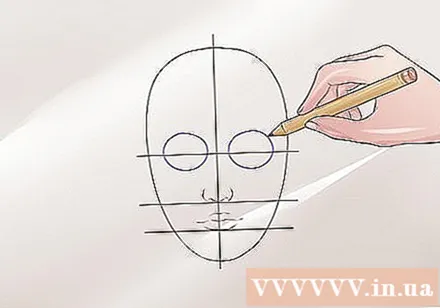
Draw the proportional lines. The easiest way when starting out is to use dividing lines to sketch the proportions of the face. First, draw a vertical line down the middle of the oval, then continue to draw another line that divides the oval horizontally.
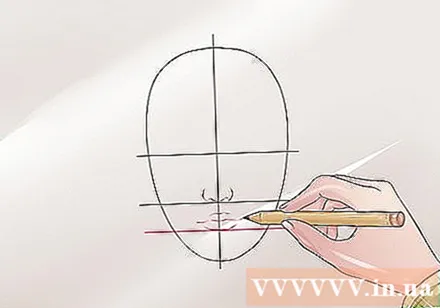
Draw the nose. Draw a horizontal line that divides the lower half of the face. The intersection of the horizontal and vertical lines is where the tip of the nose is drawn. Sketch the nose tip and the two sides of the nose.
Draw the mouth. Divide the other quarter into two parts. The lower lip contour will be above the bisecting line you just drew. Draw the line separating the upper and lower lips, then draw the upper lip and finish off the lower lip.- Draw eyes.
- Draw two circles to create an eye shape on the horizontal middle line of the oval. These two circles will be the eye sockets. The upper arc of the circle will be where the eyebrows are drawn, and the lower arc is the position of the cheekbones.
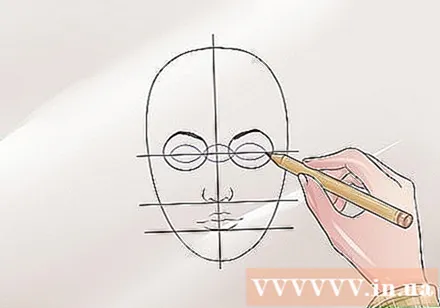
- Draw the eyebrow line in the arc above.

- The next step is to draw the eyes. Generally, eyes are almond shaped, so keep this in mind when drawing eyes (however eyes come in slightly different sizes and shapes, so be careful). The general rule of thumb is that the distance between the eyes is equal to the length of the eye.
- The pupil, the darkest part of the eye, will be drawn inside the black heart. Fill most of the pupils black, leaving only a hint of white. Tilt the pencil horizontally close to the paper surface, slightly polishing the background behind. Polish the blacks in the eyes with a medium to light shade, using short, closely spaced pencils to paint from the contour of the pupils to the whites of the eyes. Paint lighter in places for a natural effect. Draw the eyebrows above. Now delete the outline below the eye.
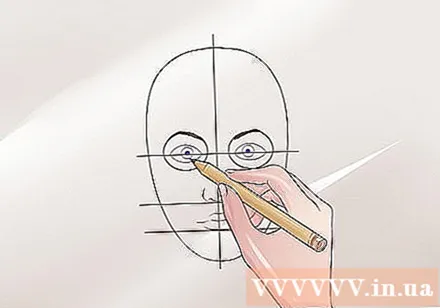
- Continue to draw the eyelids above the almond shape. The lower rim of the eyelids will reach the black in the eye and partially conceal the black heart.

- Draw two circles to create an eye shape on the horizontal middle line of the oval. These two circles will be the eye sockets. The upper arc of the circle will be where the eyebrows are drawn, and the lower arc is the position of the cheekbones.
Polish under eyes. Now you can add a bit of shadow underneath the eye as well as the eye-nose area to create the eye socket. To draw tired eyes, polish and draw a few sagging strokes with a sharper angle on the lower eyelids.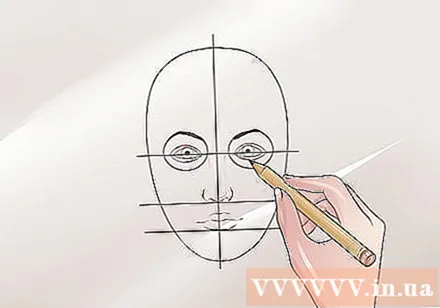
Draw ears. The bottom point of the ear will be level with the tip of the nose, and the top point of the ear will be at the brow level. Remember, the ears are usually close to the sides of the head.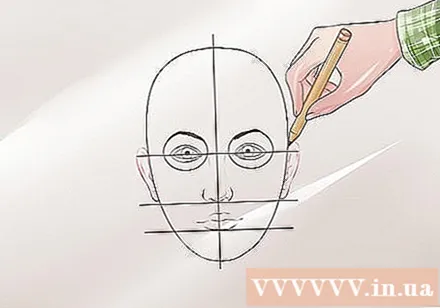
Hair drawing. You need to draw hair from the parting line facing out.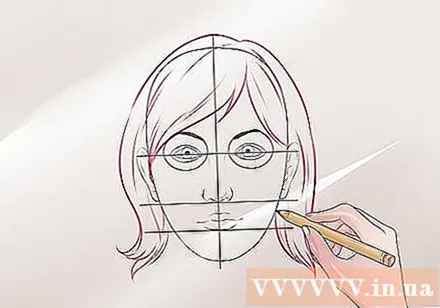
Neck drawing. The neck is usually bigger than we might imagine. Draw two vertical strokes down from the intersection of the face outline and the final horizontal line.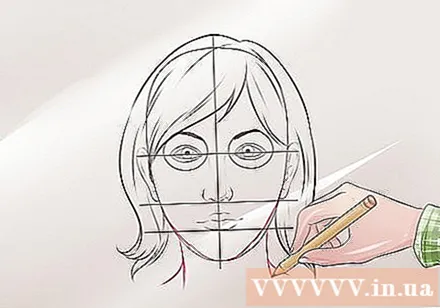
Add more details. Polish a little under the nose and stroke the chin. Add expressive strokes around the mouth and polish corners, followed by outlining the bridge of the nose. The more you highlight these lines, the "older" the face you draw will look.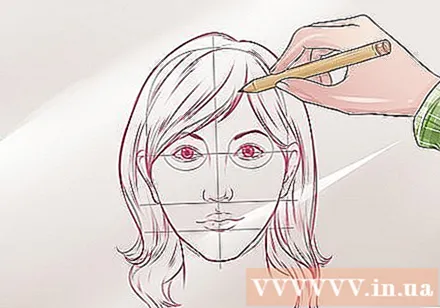
You can draw outfits with styles like parallel diagonal lines, for example.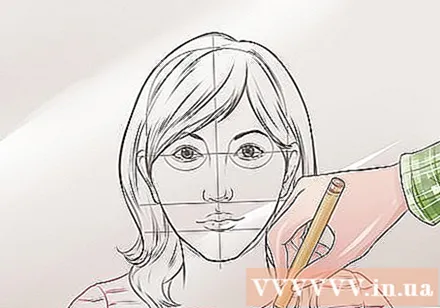
Erase unnecessary lines. Use eraser to erase all outlines. advertisement
Method 2 of 3: The maiden face
Draw the head shape you want to draw.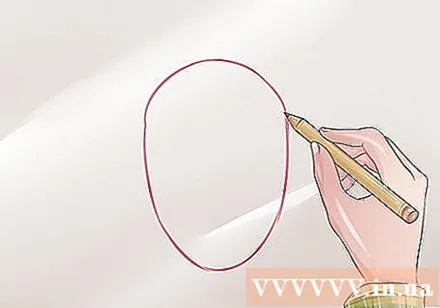
Draw lines to define the center of the face and the position of the eyes.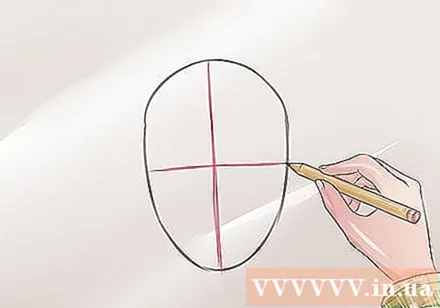
Draw outlines to define the width, height, and position of the eyes, nose, mouth, and ears.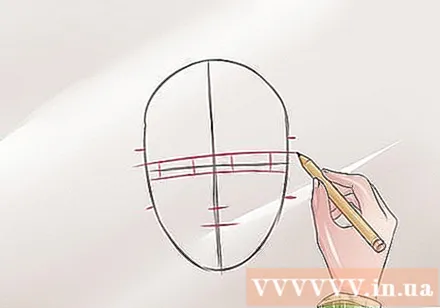
Outline the shape and outline of the eyes, nose, mouth, ears, and eyebrows.
Outline the shape of the hair and neck.
Use the sharp line tool to add more detail to the face.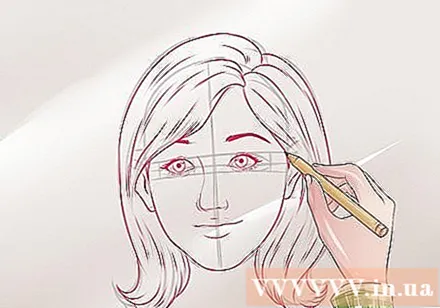
Draw the lines following the outline.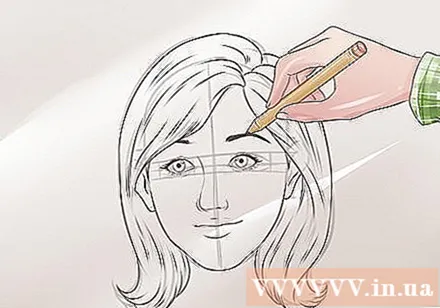
Erase and erase the outlines for a clean drawing.
Color and polish the drawing. advertisement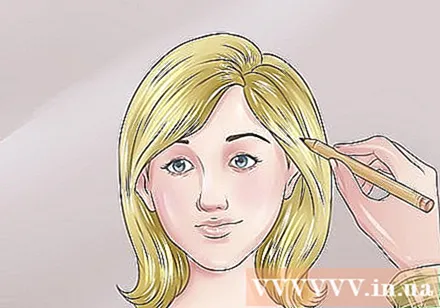
Method 3 of 3: Male face
Lightly outline a circle.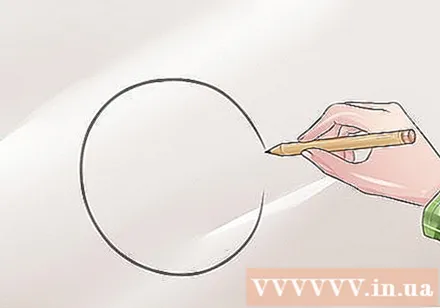
Draw a straight line in the middle, from top to bottom and stop where the chin will be drawn. (This line indicates that the face is facing you.)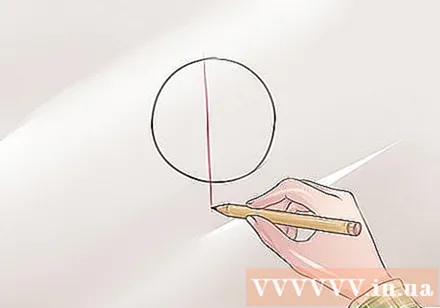
Outline the lines that define the shape of the cheeks, jaw, and chin.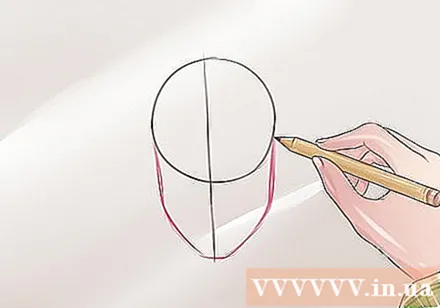
Outline the lines to define the width, height, and position of the eyes, nose, mouth, and ears.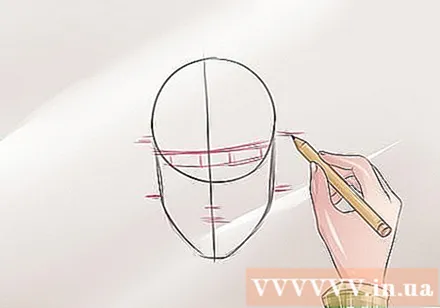
Outlines the shape and contours of the eyes, nose, mouth, ears, and eyebrows.
Draw the shape of the hair and neck.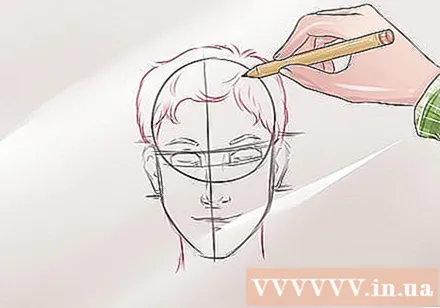
Use the tip drawing tool to add more subtle details of the face.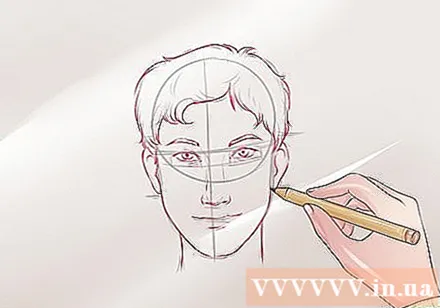
Draw the lines following the outline.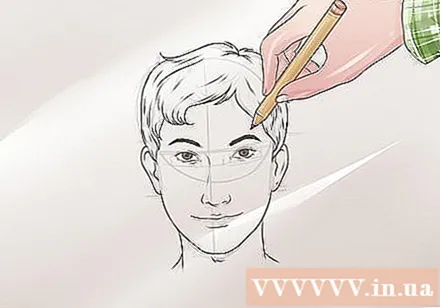
Erase and erase the outlines for a clean drawing.
Color the painting.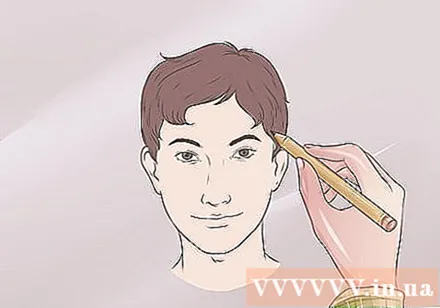
Optional: polish the drawing if necessary. advertisement
Advice
- You don't need to draw the exact face like this article. Draw your own portrait, as this is just a basic tutorial on how to draw a face.
- Pencil is the painter's best friend. Pencils come in a variety of color shades, and this is great for painters. Furthermore, pencils are easy to erase. Take advantage of this feature.
- Don't waste a lot of time on details like symmetry and exact proportions.
- If you want the painting to be more realistic, apply a bit of polish in the eyes to add more vividness to the eyes.
- Draw an oval, then you can embellish the lines according to the instructions in the article.
What you need
- Pencil
- Paper
- Ruler
- Eraser
- Ink pen (for following pencil lines)


