Author:
Laura McKinney
Date Of Creation:
6 August 2021
Update Date:
1 July 2024

Content
- There is no right or wrong rule about paper size. In fact, if you want to increase the rigidity of your model by backing up more pieces of paper, you will need paper in multiple sizes. Therefore, feel free to tear the paper.

- Glue mixture: Pour 2 parts milk glue and one part water into a bowl. This quantity can be changed to match the size of the craft. If you are using a stronger glue, 1 part milk glue and 1 part water will suffice.
- Flour mixture: Combine 1 part flour with 1 part water. Extremely simple!
- For large and sophisticated craft projects, you will need to replace water with milk glue.
- Wallpaper powder: Pour 2 parts wallpaper powder and 1 part water into a bowl. This method is good for a model you want to keep for a long time - maybe a few years.

Mix the mixture of your choice. Do this using a paint brush, spoon, or stirrer. Stir until smooth.
- If the mixture is too thin or too thick, just adjust the ingredients. Add glue if it's thin or water if it's thick.


Place the piece of paper on the surface or specimen. Flatten the surface of the paper with your finger or paint brush. Try to straighten the fold and the paper is dull. You need to create a smooth surface of the paper to paint and decorate.
- If you want to create a shape (such as a face), shape the piece of paper as you want, paste it on the surface, then apply another layer to smooth the surface. This can easily create volume, texture and vignetting.
- Paste the first layer horizontally, then the second vertically and so on. This way, you will know how far you are pasting and will help make the paper more glued.

Start painting. You can paint or decorate as you like. Then admire the work! (and don't forget to let others know it's a work you made by yourself.)
- Some opinions suggest that you should paint the white primer first. If you choose to paint brightly on the model, you will need this method (otherwise some paint stains will come off). However, if you put the paper on the balloon, do not cover it all over the top so you can easily remove the bubble.
Advice
- Prepare enough materials before starting.
- Wait for the paperboard to dry completely before painting it.
- The paper you use doesn't have to be long pieces. Any small paper pattern in any shape will work, as long as it makes it easy.
- In addition, tearing the paper with coarse lines instead of cutting it with scissors will make the finished product smoother.
- Hair spray or varnish will make the papier paper waterproof. Only add this step when you have finished painting or modeling.
- To make a mask, you can cut the circle in half and take out the bubble to get two masks.
- You can stick cardboard on anything: photo frames, old CDs, etc.
- If a water-flour mixture is used, white flour will make the surface smoother than wheat flour.
- Try different types of paper instead of newspaper - kitchen paper towels work as well.
- Always apply enough glue to cover the entire surface of the paper you are applying for, otherwise the paper will come off after it is dry.
- To keep your fingers from sticking, you should wear latex gloves.
- Have the excess paper ready. It will be very inconvenient if you run out of paper in the process.
Warning
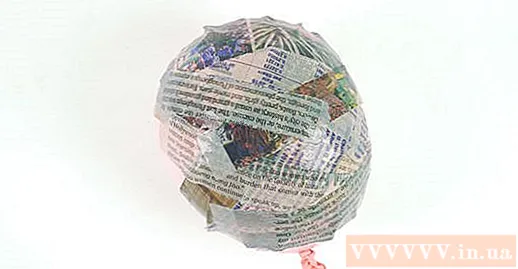
- If you are making piñata with bubbles, be sure to stick with enough layers of paper (at least 3 or more) or replace newspaper with thicker paper (like regular white paper) and make sure the paper is completely dry before take the bubbles out. Otherwise, the bubble will pull the paper inward and create a dent when the bubble burst.
- Glue mixture will be very difficult to clean if it is stuck on some surface. If you're worried about leaving glue on the countertop, put a little bit of newspaper on it before you get started.
What you need
- Glue / flour / powder for wallpaper
- Country
- Bowl
- Spoon / stirrer
- Newspaper (for gluing surfaces and specimens)
- Sample
- Paint brush
- Cooking oil (optional)


