Author:
Louise Ward
Date Of Creation:
11 February 2021
Update Date:
12 May 2024
Content
The app market is changing and shifting nonstop, and the success stories are big enough to catch anyone's attention. Do you think you have the next big idea for an iPhone app? It's easier to create than you might think. Although you will need to learn to code a bit, much of the work on the interface can be done in a graphical form. Creating an app takes time, learning, and patience but maybe you'll be able to create the next Flappy Bird phenomenon! See Step 1 below to get started.
Steps
Part 1 of 5: Setting Up Your Development Environment
Download and install Xcode. Xcode is the development environment in which all iPhone applications are made up of. Xcode is free to download from Apple, but requires OS X 10.8 or later to install. There is no formal way to run Xcode on a Windows or Linux computer. This means that if you want to develop an iPhone app but don't have a Mac, you'll need to buy one.
- To develop apps on iOS 8, you'll need Xcode 6.0.1 and the iOS 8 SDK toolkit, both of which can be downloaded from Apple. The iOS 8 SDK contains a significant number of new APIs that allow you to create all kinds of new app experiences, including iCloud and Touch ID integration.
- To develop apps on iOS 10, you'll need Xcode 8 and the iOS 10 SDK toolkit, both of which can be downloaded from Apple. In this release of Xcode there are significant changes to the Swift language and SDK tools you need to be aware of, but the good news is that there will be no "code-breaking" changes to the Swift language after release. this.

Install a good text editor. While you can compose code entirely with Xcode, you will find it much easier to work with large arrays of code if you have a dedicated text editor dedicated to programming syntax. TextMate and JEdit are two very popular options.
Install a vector graphics program. If you plan to create your own artwork and design for your application, then you will need to install a program that can create vector graphics. Vector graphics can be zoomed in and out without losing clarity, required for a good-looking application. Popular vector programs include CorelDraw, Adobe Illustrator, Xara Designer, and Inkscape. A beautiful, free vector graphics drawing program is DrawBerry. It's not as powerful as professional programs, but good for first-time users, or if you just don't want to pay for something but disposable.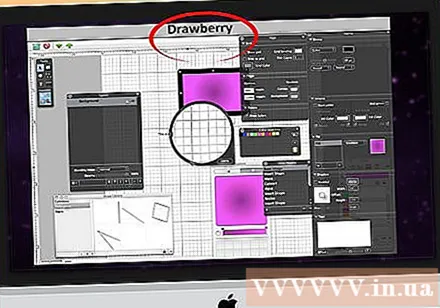

Familiarize yourself with Objective-C. Objective-C is a programming language used to create functionality within iPhone applications. It processes data and manipulates objects. Objective-C is derived from C-line languages, and is an object-oriented language. If you already have a basic understanding of C or Java, for the most part Objective-C will be pretty easy to grasp.- A newer option is to build apps in Swift, which came after the Objective-C language. Swift has a friendlier syntax and a more modern feel.
- While you can build a basic application without knowing Objective-C, you can't perform any kind of advanced functionality without coding with it yourself. Without Objective-C, all you can do is go back and forth between screens.
- There are plenty of tutorials available online, as well as a wealth of information that can be found in book form about Objective-C. If iPhone application development is something you want to take seriously, you will be satisfied by having some useful resources on hand.
- A few of the more popular online Objective-C communities include the Apple Developer Forum, the iPhoneSDK Google Group, and StackOverflow.

Consider outsourcing app development. If you simply have no interest in learning Objective-C, or don't have any artistic flair in you, there are a lot of freelancers and development teams out there that can take care of them. task many different aspects of the project for you. Outsourcing to development is a complicated process, but it will give you a lot of relief if you're not the type of person who likes to code. Make sure everyone involved signs the confidentiality agreement, and the compensation structure is in place before any work can begin.- ODesk and Elance are two of the most popular freelance services on the Internet, and both have hundreds of developers and artists of all skills.
Create a developer account. In order to be able to distribute your app on the App Store or pass it on to others for testing, you'll need to sign up for an Apple Developer account. The account charges $ 99 per year, and requires your tax identification and bank account information to be provided.
- You can create an account at the iOS Dev Center website.
Download some apps to test it out. Once you sign up for a Developer account, you'll have access to Apple developer resources. These resources include a lot of sample projects that can give you a vast understanding of how application development works. Find an example related to the type of application you want to create and dabble with Xcode. advertisement
Part 2 of 5: Application Planning
Define your concept. Before you open Xcode for the first time, you should have a well thought out plan for your application and its features. This includes a design document that outlines all the functionality of the application, outlines the UI and flow of movement between screens, and a basic idea of the types of systems that need to be. deployment.
- Try to follow the design documentation as closely as possible while developing your application. This will help you focus on the features you want to have.
- Try to draw at least one miniature sketch for each screen in your app.
Identify the application user. Your app users will have a lot of work to do with the app's interface and functionality. For example, a to-do list application will have a much different audience than a bloody shooting game. This will help you.
Solve needs with the application. If your application is of some kind of utility, it needs to provide a solution to a previously unresolved problem, or to do better than previous attempts. If your app is a game, it must have one or more unique features that highlight it and appeal to certain players.
Consider the content. Your UI will be determined by the type of content you plan to present to your app's users. For example, if the app processes pictures, you'll want a UI that makes viewing and browsing photos as easy as possible.
Practice good UI design processes. User interface should never stop the user from taking steps. This means the options must be clearly shown, and the user never has to ask what the button is for. If you use icons, they must represent their exact function. App browsing should be smooth and natural.
- UI design is more of an art than a science. You will likely have to revise your design constantly as the project progresses.
Part 3 of 5: Creating Applications
Create a new project in Xcode. Open Xcode, and start a new Project from the File menu. Select “Application” from the “iOS” heading on the left pane of the window. In the template section, select “Empty Application”.
- There are many templates available, all designed for different tasks. Start with a blank template until you become more familiar with the development process. You can try out one or more complex templates after you get used to how everything works.
- You will need to provide a Product Name, your company identity, and the class prefix. If you don't already have a corporate identity from Apple, enter it com.example. For the class prefix, enter enter XYZ.
- Select "iPhone" from the Devices menu.
Create a Storyboard Scenario. Storyboards are visual slideshows for all of your app screens. It shows the contents of each screen as well as the transition between them. The Storyboard tool will help you develop the flow of your application.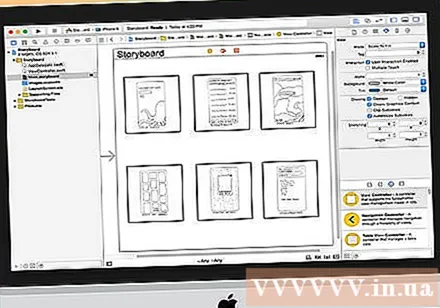
- Click File → New → File.
- Under the iOS title, click "User Interface".
- Select Storyboard, and then click Next.
- Select iPhone from the Devices menu, then name the file "Main". Make sure the file is saved in the same location as your project.
Assign a Storyboard for your project. Once you've created the Storyboard, you'll need to assign it as the main interface of the app. The storyboard will load when your application is started. If you don't assign Storyboard, nothing happens when the app is launched.
- Click on your project name in the left-hand navigation tree.
- Look for the Targets heading above the main frame. Select your project from the Targets list.
- Navigate to the Deployment Info section of the General tab.
- Input Main.storyboard in the "Main Interface" text field.
Add your first monitor using a display driver. Display drivers specify how content is displayed by the user. There are various display drivers pre-installed, including standard displays and panels. You'll add display drivers to your storyboard, letting the app know how to display the content to the user.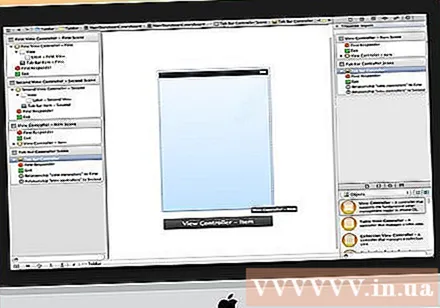
- Select the file "Main.storyboard" in the project navigation menu. You should see a blank canvas appear in the Interface Builder window.
- Navigate to the Object Library. It's at the bottom of the right pane, and can be selected by pressing the small boxy button. This will load a list of objects that can be added to your canvas.
- Click and drag the "View Controller" object onto the canvas. Your first screen will appear in the background frame.
- Your first "Scene" is complete. When the app starts, the display driver will load your first screen.
Add interface objects to the home screen. Once you've set up the display driver, you can start filling the screen with the interface objects you need, such as labels, text input fields, and buttons. The interface objects can be found in the Objects Library list, where you find the View Controller object.
- Click and drag objects from the list to add them to your desktop.
- Most objects can be resized by clicking and dragging the boxes on the edge of the object. When resizing, guides will appear on the screen so you can make sure everything is aligned correctly.
Customize the objects you add. You can adjust properties for each object, allowing you to create an arbitrary and intuitive interface. For example, you can add a placeholder text to a text input field to help guide users on how to type.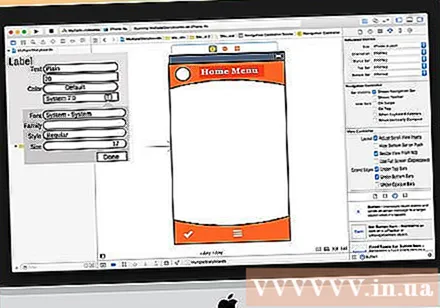
- Select the object you want to customize and then click the "Attributes Inspector" button at the top of the right pane. This button looks like a shield.
- Customize your audience to your liking. You can change the font style, font size, text color, tweaks, background images, placeholder text, border style, and more.
- The options available can change depending on the object you customize.
Add more screens. As the project grows, you will likely need to add multiple monitors to display all the content needed for the application to be useful. For example, if you were working in a to-do list application, you would need at least two screens: one to enter to-do, and one to display the entire list.
- New screens are added by dragging and dropping the visible controls onto the empty parts of your canvas. If you can't find a space to drop in, click the “Zoom out” button until you find a blank area.Make sure to drop the controls that appear on the frame and not on the current screen.
- You can change to the initial screen by selecting the display driver you want to take the lead from from your project draft. Click the Attribute Inspector button and then check the box called “Is Initial View Controller”. For example, if you were going to create a to-do list, you'd want the list to actually be seen by the user first when you open the app.
Add a navigation bar. Now that you have two screens in your app, it's time to move between them. You can do this through the use of a Navigation Controller, which is a dedicated display driver. This driver adds a navigation bar to the top part of your app to allow users to move between screens.
- Your navigation driver needs to be added to the original view so it can control all of the next monitors.
- Select initial display from project draft.
- Click Editor → Embed In → Navigation Controller.
- You should see a gray navigation bar appear at the top of the screen where you add the driver.
Add functionality to the navigation bar. Now that you've added a navigation bar, you can now start adding navigation tools to it. This allows your users to move back and forth between screens.
- Add a title to the navigation bar. Click the Navigation Item below the display controller to which you assign it. Open the Attribute Inspector and type in the title of the current screen in the Title field.
- Add a navigation button. Open the object library (if not already open) and look for the Bar Button Item item. Click and drop it on the navigation bar. Normally the "go forward" buttons in the application are placed on the right side, while the "backward" movement buttons are placed on the left.
- Set properties for the button. The buttons can be configured to have their own attributes that make them more adaptable to specific circumstances. For example, if you create a to-do list, you will want to add an “Add” button to create a new job. Select the button, and open the "Attribute Inspector" panel. Navigate to the Identifier menu, then select “Add”. The button will change to a "+" symbol.
Link the new button to an existing display. For your button to work, you will need to connect it to another monitor. In our to-do list example, the button is placed on the master list, and should be linked to the entry screen. To link a button, hold down Ctrl and drag the button onto the second screen.
- When you release the mouse button, the Action Segue menu will appear with a list of options. Select “Push” to use push transition when moving between screens. You can also select “Modal”, to open the screen as a standalone action, not as a sequence.
- If you choose Push, a navigation bar will be automatically added to your second monitor and a “undo” button will be automatically generated. If you choose Modal, you will need to manually add a second navigation bar as well as add a “Cancel” and “Done” button (for a to-do list, buttons for the button Your press will vary according to the needs of your application).
- "Cancel" and "Done" buttons can be created the same way you created the "Add" button. Simply choose "Cancel" or "Done" from the Identifier menu in the Attribute Inspector.
Add data processing capabilities. By now, you can create a basic navigation interface without writing any code at all. If you want to add advanced functionality, such as data storage and user input processing, you will need to get your hands dirty and coding. Coding is beyond the scope of this tutorial, but there are plenty of Objective-C tutorials available online.
- You can use your navigable interface prototype to help you hire a developer. Having an active interface makes it easier for you to explain what you need in terms of coding things.
Part 4 of 5: Application Testing
Launch iOS Simulator. Xcode comes with an iOS emulator that allows you to test your app on a variety of emulated iOS devices. To open the Simulator, select "Simulator and Debug" from the drop-down menu at the top of the Xcode window, then select the device you want to test on.
Build the application. Click the Build button, which looks like a traditional Play button, to compile the app and run it. Building the application may take a few minutes. You can track the progress in the toolbar. Once the build is complete, the iOS Simulator will open and you can begin testing your app.
Test the app on your iPhone. Before distributing your app for testing, you can test it out right on your device (if you have one). First of all, plug your device into the computer via a USB port. Close iTunes if it opens. Select “Device and Debug” from the drop-down menu, then click the Build button. After a few seconds the application will start running on the iPhone. Test all functionality before closing the application.
Error correction for the application. If your application crashes, you need to start figuring out what happened and why. This is a broad topic, and there are plenty of reasons for your app to crash. Open the error correction console and read the error messages. For the most part, they are quite confusing. If you don't understand the error, try searching for the error message with Google. Chances are you'll find a post on the Apple developer forum where an experienced and friendly developer responded to members' requests for help.
- Error correction can be time consuming and tedious for you. If you don't give up and persevere, there will come a time when you get better with this. You will begin to recognize errors, track them faster, and sometimes even know when they occurred. A common mistake is to free an object from memory more than once. Another mistake is forgetting to allocate memory and instantiate an object before attempting to add or assign it. With each application your errors will gradually become less.
Check memory usage. iPhone has a very limited amount of memory. Each time you allocate memory space to an object, you must release it when finished with the object and return the amount of memory. Instruments is the iPhone SDK's tool for viewing and analyzing memory usage among other things.
- Go to the Device and Debug option above, select Run → Run with Performance Tool → Leaks. This will turn on Instruments and launch the app on your device. Just continue using the app as usual. Sometimes the application will freeze when Instruments records and analyzes your memory usage. Any loss will create a red spike on Leaks' progress. The lost power will be displayed in the lower half of the screen.
- Double-clicking on the lost object will take you to the responsible snippet or clicking the small arrow in the address column will show you the loss history. Sometimes the spot is not necessarily the place where it originated.
- If you find it really confusing, try the elimination procedure. Comment and / or carefully skip the code areas and run it. Sometimes you can narrow down the general scope and then even localize the line of code responsible. Once you know where it is, you can fix it or rewrite it. Remember, using Google often gives you the fastest direct links to internal Apple forums or to document that solves your problem.
Distribute your application so others can test it. While testing your app in emulator mode is a good way to make sure that the app works and the interface looks good, nothing is better than being tested from a variety of users other than yourself. . Just make sure you've solved the biggest bugs before you go for it. In order to distribute your app to testers, you will need to create an Ad-Hoc certificate on the iOS Dev Center site.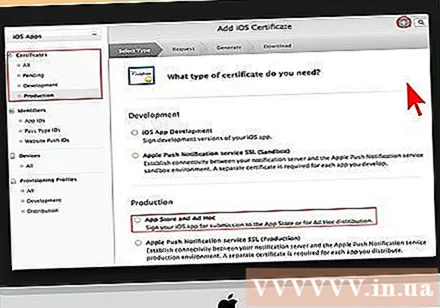
- Outside testers can provide a lot of feedback you never expected. This can be especially helpful if you have a complex application.
- In order to authorize tester devices, you will need each device's UDID.
- Select Device from the drop-down list and click the "Build" icon. In the Finder section, browse to your project folder then find the "Ad-Hoc-iphoneos" folder. Inside there will be an application. Copy the certificate "AdHoc.mobileprovision" that you have from the iOS Dev Center into the same directory. Select the application and certify and then compress them. This archive can be passed on to your external tester. You will need to create a separate archive for each Ad-Hoc certificate.
Part 5 of 5: Publishing Your Project
Create your Distribution. Select Device and Release from the drop-down menu. Click the "Build" icon. In the Finder section, browse to your project directory and find the "Release-iphoneos" folder. Inside there will be an application. Compressed into a compressed file.
- In order for new apps to get Apple certification, they will need to be optimized for iOS 8 and the Retina display.
Open the iTunes Connect dashboard. You can access this panel from the iOS Dev Center. If you have any unfinished steps to finish the installation, they will be listed at the top of the page. Make sure all your banking information and tax identification number have been entered correctly.
Enter your application information. Click “Manage Your Applications” then select “Add new Application”. Fill in the application name, SKU number and choose the ID for the plan. Select your application package from the drop-down menu.
- Fill out forms that provide app description, keywords, support pages, categories, contact emails, copyrights ...
- Fill out the Authorization and Price forms.
- Get your artwork ready for iTunes. You will need a large 512x512 vector icon, as well as a few screenshots of your app. Screenshots can be taken from the iPhone emulator software using Command + Shift + 4 and then dragging the cross-hair cursor (cross-hair viewfinder) over the selection. Make sure they are 320x480 in size for iPhone. Screenshots are a very important part of marketing your app, so make sure they represent the most important parts.
Upload your app. Click on “Ready to Upload Binary” and you will be taken to a screen that will guide you to download the Application Uploader. Download it and press Done.
- Install the Application Uploader tool and launch it. The first time running the program will ask for your iTunes credentials.
- The Application Uploader tool will check your iTunes Connect account and find any apps you're willing to upload in binary. They will be displayed in the drop-down menu. Select the app you want, select the Compressed Distribution you previously created, and upload. The upload tool will check something inside the package and will report an error if it detects something incorrect, for example some incorrect version, missing icons ... If everything goes well, it will load zip up and done.
Waiting for evaluation. Now there is nothing for you to do but wait for the evaluation process. Apple will notify you in a few days or weeks via email if your app status changes to “In review”. Once included in the evaluation, the process will be very quick. If you fail to get past the initial evaluation, you will receive a disapproval letter explaining why, and Apple will offer suggestions to fix it. If your app passes the test, Apple will send you an email letting you know that your app is ready for sale. Your app will now appear on the iTunes app store.

Advertise for your app. Now that your brand-new app is available for purchase, it's time to start promoting it. Use social media, send press releases to app-specific sites, create some YouTube videos, and do everything you can to get people to talk about your app.- You can send free copies to reviewers who will write about your app on their website or rate it on their YouTube channel. Rename reviews, this can lead to an increase in app sales.

Track sales. Download the free iTunes Connect Mobile app for your iPhone. Log in each day and check sales, market and country of sale. This is the cool part! Apple will periodically email you with a link to your most recent sales data. You can download it to record. Good luck! advertisement
Advice
- Create your own unique, not copy applications already on the App Store. Study the entire App Store to find out what's available. Of course, if your idea is better, then do it.
- Always look for ways to improve your app.
- Try to update the app regularly.
- If you like reference books, go to Amazon.com to find some books on iPhone development.
- Try testing on as many different iDevices as possible. Even better, they install different versions of iOS.
- If you hire an iOS developer and want to make sure the iOS app looks the way you intended it, you can design the app's interface in Photoshop and then use a tool to convert it to an app. It works with Xcode / iOS.
- If you are learning how to code, block structured languages or online classes may help.
Warning
- The iPhone SDK toolkit changes constantly as devices evolve. If there is an upgrade to the SDK during the project make sure you read the new features and changes before moving on to it. Unless Apple tells you that new submissions must be compiled with the new SDK, you don't need it at this time. If you upgrade, some of the methods you used in the past may no longer work, and although it is unlikely to generate a compile warning, you should still be cautious.
- There's no guarantee you will get a lot of sales or get lots of downloads, but don't be discouraged.
- When you succeed and get an app on the App Store, don't let yourself be intimidated by the malicious guys who write malicious reviews. Some people give you helpful feedback and others just like to be rude.
- This is addictive; You probably won't be able to stop.


