Author:
Louise Ward
Date Of Creation:
11 February 2021
Update Date:
1 July 2024
Content
The SQL Server database is one of the most popular today, in part because it is easy to create and maintain. With a graphical user interface (GUI) program like SQL Server Management, you no longer have to worry about dealing with the command lines. Read on to Step 1 to create a database and start entering your information in just a few minutes.
Steps
Install SQL Server Management Studio software. This software is provided for free from Microsoft and it allows you to connect and manage SQL servers from a graphical interface instead of using the command line.
- To connect to a remote SQL server, you will need this or other similar software.
- Mac users can use open source programs like DbVisualizer or SQuirreL SQL. Although the interfaces may be different, they share common rules of use.
- You can read more to learn how to create a database using the command line.
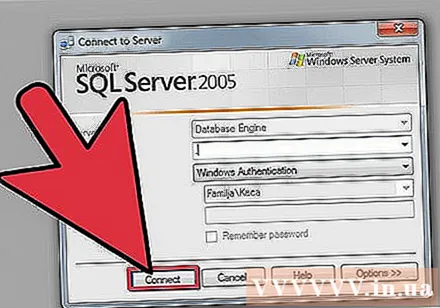
Start SQL Server Management Studio. When you start the program, you will be asked which server you want to connect to. If a certain server is running and all the permissions required to connect to that server are in place, you can enter the server address and credentials. If you want to create a local database, set Database Name to . and the authentication type is "Windows Authentication".- Click Connect to continue.

Locate the Databases folder. Once the connection to the remote or local server has been initiated, an Object Explorer window will be opened on the left side of the screen. At the top of the Object Explorer directory tree is the connected server. If the tree is not already open, click the "+" icon next to it. Locate the Databases folder.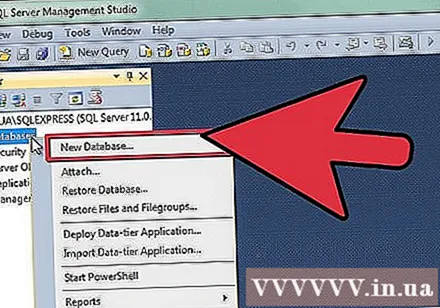
Create a new database. Right-click the Databases folder and choose "New Database ...". A new window will appear, allowing you to configure the database before initializing. You should name your database so that it is easily identifiable. Most users leave the rest at default settings.- When you enter the database name, two additional files are created automatically: the Data file and the Log file. The data file stores all data in your database while the log file records all changes made to that database.
- Click OK to create the database. The new database will appear in expanded Databases folder and have a cylinder icon.
Create Table. Databases only store data when you create a structure for that data. Tables store information that is entered into the database, and to be able to import data, you need to create tables first. Expand the new database in your Databases folder, right-click the Tables folder and select "New Table ...".
- Windows will open the rest of the screen to help you manipulate the new panel.
Create Primary Key. You should create a Primary Key in the first column of the table. This will be the ID number or record that will allow you to easily access these items again. To create a Primary Key, you need to enter "ID" in the Column Name field, type int in the Data Type field and uncheck "Allow Nulls". Click the Lock icon in the toolbar to set this column as Primary Key.
- Do not accept nulls because here you will always want this item to have a value of at least equal to "1". If left blank, your first entry will be "0".
- On the Column Properties window, scroll down to the Identify Specification option. Expand and set "Yes" for "(ls Identity)". The value of the ID column will automatically increase with each data entry, thereby numbering new entries automatically and efficiently.
Understand the structure of the board. A table is a collection of fields or columns. Each column represents one aspect of an item in the database. For example, with a database of company employees, you may have the columns "First Name", "Last", "Address" and "Phone_Number".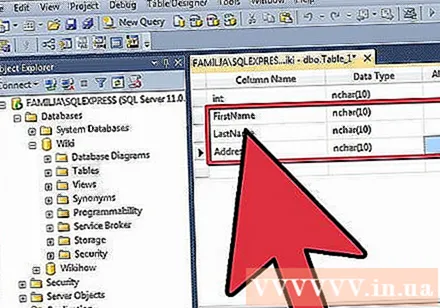
Create the rest of the columns. Once you have completed the Primary Key fields, other new fields will appear directly below that field, allowing you to enter the next column. Fill in the fields accordingly and make sure you have selected the correct data type for the information that you will be entering in that column: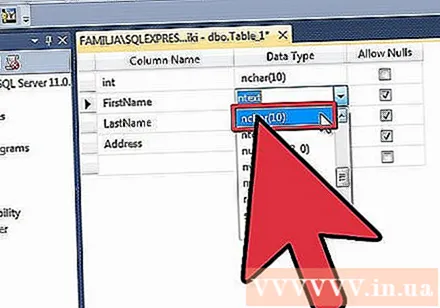
- nchar (#) This is the recommended data type for text, such as names, addresses, etc. The number in parentheses is the maximum number of characters entered for the field. Set limits to ensure that the size of the database is under control. Phone numbers should be stored in this format as they will not be used in calculation functions.
- int This is the data type for integers and is commonly used for ID fields.
- decimal (x,y) - With this data type, the number will be stored in decimal, and the numbers in parentheses represent the total number of digits and the number of digits in the decimal part respectively. Such as with decimal (6,2), the numbers will be stored as.
Save the table. Once you've created the column, you'll need to save the table before entering the information. Click the Save icon in the toolbar and enter a name in the table. You should use a name that represents the contents of the table, especially for large databases composed of multiple tables.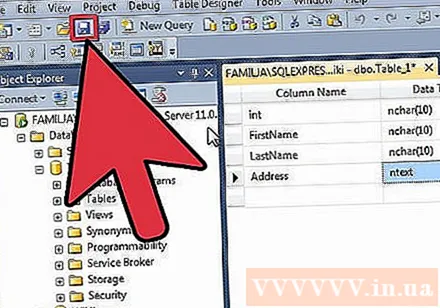
Add data to your table. Once you've saved the table, you can start adding data to it. Expand the Tables folder in the Object Explorer window. If the new sheet is not listed here, right-click the folder and select Refresh. Right-click on the board and select "Edit Top 200 Rows".
- You can start entering data on the fields displayed in the central window. The ID field will be filled in automatically. Therefore, for now, you can ignore it. Please fill in the remaining fields. When you click on the next line, you will see the ID field of the first line automatically filled out.
- Continue this process until you've entered all the information you need.
Execute the table to save the data. When you are finished entering information, click the Execute SQL button in the toolbar to save it to the table. SQL Server will run in the background, separating all the data into the columns you created. This button is empty like a red exclamation point. You can also press Ctrl+R to execute the command.
- If there is an error, the incorrectly entered row is specified before the table is executed.
Data query. By this point, the database has been completely initialized. For each database, as many tables as needed you can create (there is a limit to the number of tables per database but most users don't have to worry about that limit unless they are working with enterprise level databases). At this point, you can query the data for the report or any other administrative purpose. Please see more about running queries against database. advertisement


