Author:
Robert Simon
Date Of Creation:
15 June 2021
Update Date:
22 June 2024
Content
Let's say you want to quickly create a meme, or design a logo, signature, brochure, business card, so you need to add text to a photo. You can do this quickly and completely for free with both free and paid software. You may already have the necessary software installed. If you want to add text to your images, there are a variety of software that can help you with this.
Steps
Before start
Examine the photo. Before you add text to a photo, you should determine if the image is suitable for adding text. If the photo is confusing your text needs to stand out from the background. Text will be difficult to read when switching from dark to light (or vice versa) unless there is text border.

Determine the most effective method. There are many ways to add text to an image, depending on your needs and what you have.- If you want to quickly add text to an image completely free and ask for nothing else, you can use Paint on Windows or Preview on OS X.
- If you want to create a meme to post online, there are many online meme generators that automatically add standard meme-style text. Please refer to the articles on how to use the online meme generator.
- If you want to adjust the shape and size of your text, photo editing programs like Photoshop or free software like GIMP are a good choice, allowing you to do advanced editing.
- If you want to add text to pictures on your device, you can use applications compatible with your device.
- If you are creating a document, your Word processing software can add text to your image.
Method 1 of 4: Using Paint (Windows) or Preview (OS X)

Open the image in Paint or Preview. If you don't have any other photo editing software installed, you can right-click on the photo and select "Edit". If you are using OS X, double-click the image to open it in Preview.
Click the "Text" button. The icon is shaped "A", located on the toolbar at the top of the screen. If you are using Preview, you will first need to select the "Edit" button next to the search bar.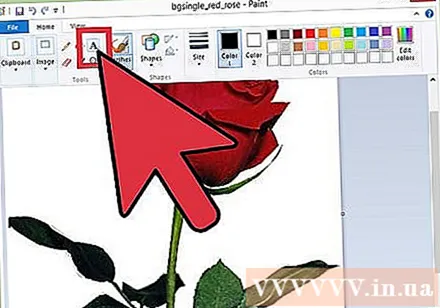
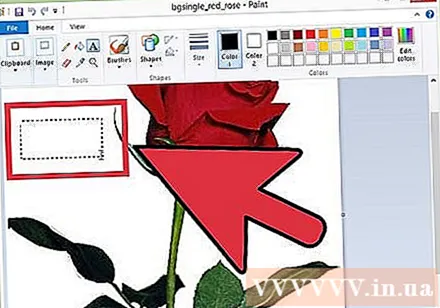
Click and drag the text to the position you want. This field contains the text you write, and displays only text that fits the field size. You can adjust the size of this field when writing text.
Write letters. Before adjusting the formatting, write down the text you want so that you can observe the changes when you edit.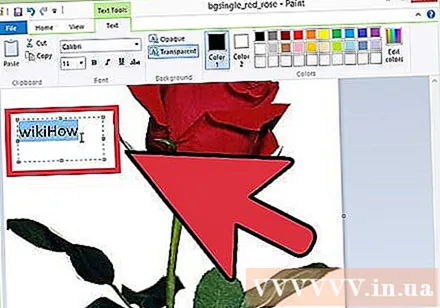
Change the font. If you want an easy-to-read font, you can choose Calibri and Arial, these are standard fonts, and Impact is a common font used to create memes.
- Remember to adjust the size to suit the requirements.
- You can change the size of the text frame if the line does not fit the frame after editing.
Change the text color. You can choose from pre-made colors or mix the colors yourself. Make sure the font color contrasts with the background color. Choosing the wrong color can make it difficult for people to read.
Review the text. Before continuing, please review the text you just wrote. Because on the basic software, you can't make any changes other than how to start over.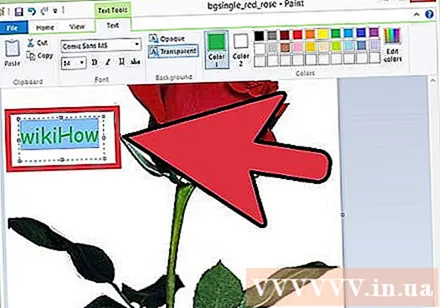
Save the text by clicking outside of the text box. Once done, you can go back and make changes.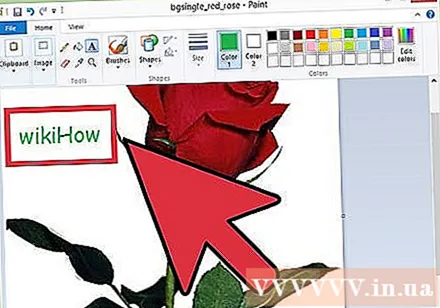
Save photo. Click the Save button to save the photo. Remember to change the name so that the photo will not overwrite the original photo. advertisement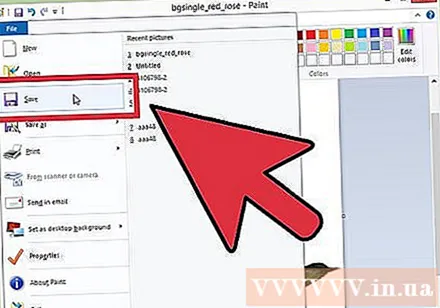
Method 2 of 4: Use Image Editing Software (Photoshop, GIMP, etc.)
Open the photo you want to add text to with photo editing software. If you cannot install Photoshop but still want to use a more advanced software than Paint, you can use the free photo editing software GIMP.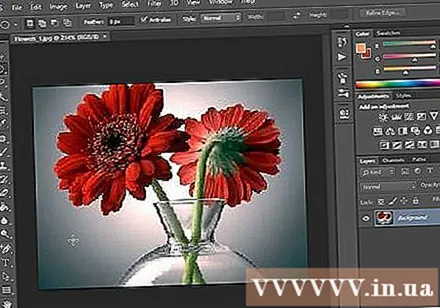
Click the "Text" button. This button is in the list of tools, usually on the left side of the screen.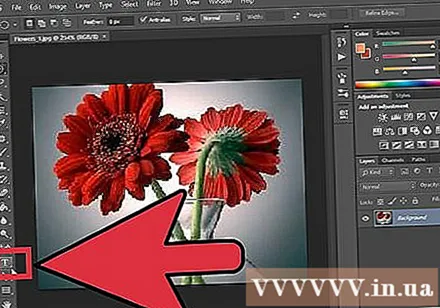
Click and drag to create a text frame. When you create the text frame, the software creates a new layer. This is the biggest benefit when using photo editing software, you can change the text layer as you like without affecting the original image.
Typing. Before adjusting the format, type in text to easily observe the changes when editing.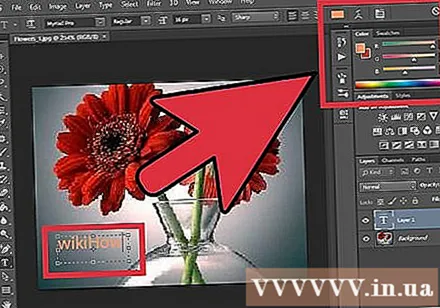
Change the font. If you want an easy-to-read font, you can choose Calibri and Arial, these are standard fonts, and Impact is a common font used to create memes.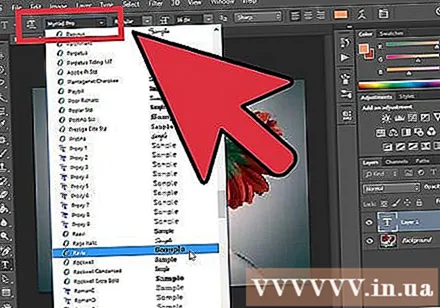
- Remember to adjust the size to suit the requirements.
- You can change the size of the text frame if the line does not fit the frame after editing.
Change the text color. You can choose from pre-made colors or mix the colors yourself. Make sure the font color contrasts with the background color. Choosing the wrong color can make it difficult for people to read.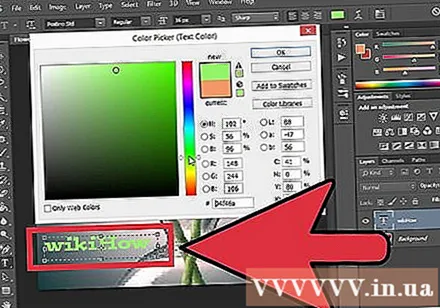
Use other editing tools to animate text. After adding text, you can use other tools for editing.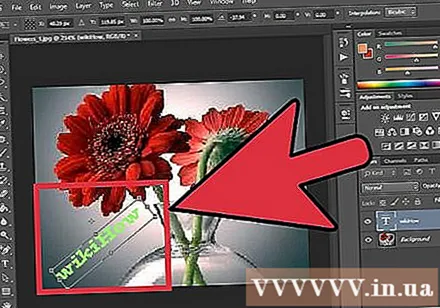
- For example, you can use the Rotate tool to drag text above the image.
- The Transform tool allows you to warp and shape the text to match the effect you want to use.
- Photo editing software offers more editing options, such as allowing you to use gradients from head to end.
- You can adjust the transparency of the text, which can make the final product look more professional.
Export images after finishing barking. Most photo editing software will save the photo as a project unless you want to save it as an image. It allows you to set the format and quality. Select "File" → "Export As" to proceed. advertisement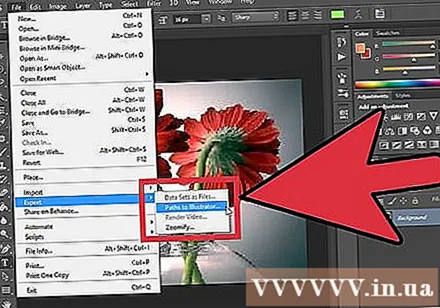
Method 3 of 4: Using an iOS or Android device
Download photo editing app. There are a multitude of iOS and Android compatible apps that allow you to edit photos saved on your device. Below are some of the more common ones.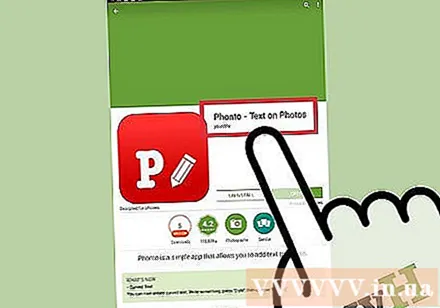
- Word Swag (iOS)
- Phonto (iOS and Android)
- PicLab (iOS, Android and Windows Phone)
Open the app. You will be asked to select the photo you want to edit to open in the app. Depending on the application, you can choose from your device's storage, or access photos from other online services.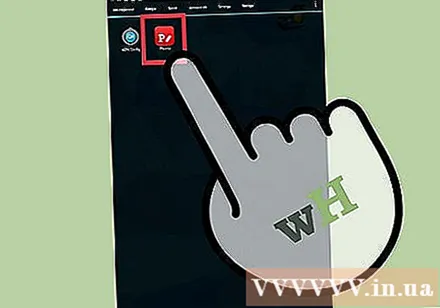
Select the "Text" button. The process for each application is different (for example, on PicLab, you will be asked to stretch and crop the image before adding text).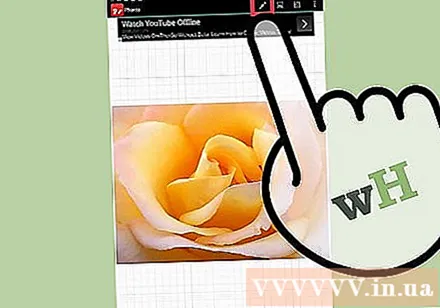
Typing. You can set the text color as well as the link and the text position during the editing process.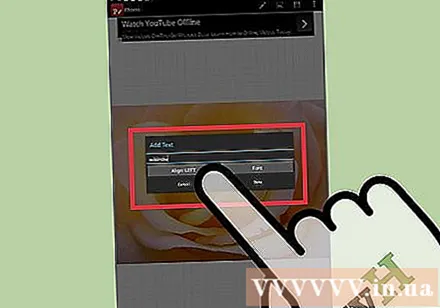
Change the font. Most editing software allow you to choose fonts, you can also change the transparency of the text.
Save the photo when finished. After you are satisfied with the text, please save the photo.You can save to your Gallery (Gallery) or Camera Roll (Camera Roll), or share directly to social networks. advertisement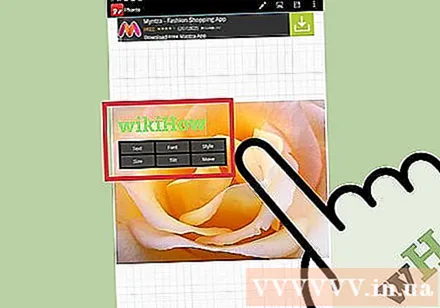
Method 4 of 4: Use a Text Processor
Insert pictures into the document. You can insert pictures using the Insert menu. Please refer to the instructions on how to insert pictures into Text.
Click on "Insert" and choose "Text Box". This allows you to create a text frame in the text.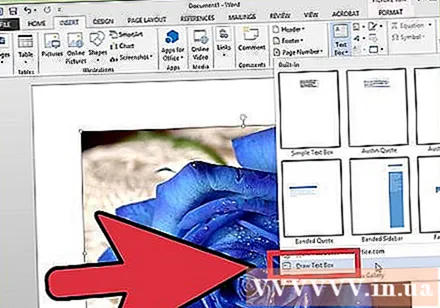
Typing. Before setting the format, type in text to easily observe the changes when editing.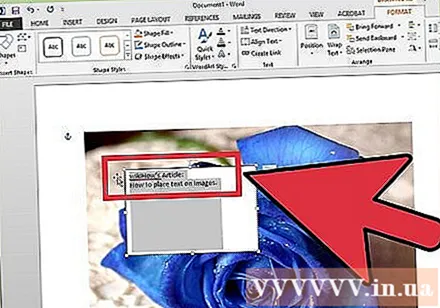
Click on "Shape Fill" and choose "No Fill". This makes the text frame transparent so you can see the part of the image behind.
Select "Shape Outline" and choose "No Outline". This removes the border of the text frame.
Change format options. You can adjust the text formatting like other text in the text. Include font, size, link, color etc.
Rotate text. Click the Rotate button above the text frame and drag to rotate the text frame. advertisement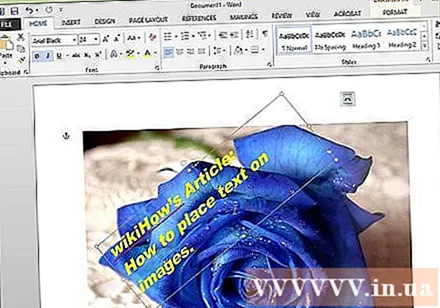
Advice
- Choose the text color carefully as it is very easy to lose black or white text on the background of the image. Change the text color, or use text borders to make the text stand out more.
- If you are using a word processing program, you may need to modify the text wrapping and foreground / background area so that the text appears correctly above the image.
- If you don't see the text after editing, check to see if you've arranged the layers correctly. If the order is not in the correct order, or opening the wrong file may cause errors.


