Author:
Peter Berry
Date Of Creation:
14 February 2021
Update Date:
1 July 2024
Content
People have known the art of growing ancient bonsai trees for thousands of years. Although often associated with Japan, bonsai actually originated in China, where bonsai is associated with the Zen Buddhist beliefs. Bonsai trees today are used for decorative and recreational purposes in addition to their traditional uses. Caring for a bonsai tree gives growers the opportunity to contemplate but be creative in the development of a symbol of natural beauty. See Step 1 below to learn how to grow your own bonsai tree.
Steps
Part 1 of 3: Choosing The Right Bonsai Tree For You
Choose plants that are suitable for your climate. Not all bonsai trees are the same. Many perennial trees and even some tropical trees can be made into bonsai, but not all will be suitable for your location. When choosing a species, it is important to consider the climate in which the plant will be grown. For example, some trees do not survive in icy weather, while others do need the temperature drops below freezing so that they can fall asleep and prepare for spring. Before you start planting a bonsai tree, make sure the species you have chosen can live in your area - especially if you're planning to have a tree outdoors. The nursery staff can help you if you are unsure.
- A variety of bonsai trees that are especially suitable for beginners are juniper trees. This decorative green plant is very healthy, can be found throughout the Northern Hemisphere and even in the more temperate regions of the Southern Hemisphere. In addition, juniper trees are easy to grow - they respond well to pruning and "wavy" patterns, and because they are green all year round, they never lose their leaves.
- Other conifers commonly planted as bonsai trees include pine, spruce, and cedar. Deciduous trees are another possibility - the maple is exceptionally beautiful like magnolia, elm, and oak. Finally, some tropical non-woody plants, such as marble and chardwood, are good options for indoor environments in temperate or cool climates.
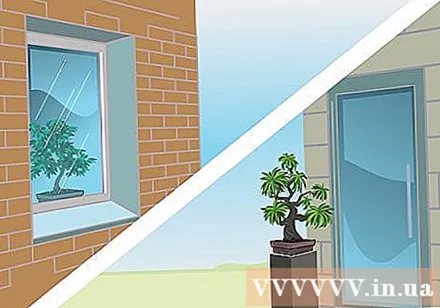
Decide if you are going to plant the plant indoors or outdoors. The needs of indoor and outdoor bonsai plants can vary widely. In general, indoor environments are drier and less light than outdoors, so you will choose plants with less light and humidity requirements. Here is a list of some of the most common bonsai species, classified according to their suitability for indoor or outdoor environments:- In the home: Da, Xa millet, Snow white apricot, Gardenia, Camellia.
- Out side: Bach jun, Bach, Cedar, Phong, Bulldog, Oak, Ginkgo, Pine, Du.
- Note that some cold tolerant varieties like juniper are suitable for both indoor and outdoor plants, provided they are cared for properly.
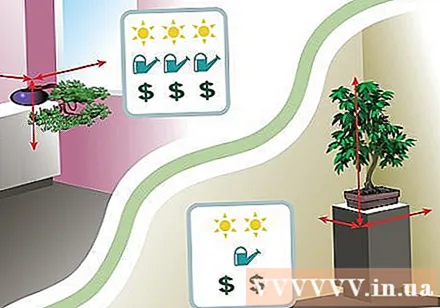
Choose the size of your bonsai tree. Bonsai trees come in many different sizes. Adult plants can be as tall as 15.2 cm or as tall as 0.9 m, depending on their variety. If you choose to plant the bonsai from a seedling or branches cut from another tree, they may be even smaller. Larger plants require a lot of water, soil and sunlight, so make sure you have all the necessary conditions before buying the tree.- Here are a few things you will want to consider when deciding on the size of your bonsai tree:
- The size of the container you will use
- The amount of space you have at home or in the office
- The amount of sunlight the plant will get at your home or office
- The level of care you can invest in the tree (larger trees take longer to prune)
- Here are a few things you will want to consider when deciding on the size of your bonsai tree:
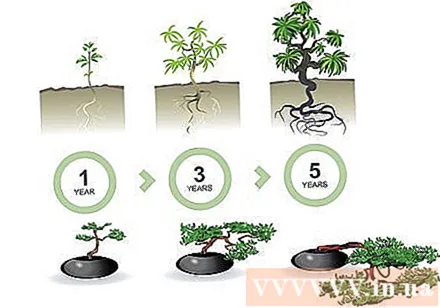
Visualize the finished product while selecting a tree. Once you have decided on the type of tree and the size of the bonsai you want to grow, you can go to the nursery or bonsai shop and choose the type of tree you will plant. When choosing, look for plants with healthy, vibrant, or needle-colored leaves to ensure that the plant is healthy (however, keep in mind that deciduous trees can change their leaf color in the fall). Finally, once you've narrowed your search to the healthiest, most beautiful trees, imagine what each tree will look like after it's pruned. Part of the joy of growing a bonsai tree is to gradually prune and shape the tree until it looks exactly the way you want it to look - this can take years. Choose a naturally shaped tree that closely resembles the shape you have in mind.- Note that if you choose to plant a bonsai tree from seeds, you can control the plant's growth at nearly every stage of its development. However, it can take up to 5 years (depending on the plant species) for the seeds to become a mature tree. Therefore, if you are interested in pruning or shaping the tree right away, you are better off buying an older tree.
- Another option you can consider is to plant a bonsai tree from cuttings. A cuttings are branches cut from a growing tree and planted in new soil to create a separate (but genetically identical) tree. Cuttings are a good choice - they don't take as long to grow like seeds, but still give you control over the plant's growth.
Choose a pot. The characteristic of bonsai trees is that they are planted in pots to limit their growth. The most important factor in pot selection is making sure the pot is large enough so that the soil can cover the plant's roots. When you water your plant, it absorbs moisture from the soil through its roots. A small amount of soil will make the roots of the plant unable to retain moisture. To prevent root rot, the pot must have a drainage hole at the bottom. If not, you can also drill those holes yourself.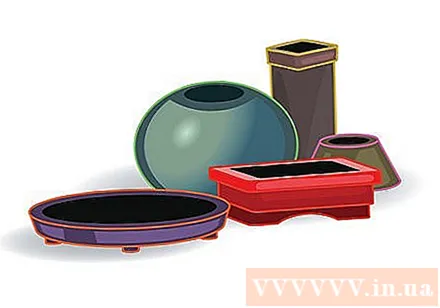
- One side of the pot must be large enough to support the tree, on the other hand, it must also ensure the neat, tidy aesthetic for your bonsai tree. A pot that is too large can make the plant dwarf, creating an odd or unattractive appearance. Buy a pot that is large enough for the plant's roots, but not too large - ideally the pot adds aesthetics to the plant, but not too obvious.
- Some people like to plant bonsai trees in simple, practical pots and then convert them into more beautiful pots once they are fully developed. This is especially useful if your bonsai tree is a weak tree, as it allows you to avoid buying "beautiful" pots until your plant is healthy and beautiful.
Part 2 of 3: Put Plants in Pots
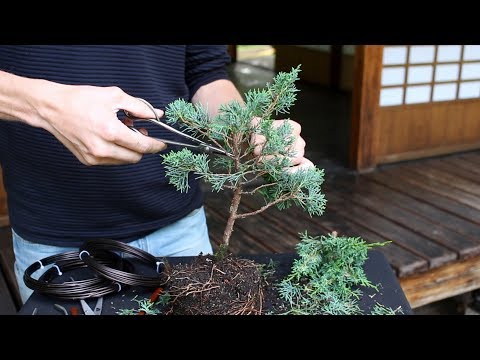
Prepare the tree. If you just bought a bonsai tree from the store and its container is made of poorly plastic or you have planted your own bonsai tree and end up wanting to put it in the perfect pot, then you will need to prepare it before changing position. First, make sure the tree is trimmed to the shape you want it to be. If you want the plant to grow in some way after repotting, wrap a sturdy string around the tree or branch to slowly guide its growth. You need to give the plant tip-top shape before transferring it to a new pot, which can be a challenge for the plant.
- Know that plants with a seasonal life cycle (for example, many deciduous trees) are best repotted in the spring. Rising temperatures in the spring allow many plants to enter a state of strong growth, meaning they will recover more quickly from pruning and trimming.
- You may need to reduce watering before repotting. Dry and loose soil makes the job a lot easier than wet soil.
Remove the plant and clean the roots. Carefully remove the plant from the old pot, making sure not to break or scratch its main stem. You may need to use a uplifting shovel to help lift the tree out. Most of the roots will be cut before the tree is re-potted. However, in order to have a clear view of the roots, it is usually necessary to remove any dirt that has stuck to them. Clean the roots, sweep away the dirt and sand that obscures your view. Root rakes, chopsticks, tweezers, and similar tools are helpful in this process.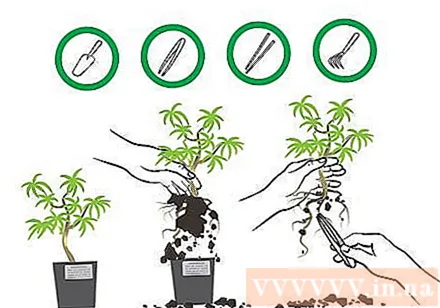
- The roots don't need to be shiny - just clean enough for you to see what you're doing while trimming them.
Prune the roots. If you don't properly control the plant's growth, your bonsai tree can easily grow out of the pot. To make sure your bonsai tree remains manageable and tidy, prune its roots when potted.Cut off the large, thick roots and roots pointing upwards, leaving a long, thin root jars that will grow near the ground. Water is drawn from the tips of the roots, so, in small pots, many thin root fibers are generally better than a large, deep root.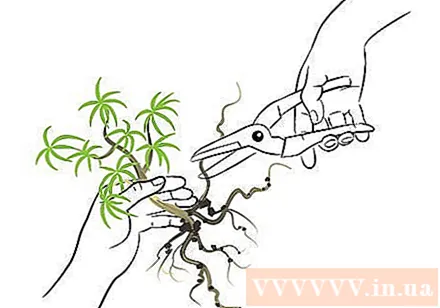
Prepare the pot. Before placing the plant in the pot, make sure the soil is fresh and clean for the plant to reach the desired height. At the bottom of the pot, lay a layer of soil. After that, add a finer layer of soil to the top. Using soil or a soil mixture that is not draining can cause waterlogging. Leave a small amount of space above the pot so you can cover the roots of the plant.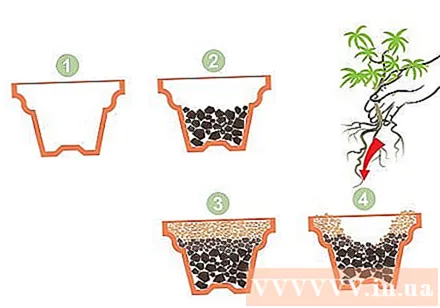
Place the plant in a pot. Place the plant in the new pot in the desired direction. Finish off by adding soil or a well-drained, nutrient-rich planting medium to the pot, making sure to fill the plant's root system. If desired, you can add a layer of moss or gravel to the top. In addition to being aesthetically pleasing, this can also help keep the plant in place.
- If your plant is not upright in its new pot, tie a large wire from the perineum through the drainage holes in the perineum. Tie the rope around the root system to keep the plant in place.
- You may need to install a mesh screen over the pot's drainage holes to prevent soil erosion, which occurs when water carries soil out of the pot through the drainage holes.
Take care of your new bonsai tree. Your new tree has just gone through a relatively painful process. For 2-3 weeks after repotting the plant, leave it in an area with little shade, away from wind or hot direct sunlight. Water the plant, but do not use fertilizer until the roots are firmly established. By allowing your plant to "relax" after re-potting, you allow it to adapt to your new home, and eventually thrive.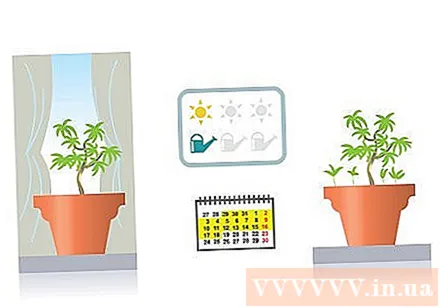
- As noted above, deciduous trees with an annual life cycle experience an intensified spring growth. Because of this, it's best to re-pot them in the spring after their hibernation has ended. If your deciduous tree is indoors, after allowing it to take root in a new pot, you may have to move it outdoors where temperatures are high and plenty of sunlight can trigger a "big" boost. Its natural "leap.
- Once your bonsai tree is in place, you may need to experiment by adding other small plants to the pot. If carefully arranged and maintained (like a bonsai), this addition can allow you to create a vivid and interesting landscape picture. Try using plants that have the same origin as your bonsai tree so that the same lighting and watering regime will support all plants equally well.
Part 3 of 3: Growing Plants from Seeds
Prepare the seeds. Growing a bonsai tree from seeds is a very long and slow process. Depending on the type of plant you grow, it can take up to 4-5 years for the stem to reach a diameter of 2.5 cm. Some seeds also require precisely regulated germination conditions. However, this method is perhaps the "best" bonsai experience because it allows you to fully dominate the plant's growth from the moment it emerges from the ground. To get started, buy seeds of the plant you want from a gardening store or get them in the wild.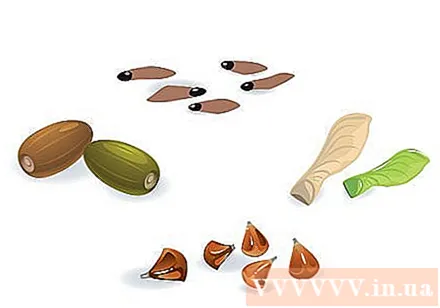
- Many deciduous trees, such as oak, maple, have an instantly recognizable seed bark (oak seed, etc.) and the seeds fall off annually. Due to their ease of obtaining seeds, these plants are a great choice if you are planning on planting a bonsai tree from seeds.
- Try to get fresh seeds. The time that a plant seed can germinate is usually shorter than that of a flower or vegetable seed. For example, oak seeds are "freshest" when they are harvested in early autumn and still have a hint of green color.
Let the seeds sprout. Once you have the right seeds, you must take care of them to make sure they germinate. In non-tropical regions with well-defined seasons, seeds usually fall off the tree in the fall, then lie asleep during winter before sprouting in spring. The seeds of native plants in these regions are often biocoded to germinate only after experiencing the cold temperatures of winter and the increasing warmth of spring. In these cases, it is essential to expose the seeds to the same conditions or induce them in your refrigerator.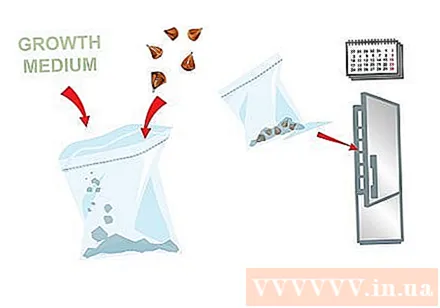
- If you live in a temperate environment with well-defined seasons, simply bury the seed in a small soil-filled pot and leave it outdoors during winter and into spring. If you don't, you can keep the seeds in the refrigerator for the winter. Place the seeds in a sealed plastic bag with a little moist and spongy growing mixture (such as fertilizer) and take them out in the spring when you see the sprouting.
- To stimulate the nature's gradual, then-rising cycle that takes place from late autumn to early spring, first place the seed bag at the bottom of the refrigerator. Over the next two weeks, gradually move it up shelf-by-shelf until it reaches the top, right next to the refrigeration unit. Then, at the end of winter, reverse the process, moving the bag down shelf by shelf.
- If you live in a temperate environment with well-defined seasons, simply bury the seed in a small soil-filled pot and leave it outdoors during winter and into spring. If you don't, you can keep the seeds in the refrigerator for the winter. Place the seeds in a sealed plastic bag with a little moist and spongy growing mixture (such as fertilizer) and take them out in the spring when you see the sprouting.
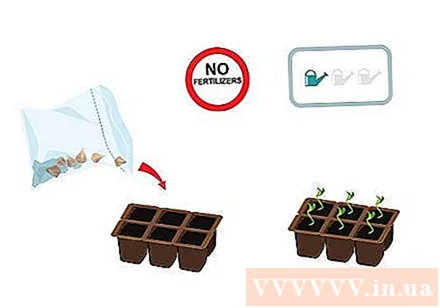
Transfer the seedling to a nursery tray or pot. Once the seedlings begin to sprout, you're ready to nurture them in a small soil-filled pot of your choice. If you allow the seeds to naturally germinate outdoors, they will usually remain in the pot where you nursed them. If not, transfer healthy seeds from the refrigerator to a pre-filled pot or nursery tray. Dig a small hole for your seed and bury it so that the main sprouts point straight up and the taproot sticks down. Immediately water your seeds. Over time, try to keep the soil around the seed moist, but not wet or muddy, as this may cause the plant to rot.- Do not use fertilizer until about 5 or 6 weeks after the plant has firmly rooted in the new pot. Start with a very small amount of fertilizer, otherwise you may "burn" the young roots of the plant, damaging them with too much exposure to the chemicals in the fertilizer.

Keep the seedlings in an area with the right temperature. As your seeds continue to grow, it is important not to expose them directly to cold temperatures or else you risk losing young plants. If you live in an area with warm springtime, carefully move the sapling to a warm but sheltered place outdoors, making sure your plant is not exposed to constant sunlight or strong winds, except when your species is naturally viable in that geographic area. However, if you are going to grow tropical plants or germinate seeds in the wrong season, it is better to leave the plants indoors or in a greenhouse where the temperature is warmer.- No matter where you put the seedlings, it's important to make sure they are watered regularly, but not over watered. Keep the soil moist, but not submerged.
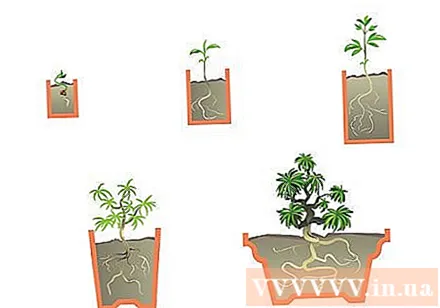
Take care of the seedlings. Continue a careful watering and sun drying regime as your seedling grows. Deciduous trees will grow two small leaves called cotyledons directly from the seed before developing real leaves and continuing to grow. As your plant grows (again this process usually takes years), you can gradually transfer it to larger and larger pots to accommodate the plant's growth until it reaches the size you desire.- Once your plant is relatively solid, you can leave it outdoors in a pot where it receives early morning sun and late afternoon shade, unless the species you plant can survive. nature in that geographic area. Tropical plants and other fragile varieties may need to be kept indoors permanently if the climate in your area is not right for them.
Advice
- Pruning often helps the plant to adapt to its small environment.
- You can also create bonsai trees from other plants.
- Focus on basic tree styles such as vertical, freehand, and waterfall.
- Plant the plant in a large pot and let it grow for a year or two to increase the thickness of the stem.
- Let the tree continue to grow until next season before styling or pruning it.
- Don't let the plant die and take care of it.
- Indoor pots should be lined with gravel or pebbles to avoid dirt.


