Author:
Louise Ward
Date Of Creation:
9 February 2021
Update Date:
1 July 2024

Content
- Be sure to use shaving cream or other lubricants to minimize the risk of cutting the skin.
- After shaving, wash your skin completely to remove oil and sweat, then dry with a clean cloth. Do not apply moisturizer as the tape will not stick properly.
- Clean skin with an alcohol swab is best. Alcohol is not only a good disinfectant, but it also removes oil or sebum that can prevent the dressing from sticking to the skin.

- Sprays are available at most drugstores and medical equipment stores. A physical therapist or sports practitioner can give you this glue.
- Avoid inhaling when you spray the glue because the glue can irritate the lungs, cause coughing or sneezing.
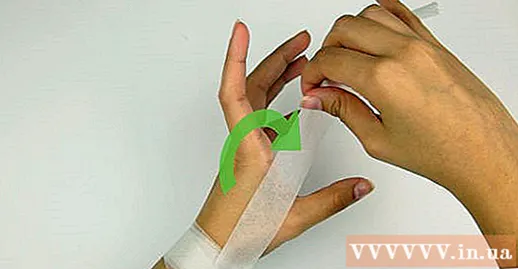
Paste the anchor paragraph first. Wrap the tape around your wrists (not too tight) just below the bony. This bandage serves as an anchor, and is the primary fixation position in many thumb tape methods. Before wrapping the forearm bandage, place the wrist / hand in a neutral position - wrists should extend slightly back.
- Gently wrap the anchor ring and do not avoid wrapping it too tightly to prevent blood circulation problems. If you wrap it too tightly, your hands / fingers will itch, feel cold to the touch and start to turn purple.
- You can also wrap an anchor ring at the end of the thumb - on the furthest knuckle. However, sometimes this part can cause the entire structure to become loose and dirty. Wrapping with a single anchor ring around the wrist usually works well with the method of wrapping the figure 8 around the thumb.
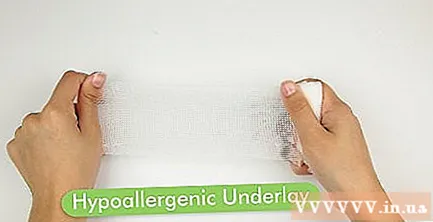
- The best tape for the thumb is water-resistant, inelastic tape, about 25-50 mm wide.
Wrap a ring from the top of your thumb. After applying the anchor tape, wrap a loop with the smaller (10 or maximum 20mm) tape at the position used to capture the pulse, just below the mound of the thumb. Pull up the tape and wrap it around your thumb, across the skin between your thumb and index finger. Pull the tape back down, wrap it across the first cuff, and attach it to the anchor loop just below the index finger. Adhesive tape will look like the ribbon of perception wrapped around the thumb. Wrap at least two rings around your thumb. It's also a good idea to keep your thumb in a neutral position - see how well your resting healthy hands are placed.
- For added certainty, wrap three to four rounds of sports tape around your big toe.
- The tape is not pulled back too much to look like you are asking for a ride. Keep in mind that the thumb can get overly flexible syndrome due to an stretched ligament, so wrap your thumb in a neutral position.

Wrap it around from the bottom of your thumb. After you lock the ring with glue wrapped from the top of your thumb, you will wrap a few more rings in the opposite direction, that is, from the bottom of your thumb up. These wraps will start on the front of the wrist / forearm, then go around the top of the thumb, then back to the front of the wrist. Minimum two rounds for sure if you need stability.
- Another way to increase stability is to use 50mm strips of tape to stick on these wraps in the same direction as the anchor tape. Apply over the starting position of the tape at the back of the hand to the mound under the thumb on the palm. Wrap the loop from the anchor tape to the first knuckle to stabilize the muscle group connecting the thumb to hand.
- The thumb pull technique should only be used if it is not uncomfortable and does not harm existing injury.
- The dressing should not be too tight as this will interfere with blood circulation to the thumb, and aggravate the injury.

- When this knuckle is injured, wrap your thumb close to your hand to avoid impact and further injury.
- You do not need to apply bandage to the joint near the nail if the joint near the palm of the hand is sprained, as this will make it virtually impossible for your thumb to move.
- Wrapping bandages around joints near your nails is a common precaution in sports such as soccer, rugby and basketball.
Advice
- Make sure you are not allergic to the tape as an allergic reaction makes the area worse. Symptoms of an allergic reaction are that itchy, itchy and swollen skin.
- After you wrap your thumb tape, you can still apply ice to reduce swelling and pain from the sprain. Don't use ice for more than 10 - 15 minutes at a time.
- If you are careful when taking a shower and don't soak your injured thumb in the water, you can leave the bandage on for 3-5 days before you need to re-wrap it.
- When removing the tape, use the circular nose scissors to avoid breaking the skin.
Warning
- Use caution when wrapping your thumb tape if you have diabetes, breathing problems, or coronary artery disease, as a significant decrease in blood circulation (due to tight bandage) increases the risk of tissue cell damage or death (necrosis).


