Author:
Louise Ward
Date Of Creation:
9 February 2021
Update Date:
2 July 2024
Content
Motherboards are the mainstay of the desktop. All the components are plugged in here, so making sure that the motherboard is properly installed is the first step in building a computer or upgrading to a new motherboard. Let's read the article on how to install a new motherboard in the chassis in just a few minutes.
Steps
Open the computer case. Remove the two side panels to access the motherboard tray. The motherboard tray can be removed from the chassis, this allows you to install the motherboard without having to look at it. Not all cases can remove the motherboard tray.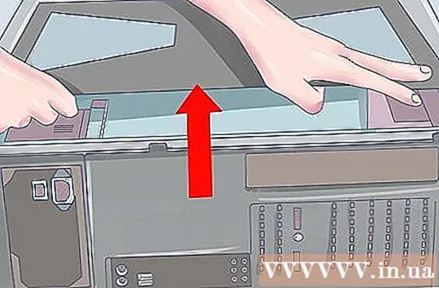
- The motherboard tray is usually fixed with two screws. Put them aside so you don't get lost.
- Often, installing a motherboard is essentially installing a new computer. You will need to reinstall your operating system if you are upgrading and reformat the entire system drive. You cannot simply upgrade to a new motherboard without reinstalling everything on your computer.
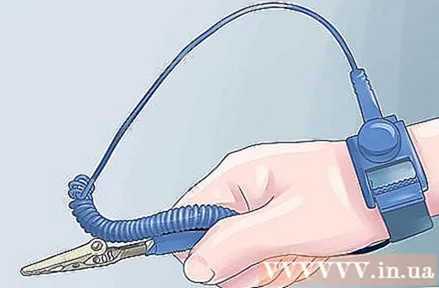
Self-grounding. Before you start working on components inside your computer or making contact with the motherboard, you need to make sure that you have completely discharged the static electricity from your body. You can touch the tap to do it.- Wear an anti-static bracelet when working with a computer to avoid damage to the components due to electrostatic discharge.
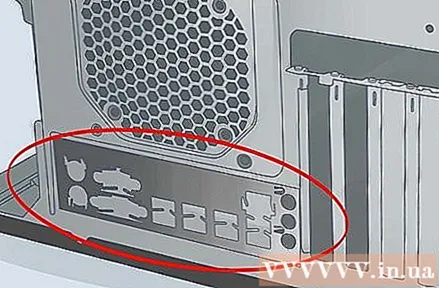
Replace the I / O shield (rectangular metal plate with slots matching the motherboard ports). This sheet is located on the back of the chassis, this is where the connectors extend to monitors, USB devices, and other peripherals. Most cases come pre-installed with a protective shield, you will need to remove it and replace it with the one that came with the new motherboard.- Press the four corners to attach the shield to the chassis. The shield will pop in properly.
- Make sure you install the shield correctly. Compare with the actual layout of the connectors on the motherboard to be sure.
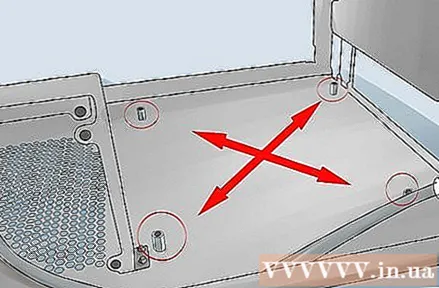
Find the standoff screw (the specific screw used to attach the board). The standoff screw holds the motherboard in place on the top of the chassis. This helps to cool and prevent short circuits. Some cases have standoff screws available, others do not. The motherboard will usually come with separate standoff screws for you to use.
Install the standoff screw. Insert the hole on the motherboard into place of the available standoff screws on the motherboard tray. Each case and motherboard tray are different so they usually have their own hole structure. Set up the motherboard to see where you can fit the standoff screw to secure it. Every hole on the motherboard needs to be attached to a standoff screw.
- Most standoff screw screws come with a screw, but there are also screws that fasten directly into the hole.
- Not all motherboards can be fully fitted with existing holes. Try to install as many standoff screws as possible, but never use extra screws. Standoff screws should only be inserted in the locations corresponding to the holes on the motherboard.
Place the motherboard on the standoff screw. The holes and screws should be in line with each other. If the motherboard tray is attached to the chassis, you need to gently push the motherboard towards the I / O shield on the back of the chassis to install. Tighten the screw to secure the motherboard.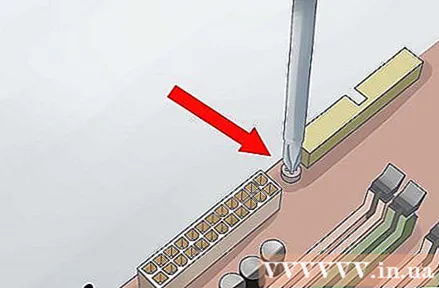
- Do not tighten the screws too tightly. Make sure it's sturdy but not too tight. Do not use an electric screwdriver.
- Non-metal holes will need to be inserted between the screws and the motherboard. It is best to avoid using holes that are not metal.
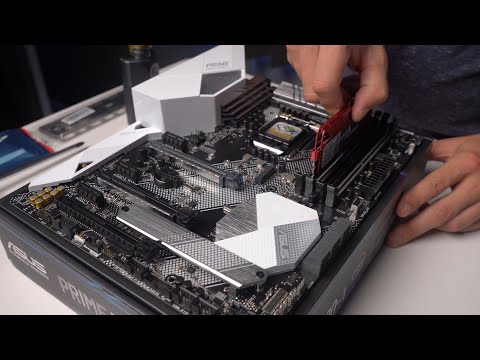
Component installation. Before you install the carrying tray with the new motherboard that has been securely fastened into the chassis, you should install the CPU, CPU cooler and RAM. Installing these components now will make the process easier afterward. If the motherboard tray is not removable, install the wiring first and then the components.
Power connection. Once the motherboard is in place, you can start connecting the components. Power supply is the first recommended factor for connecting because the plug will be harder to plug in later. Make sure that both the 4/8 pin 12V type connector and the 20/24 pin connector are connected.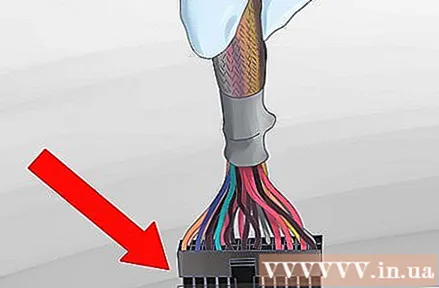
- Check the power supply's documentation if you are unsure what cable to use.
Connect to the front shield. To turn on the computer with the power button located on the front or see when the hard drive is accessed, you need to connect to the switch and indicator light on the front panel. Look for the following wires and connect to the appropriate pins on the motherboard: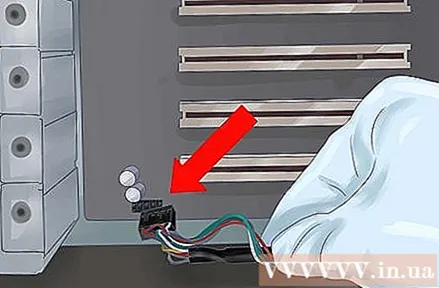
- Power switch
- Reset switch (reset)
- Power LED
- Hard Drive (HDD) LED
- Speak
Connect the front USB ports. Connect all the front USB ports to the appropriate connectors on the motherboard. These ingredients are often labeled. Make sure that the correct plug is plugged into the correct pin.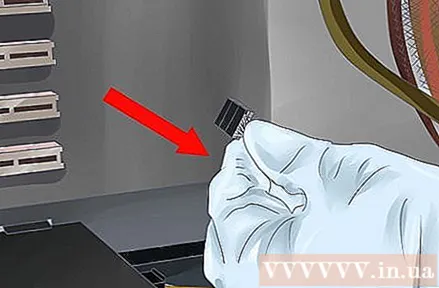
Connect a radiator fan. Connect the chassis and CPU fan to the correct pins on the motherboard. Usually there are places for the fan chassis as well as a two-pin header near the CPU fan for the CPU.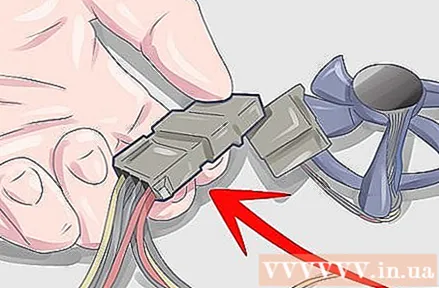
Installing the drive. Once the motherboard is fixed and connected, you can begin to install the drive. Make sure you plug the SATA hard drive and optical drive into the correct SATA ports on the motherboard.
Installing the graphics card. One of the last components that need to be installed is the graphics card because it takes up the most space and makes it difficult to access other areas. Installation of the graphics card is optional, depending on the system and your needs.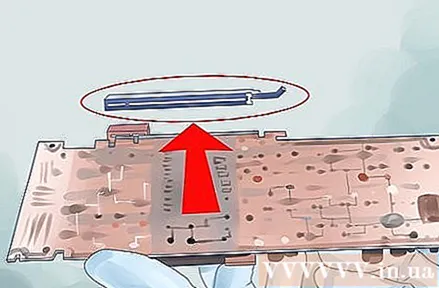
Adjusting the wiring. Now that everything is connected to the motherboard, it's time to re-tune the wiring so that the heat can escape or the wires don't get caught in the fan blades. Attach excess power cord to the spare drive box and use the plastic drawstring to tie the end of the cable together. Make sure each component has its own space.
Close the lid of the chassis. Replace the side shield in position and screw it on. Plug in computers and components. Turn on the computer and prepare for the installation of the operating system. Follow the online instructions and wikiHow (if available) to install a specific operating system:
- Install Windows 7.
- Install Windows 8.
- Install Windows XP.
- Install Windows Vista.
- Install Linux.
Advice
- It is recommended that you install the processor, fan / heatsink and RAM before mounting the motherboard into the chassis.
- Besides, please check the documentation before starting the process. The documentation will let you know if there are any connectors that you need to arrange prior to installation. These settings may vary depending on the motherboard you purchase.
- In most cases, you will need to purchase a chassis and other power supply that is suitable for the new motherboard.
Warning
- Don't forget to ground yourself before performing any computer operations. This means that you must discharge all the static electricity that can build up on your body before you touch electronic components. To do this, make sure you are not working on a surface that is likely to generate static electricity (wool rugs, sofas, etc.) and before touching any parts of the chassis, metal front surface (the chassis itself can also be utilized).


