Author:
John Stephens
Date Of Creation:
24 January 2021
Update Date:
1 July 2024

Content
Making soap from an embryo is the easiest way to make homemade soap. Since you already have soap stock, you won't have to worry about using caustic soda like hot or cold soap. This is a quick and easy method that both adults and children can do. Best of all, you don't waste time drying and will have soap to use as soon as it freezes!
Steps
Part 1 of 2: Making soap from an embryo
Buy soap ingots. You can find soap billets in craft material stores and online. White or clear glycerin are the most preferred options. For a more premium bar soap, try one of the following soap embryos: goat's milk, olive oil or shea butter.
- Don't use regular bar soap for this; It is not like soap and will not melt easily.
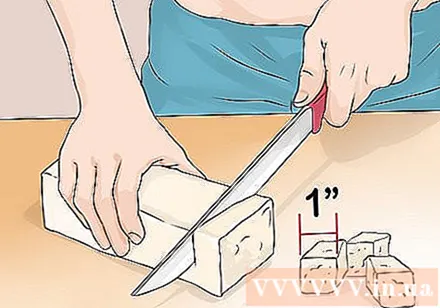
Use a clean, sharp knife to cut the bar of soap into small pieces (about 2.5 cm). The size and shape of soap blanks does not need to be precise. Shred the bar to make it melt faster and smoother.
Microwave soap blanks. Flush pieces of soap blanks into a microwave-ready bowl. Boil the soap embryos in 30 seconds increments in the microwave, stirring each batch until melted. The melted bar will be loose, smooth, and free of lumpy particles. If you don't have a microwave oven, you can do the following: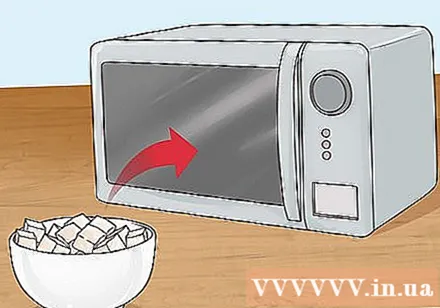
- Fill the pot with water to about 5 cm high.
- Place a heat-resistant glass bowl in a saucepan.
- Pour the soap ingots into the bowl and bring the water to a simmer.
- Simmer until the soap is melted, making sure to stir it occasionally.

Wait for the bar of soap to cool to 50 degrees Celsius. Once the soap has melted, put the pot down and let it cool down (if it is on the stove), remove the bowl from the pot and place it on a heat-resistant surface.- The color and aroma of soap can be affected if you add in colors and fragrances while the soap is too hot.

If desired, stir the liquid or powder dye into the soap. Use 1/8 teaspoon of pigment for every 450 grams of soap. You can add the coloring later, but be aware that it may fade out of hand.- If you are using a powder pigment, stir with 2-3 teaspoons of liquid glycerin first, then pour into the soap embryo.
- For liquid dye, 2-3 drops is enough for 450 g of soap.
- Make sure to use the correct soap color. Other colorants such as candle-making pigments are not safe for the skin.
Stir in a pinch of aromatherapy or essential oil, if desired. You can use one oil or a combination of different types to create a unique fragrance. As with pigments, you need to use oils that are safe for your skin or that are labeled as soap. Do not use aromatherapy oils as candles, as they can irritate the skin.The recommended amount of oil to use is as follows: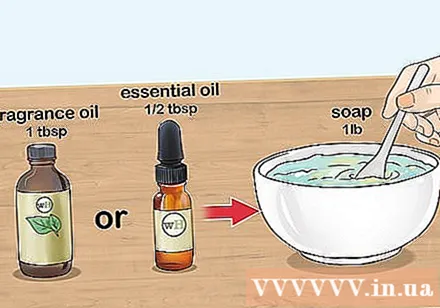
- Aromatherapy Oil: 1 tablespoon (15 mi) gives 450 grams of soap.
- Essential oil: ½ tablespoon (7.5 mi) for 450 grams of soap.
Pour soap into the mold as you like. You can find molds and ingredients for making soap at craft stores. The soap mold can be made of plastic or silicone. If you cannot buy a soap making mold, you can use a baking tray or a cupcake made of silicone.
- If you want, you can use a traditional mold with a larger size, but you will have to cut the soap after you remove the mold.
- If you are using a plastic soap mold, you may need to apply mineral oil wax inside the mold.
Tap the mold lightly so that the air bubbles float to the surface. If you see bubbles emerging, spray a thin layer of rubbing alcohol on the soap surface.
Wait for the detergent to cool for 12 -24 hours. Don't put the soap in the fridge or freezer in the air.
Remove the soap from the mold. Gently pull the edges of the mold to separate from the soap, then turn the mold upside down and push the soap out. If soap is still in the mold, you can put it in the freezer for 15-30 minutes, then rinse it under hot water. outside mold in seconds.
- If you are using a large mold, you will need to cut the soap into smaller slices / cakes after removing it from the mold.
Wait for the soap to dry completely, if needed. Unlike the usual hot or cold soap making method, embryo soap is ready to use. This is because it is saponified and does not require drying. Soap may remain moist on the edges after removing it from the mold. If so, just set it on the cooler for about an hour for the soap to dry. advertisement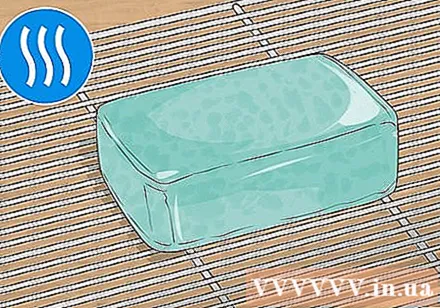
Part 2 of 2: Soap Upgrades (optional)
Texture the soap with herbs or dried flowers. Chamomile, rose, and dried lavender are great options, but you can go for others. You will need 5-12 g of dried herbs for every 450g of soap. Add flowers or herbs to the mold before adding soap. This way, they will retain the color without fading.
- You can also sprinkle herbs or flowers over the soap after you've poured it into the mold.
- Note about how to use soap. Herbal soap for hand washing is great, but if used for bathing it can be very rough.
- Cut large petals to avoid clogging the drain.
Use spices for fragrance, texture and color. With just 1 tablespoon (15 grams) of seasoning powder, you'll have a whole different level of soap! Stir spices, colors, and other flavors into the soap after removing it from the kitchen. Popular seasonings include cinnamon, turmeric powder and pumpkin cake seasonings.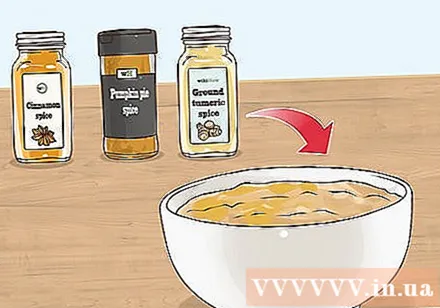
- Consider reducing the amount of flavorings or not using flavorings.
Use butter to increase moisture. You need to add the butter to the bar while it is melting. Don't use regular butter made with cow's milk, as it will turn rancid. Instead, you can choose one of the avocados like cocoa butter, shea butter, mango, or margarine. Use 1-2 tablespoons (15-30 g) for each 450 g of soap.
- Both cocoa butter and shea butter help increase the smoothness of the soap.
- Mango butter can soothe irritated skin, treat sunburn and reduce dryness.
Increase the soap's effect with certain essences. The essence is different from essential oils or aromatherapy. Although some essences add fragrance to soaps, they are used primarily for their other properties. Use 1-2 tablespoons (15-30 ml) of essence for every 450 g of soap, stirring together with coloring and flavoring. The most common types of essences and their uses are as follows:
- Chamomile extract helps to soothe and reduce stress, in addition to having antibacterial and anti-inflammatory properties.
- Grapefruit seed extract is a natural antiseptic, in addition rich in vitamins A, C and E.
- Green tea extract can help soothe sunburns, irritation, and acne.
- Guava essence is rich in vitamins A, B and C, especially good for aging skin.
- Papaya extract is good for both dry and oily skin, making the skin softer and smoother.
Add exfoliation benefits with additives like ground oats. Stir the ground oats into the soap embryo just before molding. Usually you need 1-2 tablespoons (15-30 grams) of oats. Here are my favorites:
- Jojoba and ground oats are both gentle exfoliating materials for sensitive skin.
- Sea salt and fine granulated sugar are moderate exfoliants.
- Coffee grounds and strawberry seeds are the coarser materials. You should limit yourself to 1-2 teaspoons.
Put a soap-making rubber seal into the mold before pouring soap. Some soap molds have lovely textures available. However, some molds are only round, oval, square or rectangular in shape. If you want a more beautiful soap, you can put a soap-making rubber seal on your face (patterned face up) before pouring the soap. You can find seals and soap making materials at craft stores. They are rubber pieces with embossed patterns like ink seals.
- Choose a seal whose shape is similar to that of the mold. Use a round seal for a round mold, and a square seal for a square mold.
- If the seal gets stuck in the soap after you have taken it out of the mold, simply peel it off.
Make a surprise in the transparent glycerin soap. This idea is great when making baby soap. You can place a small plastic toy in the soap, such as a fish or a spider. Pour soap into the mold over the toy. When you remove the mold, you will see it in the soap cake.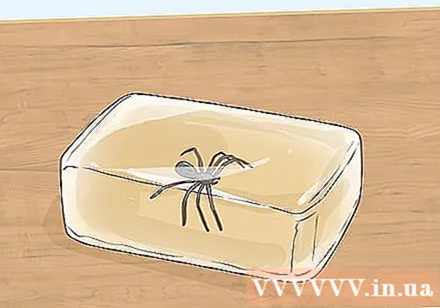
- This does not work for colored or cloudy soaps; the toy will not show up.
Stir in 2 different colors to make a swirl soap cake. Melt the soap as usual, then divide into 2 batches. Add a different color and flavor to each batch of soap. Pour liquid soap into the mold, color by color, then gently stir the two colors to create swirls. Don't stir too much, lest the two colors mix. If you want to make a white soap with colored swirls, follow these steps:
- Melt the soap embryo as usual, but not give color.
- Pour the soap into the mold.
- Place one drop of dye in each corner and one drop in the center of the mold.
- Use a toothpick to stir the colored drops together.
Pour soap billets of different colors one after another to create a layer. Prepare a half batch of soap and pour into a mold. Prepare the next layer of color with the remaining soap. Wait for the sclera to form over the first layer, then use a fork to scratch the soap surface. Add a second layer and wait for the soap to harden.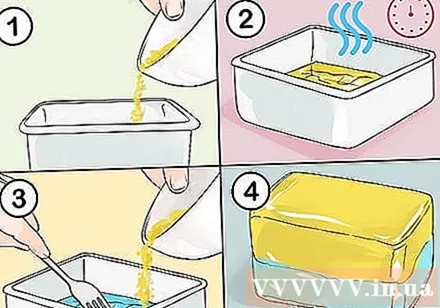
- Spray a layer of rubbing alcohol in layers while the soap is still wet to reduce air bubbles.
- This method is most effective when using a mold for large soap making. Unfasten the mold once the soap has hardened, then cut it into small bars to reveal layers of color.
Advice
- Experiment with different colors and fragrances for a wide variety of soaps.
- 450 grams of soap can be used to make 4-6 soap bars.
- You can buy soap ingots, aromatic oils and dyes at craft material stores or order them at online stores that provide soap making materials.
- Store soap in a plastic bag to prevent it from "sweating".
- Some colored soap embryos will affect the color of the finished soap. For example, hemp soap is green; if you add pink color your soap will be brown.
- Spray rubbing alcohol on the soap surface. This will help break up the air bubbles that float to the surface.
- You can use a baking tray or a silicone cupcake mold to make a soap dispenser. You can even use an ice cube tray to make mini bar soap.
- Combine 2 types of soap by melting together. Sticky milk soap and honey are a popular combination.
- Choose the corresponding color and fragrance. Use lavender essential oil for the purple soap cake, and rose essential oil for the pink soap.
Warning
- Use caution when choosing colors and fragrances if you have sensitive skin.
- The bar soap will very hot; be careful.
What you need
- Sharp knife
- Chopping board
- The bowl can be used in the microwave
- Stirring with a rubber spatula or spoon
- Stick soap
- Soap making dye liquid or powder
- Liquid glycerin (if using powder pigment)
- Aromatherapy oils make soap or essential oils
- Soap mold
- 99% isopropyl alcohol spray (rubbing alcohol)


