Author:
Randy Alexander
Date Of Creation:
4 April 2021
Update Date:
1 July 2024
Content
To display the desired image, you need to calibrate the screen. If you are a web designer, photographer, or graphic professional then this is extremely important. You don't want to spend hours adjusting colors and then viewing it on someone else's screen or printing it out into a mess. In order not to waste time in vain, you need to calibrate the monitor to render accurate colors and images.
Steps
Part 1 of 2: Setup
Adjust the brightness and clarity of the screen. Make sure the screen is not exposed to reflected light, flare, glare, or direct light. There is no need to be in a dark room but the room should not be too bright, as the light will affect the display level of the screen. If the screen becomes dirty, wipe it off before continuing.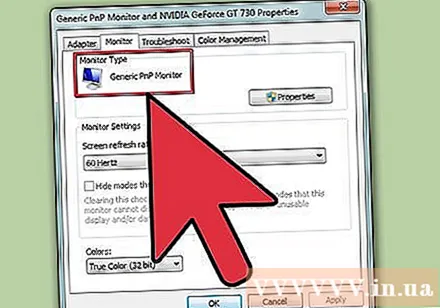
- If you regularly edit photos or do other jobs that require other color sensitivity, it's important to keep lighting levels constant throughout the day or between work sessions.

Check screen resolution. If you are using an LCD monitor, you should check the user manual or case for "real" resolution or see the list below. For all screens, choose the highest resolution for comfortable reading or thumbnail viewing.- Conventional LCD monitors have the following true resolution: 19 inch (48.3 cm): 1280 x 1024; 20 inch (50.8 cm): 1600 x 1200; 22 inches (55.9 cm): 1680 x 1050; 24 inch (61 cm): 1900 x 1200.

Adjust the number of colors displayed. Set the screen to "millions of colors" or set "nuts and bolts" to a high color depth, if available. Color depth is the number of bits that determine the color in each pixel (Red, Green and Blue). The definition of the number of colors and the depth of color can be confusing, but in fact 24-bit and "millions of colors" have equivalent value on modern displays. 16-bit or "thousands" is showing a much lower quality but using less of the video card memory; while old-fashioned 8-bit and "256 colors" display extremely low quality images on modern monitors. Screen 30-bit and above is much improved but most users do not realize.- The maximum color depth is limited by the monitor, the graphics card, and the operating system. You need to see the specs for improvement.
- On Windows, right-click on the desktop and select Graphic Properties or Screen Resolution. On Windows 7, you need to access Adapter → List All Modes.
- On the Mac, open System Preferences and select Displays. On many newer Macs, the settings do not have options, but usually set a color depth to 24-bit by default.
Print images for comparison (optional). You can skip this step if you don't use your computer to edit the images and then print them on paper. This is unimportant if you are not using a high quality printer and glossy photo paper.- It is best to print all the photos on one page: black and white photos, photos taken under natural light, low light photos, still lifes, and skin tones under a variety of conditions.
- Keep the dry ink away from sunlight and set the correct new color.
Continue after the screen has stabilized. If you have followed the steps above, let the monitor rest for 30 minutes before proceeding with calibration, especially with CRT monitors. This will ensure that the computer has returned to its standard operating temperature without affecting the colors displayed on the screen.
- If you are not using your computer, set the time to put it into sleep longer so that the screen does not turn off while it waits.
Part 2 of 2: Editing
Explore free tuning options. See below this step to learn about the built-in features or use an online tool like Photo Friday or displaycalibration.com. Once a tool has been selected, you can follow the on-screen instructions, and / or apply the step-by-step instructions below.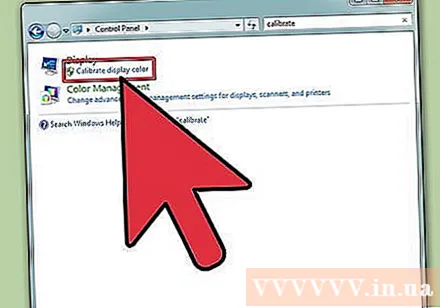
- On a Windows computer, click the Start button> Control Panel. Find "Calibrate display" in the control panel's search bar and click "Calibrate display color". You will need to enter your administrator password to continue.
- On a Mac, open System Preferences> Displays → Color tab → Calibrate .... If you don't see this option, look for "Calibrate" in the System Preferences search bar.
Consider purchasing calibration software. Although this is not strictly necessary for many users, graphic designers or professional photographers will need a professional level editing software. Look for software that has a colorimeter, gamma correction and color temperature.
- Some versions of Photoshop come with editing software "Adobe Gamma", but this is old software and is only available for CRT monitors and older operating systems.
Adjust brightness and contrast. These options can be physical buttons on the screen or set in the calibration manual. Usually, the calibration guide will show 2 or 3 grayscale to help you with adjustments. Follow the instructions on the screen. For best results, monitor images must display a minimum of 4 colors: black, dark gray, light gray, and white.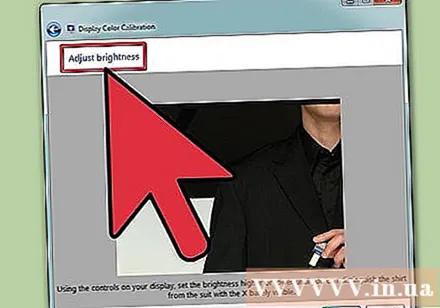
- Squint and pull away from the screen for more precise adjustments.
- Many laptops do not allow you to adjust the contrast.
Gamma setting. When the computer brightens the pixels, it increases the screen voltage. However, each relationship between voltage and brightness is quite complicated, you have to adjust to the "gamma standard", which is named after a related mathematical term.Some tuning settings allow you to adjust the slider until it suits your needs, but typically only use 2 settings: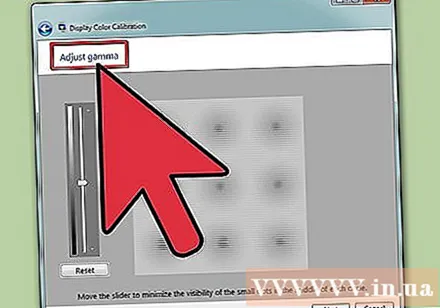
- Gamma 2.2 is the most commonly used standard for displays. This standard allows you to view images and videos at expected range of light, displaying designs on the web similar to that of other internet users.
- Gamma 1.8 displays images that are more similar to prints. You can easily see the shadows when editing detailed animations.
- Note that image editing software usually adjusts the gamma value by itself.
White balance settings. Also called color temperatureThis factor determines the monitor's overall color tone. The most common standard for computer monitors is the bluish D65 (or 6500). This is a standard familiar to users of computers or TVs. Some graphic professionals who print regularly will prefer to use the standard D50 (or 5000), neutral or slightly yellowed tones to better simulate prints and natural light.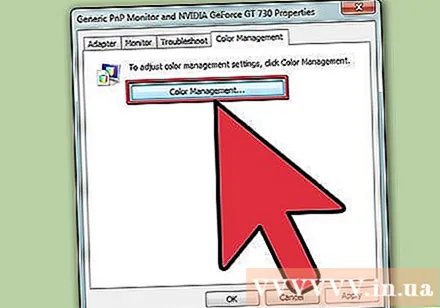
- Some monitors can be adjusted directly on the physical button. Try a button if you can't find white balance or color temperature adjustment settings in the calibration instructions. Select "warm" if the correct number is not displayed.
Schedule the next calibration. Calibrate the screen every 2 to 4 weeks so the visibility always meets your needs. Experts often calibrate screens before undertaking important projects. advertisement
Advice
- Some monitors display uneven brightness. Drag the picture around the screen and see if the picture is brighter or darker somewhere. There is no way to fix this other than replacing a new screen. If you only observe part of the screen during calibration, be careful not to distort the results.
- Some monitors have built-in buttons for auto-calibration, although you'd rather check the results yourself.
Warning
- If you have more than one tuning program installed on your computer, you may only run one program at a time, otherwise a conflict will occur.
- Each printer printer prints out different colors, so does the printing paper. You can calibrate the printer, but special software is required.
- If you use Windows Vista, you will lose your ICC (International Color Combination) and / ICM (Image Color Manager) information during logout or when User Account Control is activated.


