Author:
Morris Wright
Date Of Creation:
28 April 2021
Update Date:
1 July 2024

Content
- To step
- Method 1 of 3: Using nail polish
- Method 2 of 3: Use clear hobby glue
- Method 3 of 3: Fuse a ribbon
- Necessities
Synthetic and natural fabric ribbons tend to fray and tear at the edges. You can extend the life of a ribbon by cutting it diagonally and then heating it, applying nail polish, or smearing glue on the edges.
To step
Method 1 of 3: Using nail polish
 Use extremely sharp fabric scissors. The sharper the scissors, the better the edge of the ribbon will be.
  Measure the length of the ribbon. Trim the edge at a 45 degree angle, or cut it in an inverted "v" shape to prevent fraying.
  Purchase clear nail polish. Use a good quality for this that lasts and can be worn for a long time.
  Dip the nail polish brush into the nail polish. Wipe the brush on the top of the bottle to remove any excess paint.
  Apply a thin layer to the edges of the ribbon. You can hold the ribbon in your hand and paint the very edge, or lay it flat and paint the ribbon on one side, turn it over and paint the other side.
  Pick it up to keep it from sticking to something.
 Repeat this again to make sure the ribbon is extra strong. Do not apply the lacquer in a thick layer or beyond the edge. This can cause the ribbon to darken and become damp.
 - For best results, test some of the ribbon before proceeding with the rest to avoid ruining the ribbon.
Method 2 of 3: Use clear hobby glue
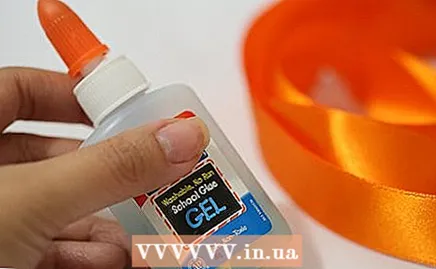 Buy anti-fray spray or liquid from a craft store or online. If you plan to wash the ribbon often, this is the best option. If you can't find an anti-fray spray or liquid, use clear hobby glue.
  Cut the ribbon at a 45 degree angle or in an inverted “v” shape if possible.
 Squeeze a small amount of the glue or anti-fray spray from the bottle.
 Dab it on the ribbon with a cotton swab. Wipe the cotton swab on a paper towel to remove excess glue / liquid.
  Drag the cotton swab against the very edge of the ribbon on each side.
 Hold it up until almost dry or hang it on a clothesline to make sure it won't stick to anything.
Method 3 of 3: Fuse a ribbon
 Make sure the ribbon you want to seal is synthetic. Most satin ribbons and grosgrain ribbon you can get are synthetic. Burlap and cotton ribbons cannot be sealed.
  Light a candle near a bucket of water. Throw the ribbon into the water if it catches fire. Open a window.
  Cut the ribbon at a 45-degree angle with fabric scissors to prevent fraying.
 Hold the edge between your thumb and index finger. Make sure your fingers are as far apart as possible and the ribbon is taut on its side.
  Keep the very edge of the ribbon next to the flam. In most cases, it doesn't need to be held in the flame to melt the rim. Move the ribbon quickly and evenly around the edge of the flame.
  Hold the ribbon between your fingers to cool. Run your fingers along the edge after about 30 seconds. It should feel hard where it is closed off.
 - Repeat the process again, keeping the ribbon closer to the flame if the brim doesn't feel different.
Necessities
- Ribbon
- Fabric scissors
- Nail polish
- Anti-fraying spray or liquid
- Clear hobby glue
- Cotton swab
- Washing line
- Candle
- Water


