Author:
John Pratt
Date Of Creation:
16 April 2021
Update Date:
25 June 2024

Content
Editing video clips can be an enjoyable afternoon activity or a full-fledged career. Today, when it comes to software, there are many different options, as well as hundreds of places to share your clip with the world. But that does mean that your video must be cleaned up properly first. Note: This article is about editing a simple video clip, not editing movies or longer videos. Click here to read more about movie editing.
To step
Method 1 of 2: Editing any clip
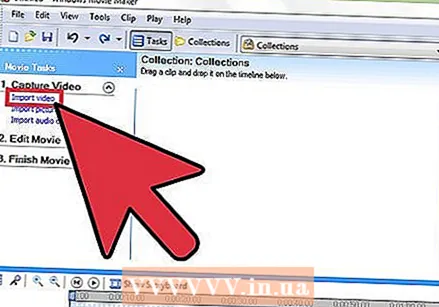 Open the clip in your favorite video editor. You can use any program you want, from free programs such as Windows Media Maker and iMovie, to commercial programs such as Avid or Final Cut. You can even edit simple clips on smartphones and tablets these days, using apps like Vee for Video or Magisto. Your choice depends on what you want to do with your video clip:
 - If you want to add something or split up clips, add simple titles and / or music, apply simple effects or trim the intro and outro, free software is all you need. You can even use a variety of free online editors, such as YouTube's editor, for short clips.
- If you want to add special effects or transitions, adjust colors or lighting, or have more control over your edits, choose professional software.
- Mobile software often makes it easy for you to upload clips to YouTube or Vimeo, and allows you to record, edit and post clips that require little editing.
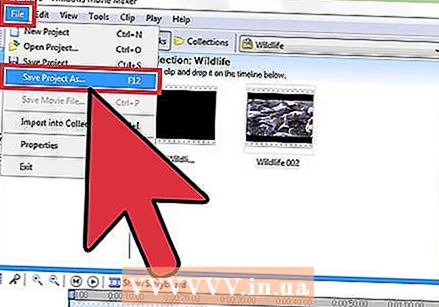 Click on "File" and "Save As" to make a copy of your original video. Always make a copy of your original, unedited video in case something goes wrong while editing. Most editors will even save a new copy after each edit of a clip, so they have an old version should something go wrong.
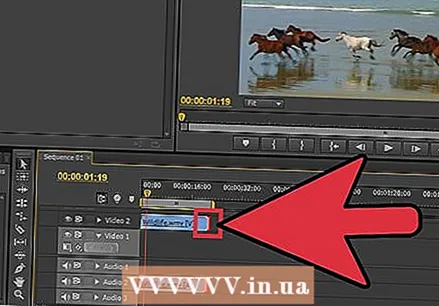
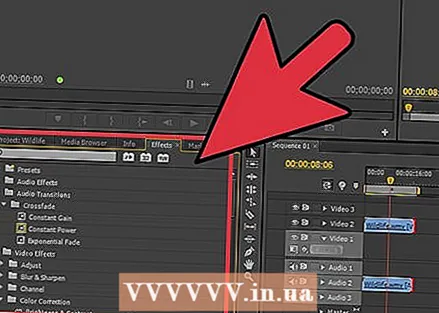
 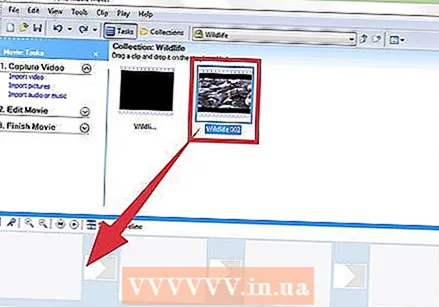 Drag all the clips you want to add to the video you want to your "Timeline". All video editing software has a timeline where you organize the clips for your final video. If you only need to edit one clip, you still have to place it on the timeline to edit it.
 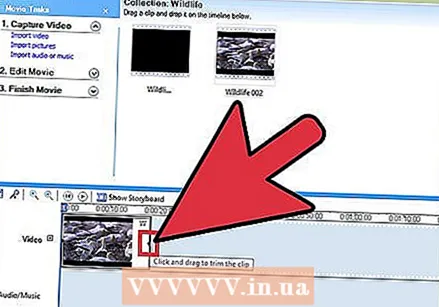 Click and drag the ends of the clip to shorten or lengthen it. With videos, the basic editing is quite intuitive. You can move, stretch, and trim the video clip in the timeline, which then plays the clips just as they appear. If more than two clips are stacked, the top clip will always be played. Since each program is slightly different, if you don't understand something, you can look online for a quick tutorial to learn more about the basics of your software.
 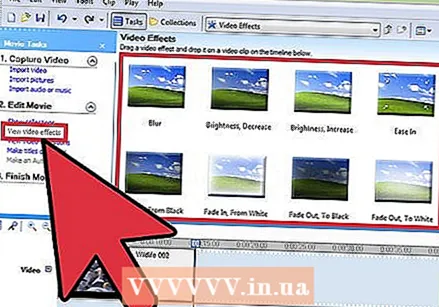 Add music and effects to the clip as desired after it has been edited. When the clip is ready, press "File" & rarr; "Import" to add music, or click "Effects" or "Filters" to play with some fun special effects. Do not make these changes until after you have finished the video - make the major changes first before proceeding with the cosmetic edits.
 - Remember, you can't use copyrighted music, such as a pop song, without permission if you plan to monetize your video.
 Add any titles using the "Title" or "Text" field. Again, this depends on the software you are using. Place the titles on top of the video, effects, and music in the timeline - this will prevent them from being changed by changes you've made.
 - Place your titles in the top or bottom third of the screen for a professional look.
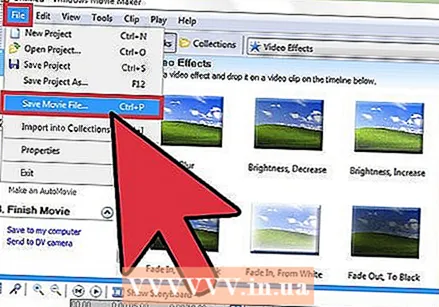 Export the final clip to use it however you want. Usually you click on "File" & rarr; "Export" to share your video with the rest of the world. While you will have a wide variety of options available, the most common video file extensions are .avi, .mov, and .mp4. You can play these three formats on YouTube, Vimeo and most other streaming sites and computers.
 - Some programs only have a "Save As" button, after which a menu is displayed from which you can select a video type.
Method 2 of 2: Edit videos like a pro
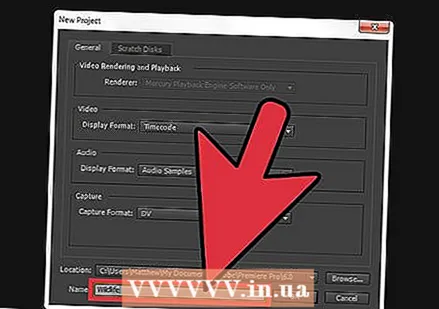
 Use a high-quality, professional, non-linear editing program. Nonlinear Editing (NLE) is just a fancy way of saying that you are no longer editing rolls of film by hand. That aside, the term today usually means high-quality video editing software with powerful features and controls. Use what suits you best. Some examples:
 - DaVinci Resolve: a new free open source video editing program. It is still being worked on, but the price is worth a try.
- Adobe Premier: One of the classics, Premier works well on the Mac and Windows. If you have other Adobe products, such as Photoshop, you may find Premier easy and intuitive to get used to.
- Final Cut X Pro: This particular version of Final Cut has long been considered the industry standard, although it has gotten weaker with each new version. Very popular for Mac computers.
- Avid: The standard of many professional film editors. Avid has all the functionality of the competitors and an interface that is made for working with a large team on projects.
 Think about the "story" you want to tell with your video. What is it you are trying to say with your clip? Do you tell an actual story or plot with it? Is it just a funny event that you witnessed the day before? Is it a powerful speech that you recorded? Find out what the purpose of your video is - how do you want the viewer's mood to change after watching? Good editors underline that idea and use it to guide the decisions they make while editing.
 - What is the main point, image or idea of the video? How can you bring that forward and place it centrally?
- This does not mean that all videos need a story - just a central thought or image to hang everything on.
 Cut the video to be as short as possible without losing quality. If a shot, moment or image doesn't add anything to the story, leave it out. For good video clips, each frame should appear intentional - this is not a movie, but a short scene that should keep the viewer's full attention throughout the playback time.
 - If you only use continuous camera images, you can still mask errors or slow moments with well-placed text or music.
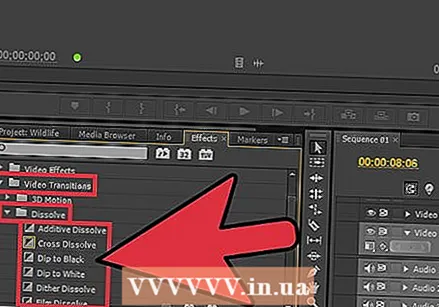 Make all transitions as smooth and barely noticeable as possible. Flashy, unpleasant transitions are the trademark of many bad video editors. Dump hip flash and stick to simple fades, dissolves, and hard cuts (no transition at all) as you transition from one clip to another. If you want to use a nice effect, do this at the beginning and end of the clip.
 - Never use flashy cuts and transitions, such as "Star Wipe". Do only distract you from your actual video.
 Do not forget about the rule of thirds, especially when drafting titles. The rule of thirds comes from photography, and is used for creating great frames for film or photos. Divide the frame into two horizontal lines and two vertical lines so that the image is divided into nine equally sized boxes.The rule of thirds simply states that the best images have items on these lines. When placing titles or adjusting the image, try to align your text, horizon, and special effects with these imaginary guides.
 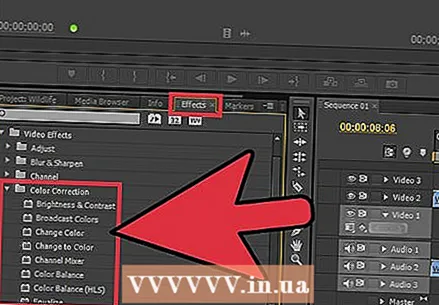 Balance color, sound and music to make sure your video's content can shine. The goal of a good editor is to disappear, and this goes doubly for a short video clip. Use a base color correction tool, such as the "color balance" of your programs (they all have) to make the images smooth and attractive. Then lower the music volume so that you can still hear the sound as recorded by the camera. When playing together, make sure that the sound is not too loud. Remember - you want people to focus on the content, not why the music is too loud or the video looks "too blue".
 - Audio must fade in and out, just like video, for the sound to sound natural.
 The next time you start recording a clip, consider editing it. If you are only recording simple clips that only require one recording, this does not apply. But for all other shots, knowing that you're going to edit the video can make you a much more aware camera person. Some things to consider are:
 - Always shoot with a ramp-up time and a run-out, or nothing for 5 seconds before and after the shot. This gives you crucial material for putting the different recordings together.
- Make a recording for "fill", or recording of the environment, which you can insert to hide any errors in the recording.
- Never skimp on audio. If you can, use a dedicated microphone instead of a camera microphone, or just record a few minutes of local background noise that you can use afterwards to correct errors.
Tips
- Editing is easy to learn but difficult to master. To get better after these simple clips, move on to longer projects and movies.
- There are millions of free tutorials and videos online to teach you about any video editing program. Go online and start studying.
- This article is about editing a single video clip, not editing movies or longer videos. Click here to read more about movie editing.


