Author:
Roger Morrison
Date Of Creation:
27 September 2021
Update Date:
1 July 2024

Content
- To step
- Method 1 of 6: Prepare
- Method 2 of 6: Do the handstand against the wall
- Method 3 of 6: Jump
- Method 4 of 6: Do the split
- Method 5 of 6: Learning the forward roll
- Method 6 of 6: Do balance exercises
- Tips
- Warnings
Gymnastics can be a very expensive sport, where membership of an association along with guidance from a professional gymnastics trainer can be costly. Unlike team sports like soccer, where it's just safe to practice in your backyard, gymnastics at home is quite dangerous to do. However, there are a few relatively safe ways you can practice your skills at home between classes.
To step
Method 1 of 6: Prepare
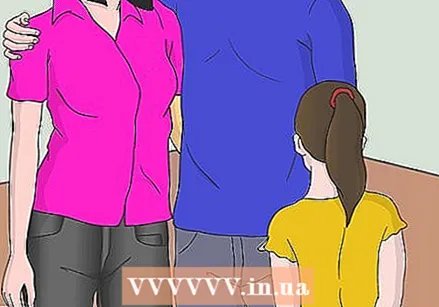 Tell an adult you want to exercise at home. Before starting a gym workout at home, get permission from a parent or guardian. Your guardian must be at home and available to respond immediately in the event you are injured. Ideally, an adult should be with you in the same room to assist.
  Wear appropriate clothing. You need to make sure that your clothes are not so loose that they hinder your movements, but also not so tight that they rub against your skin.
 - As a girl it is best to wear a gymnastics outfit.
- A singlet is another special sports garment and can be worn by gymnasts of any gender. Just like the leotard, you can also choose to wear athletic shorts over your singlet.
- You can also wear a T-shirt or tank top with athletic shorts instead. Wear clothes without buttons, zippers or snaps.
- Do not wear socks. Practice barefoot to avoid slips and falls.
- If your hair is long, tie it up tightly.
- Only wear glasses if they are specially made for the sport and do not slip. If not, store it in a safe place where it cannot be damaged.
 Create a safe place to exercise. You need a large space free of clutter. Arranging a gym room correctly will help you avoid serious injury.
 - Practice only on a soft surface. Don't train on bare hardwood, tile, or laminate floors. You can also ask an adult to buy a sports mat for your home.
- Ask an adult to place all furniture against the wall. Make sure the furniture is free from sharp corners. If necessary, cover sharp edges with a pillow or a thick duvet.
 Think about what equipment you need at home. Pull-up bars are relatively inexpensive and easy for an adult to install. There are also athletic bars and balance beams that you or an adult can buy for the home. However, these take up a lot of space and are best saved for a special rehearsal room.
  Warm up your muscles. To get the most out of your workout, you need to warm up properly first. Warming up will improve your performance and prevent muscle pain.
 - Start stretching your entire body. Slowly tilt your head from side to side and gently roll your head back. Straighten your arms by holding both arms in front of your chest for a few seconds and then lifting back over and behind your head. Do a few lunges to stretch your legs and lower back. Lift both legs slightly off the floor and roll with both ankles. Bend all your toes. Roll your wrists and bend your fingers.
- After stretching, make sure to increase your heart rate with a quick aerobic exercise. This can be any form of simple high-intensity exercise that you can do on your own in a small space. Examples include: skipping rope, running or jumping in place. Do this for a few minutes until you notice your heart beating, but not so long as to tire you out.
 Check your equipment. Make sure that the floor, mat, or rug you will be exercising on is flat and free of unevenness. If you are using a balance beam, sit comfortably on it first. Make sure it doesn't wobble before stepping on it. If you are using horizontal bars, shake them to make sure they are stable enough before leaning on them.
Method 2 of 6: Do the handstand against the wall
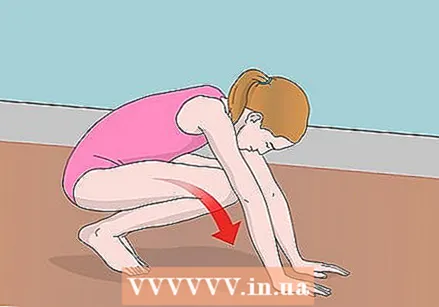
 Squat down. Spread your hands on the floor. Make sure the wall is behind you. Make sure an adult is present when doing this move to avoid falling.
  Walk up the wall to the back. Put your feet against the bottom of the wall and "walk" back. Keep your hands on the floor. Straighten your elbows and knees as you go up.
  Move closer to the wall with your hands. Once your legs are straight and your toes are against the wall, it's time to walk on your hands. Start by moving your right hand back slightly. Bring your left hand back to the right. Repeat this until your stomach is very close to or flat against the wall. You just did a simple handstand.
  Return safely to the starting position. When a coach or trainer tells you to return to the position in gymnastics, you should return to the position you started in. In this case, go back to the squat from Step 1. To go back down, walk forward with your hands and slowly slide your legs down.
Method 3 of 6: Jump
 Stand up straight. Make sure your feet are pointing forward together with your toes. Raise your arms straight up in the air above your head.
 - The straight jump is a fairly easy jump that is safe to do at home. It will help you strengthen your legs, improve your cardiovascular endurance and learn to maintain your balance.
- While you're unlikely to hurt yourself on this jump, you can still twist or fall your ankles.
 Begin your jump by bending your knees. While squatting, swing your arms back at the same time. Make sure your arms swing back as far as possible as you reach the lowest part of your squat. Don't go down so far that you lose your balance, but spread your arms out to the side if necessary.
 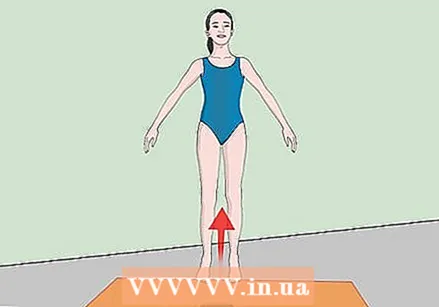 Jump in the air. Sit off with your feet and straighten your legs. You return to your original position with straight legs and upper body, but now you are in the air. As you spring up like a spring, swing your arms back above your head for an extra boost.
 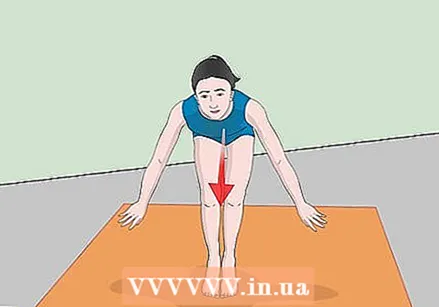 Land as softly as possible. The English term "Stick the landing" was coined to describe landing on the feet where the shock is absorbed to prevent injuries. To do this, land with your legs apart and your knees slightly bent. Keep your arms apart for balance. With a perfect landing, your feet should not move at all.
Method 4 of 6: Do the split
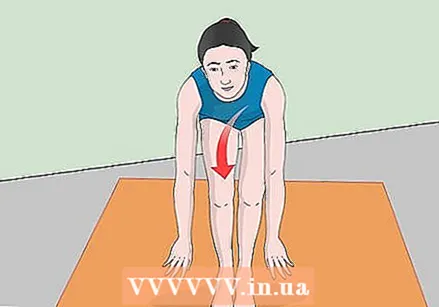
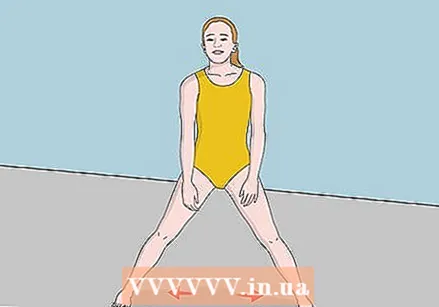 Stand with your feet wide apart. This is also referred to as the "straddle" position. Your feet should be much further apart than your shoulders. Try to spread your legs as wide as possible while standing comfortably upright with your legs straight.
  Crawl further out with your feet. Let your feet slide further apart. Until you have mastered the exercise, you should perform this step slowly. Keep your legs straight. If you feel any pain, stop immediately. Forcing muscles and tendons to stretch can cause injury.
  Stay like this in the split. Once you've gone down as far as you can, hold that position for as long as you can. Maintaining this stretch will help improve your flexibility and strength. Use your hands for support if you become unbalanced.
  Practice the split until you can reach the ground. Unless you're already athletic, you probably won't be able to do a split on your first try. As you build strength and flexibility, you can stretch your legs further apart and get closer to the ground. This can take a while, so do your best to be patient.
Method 5 of 6: Learning the forward roll
 Squat with your hands flat on the floor. Your knees should be close together and your hands spread apart. Your fingers should be pointing straight forward. Keep your chin on your chest to avoid injury.
 - Only do this movement on a mat or other very soft surface.
 Start your somersault. Stretch your legs to push forward, on your back. Keep your head in. It should never touch the ground. Make sure to keep your spine bent and your legs together. Use your arms for support and as an extra boost.
  Get up. While lying on your back, bend your knees back together and keep your shins together. Roll forward with the impulse generated by your legs. You should end up flat on your feet in an upright, squat position. Do this and step two all in one smooth motion, to successfully complete a forward roll.
  Get up again. An experienced gymnast should be able to do this without pushing himself or her off the ground. However, until you have practiced enough, it is fine if you use your hands. If you find yourself unbalanced, don't hesitate to use your arms for support.
Method 6 of 6: Do balance exercises
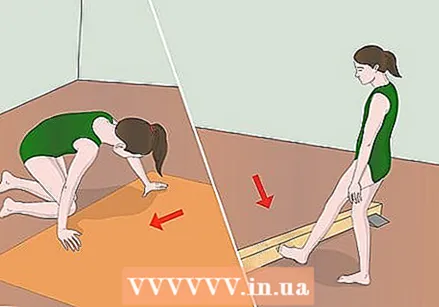
 Stand on one foot. Keep your standing leg straight, along with your upper body.
 - The purpose of a balancing act is to learn how to keep your body stable. To be an experienced gymnast you need complete control of your muscles at all times. With balance exercises you can improve this skill in a safe environment.
 Slowly lift one leg in front of you. Keep your arms apart for balance. Keep your toes pointed forward and both legs and torso straight. Once your leg is in position, hold it there for a few seconds.
  Switch legs after each balancing act. You want to strengthen and balance both sides of your body evenly.
 - Lift each foot higher and repeat the balancing act after doing it with both legs. By exercising, you can eventually maintain your balance with your leg pointing forward at a right angle to your body.
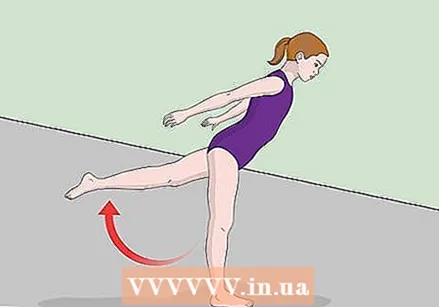 Do roughly the same exercise, but this time with one leg back. Swing one leg back and keep both legs straight. Tilt your body forward to keep a straight line between your body and the leg you lifted.
 - With a little practice, you can do the balancing act with your leg back so that your body and leg are parallel to the ground.
Tips
- Contact your coach for advice on safe ways to exercise at home. Your gymnastics trainer has the experience and knowledge to create the best individual plan for you.
- Make sure to always warm up before any strenuous exercise. Warming up helps your body prepare by increasing your heart rate while loosening up muscles and joints. By doing warm-up exercises, your body will tire less quickly. Many coaches advocate warming up your muscles to prevent injuries, but there is a lack of data to back up this claim.
- Make sure to drink plenty of water. It is recommended that children aged 5-8 drink five glasses of water per day. Children between 9-12 years old should drink seven glasses of water and teens from 13 years old about 8-10 glasses. However, if you are working up a sweat, you should drink more. Always drink water when you are thirsty.
- What most people call "the split" is actually called the "split" (as explained here). This one is often difficult for most adults, as we lose flexibility as we get older and don't exercise. Ask your coach about learning to do other types of splits.
- Stretch every day and you'll be able to do the split one day.
- Stretch daily and work hard, first on a trampoline and then on the floor.
- Continue to stretch regularly for more flexibility.
- If you don't have a mat, you can train on a yoga mat.
Warnings
- Given the number of accidents and injuries, gymnastics is at the top of this list for girls. However, many injuries can be prevented.


