Author:
Christy White
Date Of Creation:
8 May 2021
Update Date:
1 July 2024
Content
- To step
- Method 1 of 3: Prepare
- Method 2 of 3: Planning the tattoo
- Method 3 of 3: Shading a tattoo
- Tips
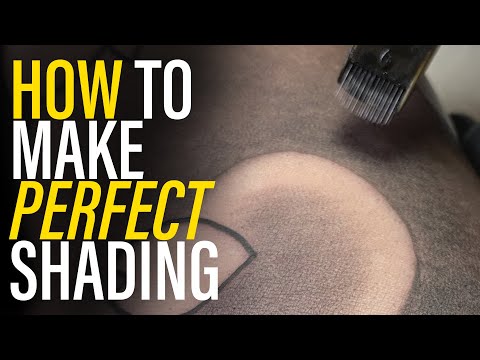
Good shade can add a lot to the quality of a tattoo. You can cover up mistakes or add a fresh three-dimensional look to your tattoo. It often takes years for tattoo artists to perfect their shading skills, so even if you've got the hang of tattooing, don't assume that you'll be able to create top-level shadows in a few days. However, if you're interested in an overview of how shadows are created and the techniques used for this ... you've come to the right place!
To step
Method 1 of 3: Prepare
 Practice with paint or with a pencil. Hatching (making shadows) is an artistic activity - no manual can give the confidence you get from just doing it often. Shading a tattoo isn't much different than shading a still life. Try to get used to shading something other than a body first, even if you're already an accomplished tattoo artist.
 - Practice with differential pressures. Pressing hard versus pressing lightly can produce very different effects, so you need to get a feel for this beforehand.
- Also, practice using different pencil or brush strokes to prepare for tattooing in different styles.
 Tattoo on a pork belly for a more realistic feel. Pork hide looks quite a bit like human skin and you can buy a piece of pork belly at the local butcher or even online. This way, you can get a good idea of how much pressure to apply and which strokes to use, without worrying about permanently marking a human's skin.
 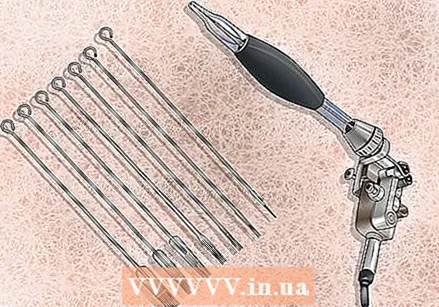 Choose the right tattoo machine and needle size. Different shader needles produce different effects. Larger shader needles, for example, create a softer shade than smaller needles, which give a higher color concentration. To obtain a nice shadow effect, use a needle that protrudes no more than 1 mm.
  Set your tattoo machine to the right speed to get the effect you're going for. A slower speed will help create softer shadows, which you can then build on. A higher speed produces a darker shade. Adjust the speed as needed, depending on what look and depth the customer wants.
  Prepare the area of skin you will be working on. Clean the entire area with soap and water, especially if you've already done the brushing. Make sure you have removed any stencil prints, sticky residue, or grease that could get in the way of shading.
Method 2 of 3: Planning the tattoo
 Design the tattoo according to the client's wishes. Always discuss with your client what they want their tattoo to look like. Even if they say they trust you completely, it's always a good thing to keep them up to date with the decision-making process.
  Be aware of light and shadow. If you want to do shading successfully, keep in mind that with each individual tattoo, both light and shadow play an important role. Shading a tattoo properly has to do with artistry as well as technique. Ask your client to describe the lighting of the tattoo as he / she envisions it.
 - Your hypothetical light source should always be in the same spot while shading. You don't want the shade to be incongruent - so that the light is not right. If the top part of a tattoo is illuminated, then if the light comes from above, the bottom part should be darker.
- When working with colors, try shading in complementary colors. Grab a color wheel and find the complementary color to the color you used for the lines. This will really make the tattoo stand out beautifully.
 Make a sketch for the client. The client will want to have an idea of what the tattoo will look like and it will also help you figure out exactly how and in what style to draw. Make a few practice sketches to get it right on paper.
Method 3 of 3: Shading a tattoo
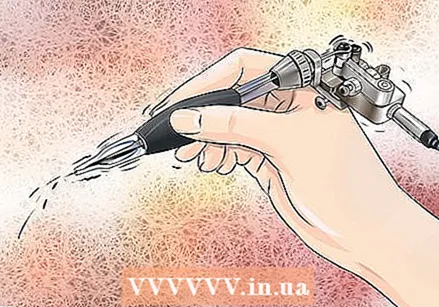 Turn on your tattoo machine. Make sure to use a machine that is suitable for the tattoo you want to make and has good shading capabilities. Use a needle type and size that is appropriate for the work you are doing. Also adjust the speed of the device. Many tattooists recommend a slower speed than normal for shading.
  Let some time pass between outlining and shading. It is better not to start shading immediately after your line work. While it is possible if you wait 15 minutes for the tattoo to dry, most tattoo artists prefer to do the shading in a separate session. Not only does this make your job as a tattoo artist easier, but it also gives the client a chance to think about how he or she would prefer the shadows.
 - Use petroleum jelly throughout the process. Petroleum jelly helps to protect and keep the skin supple, so apply it to the client's skin as often as needed during the tattoo session.
 Work in circular movements. Start in the center of the area you plan to shade, then move outward in circular motions. Keep in mind that the dark areas will require more pressure than the lighter areas. This requires a lot of feeling, so you will have to practice well.
 - A circular motion is gentler on the skin than a back and forth motion.
 While you're at it, wipe off the excess ink. If unnecessary ink gets on the surface of the skin while tattooing, remove it immediately. You must be able to see your work clearly to check its progress. You may see inconsistencies in your work that you need to resolve. Adjust the shading to address any inconsistencies in your tattoo.
 - When you are done with the tattoo, remove any remaining ink as well.
 Change the depth of the shadow by adjusting your technique. Essentially you should go from dark / heavy to light. You have to exert more pressure on the dark parts than on the lighter parts. When shading, try to keep the color as gradual and smooth as possible; you don't want abrupt changes to be seen.
  If necessary, dilute the ink. This helps to create natural looking gradations. Dip your needle in distilled water to dilute the black pigment to a gray pigment. This is useful because you do not have to change the needle every time while tattooing.
 - While shading, move the needle diagonally across the skin to effectively blend the different shades of the tattoo. This will apply a different amount of ink, which will benefit your shading.
 If necessary, change the ink capacity of the needle tip. This method is a bit more time consuming, but it is useful if you still have some difficulty producing gradations from the pressure you put on the needle. If the latter is your case, changing the ink capacity may be a good option.
  Always clean the used needles in between. Make sure the dark ink has completely disappeared from the stylus before proceeding to shade lighter areas. If you don't clean the needles in between, it can negatively affect the quality of your shading work.
Tips
- Consider whether it might be a good idea for you to take a course in the art of shadowing. Such a course will help you familiarize yourself with the basics.
- Practice a lot. Shadowing isn't just about following certain directions; it is an art that you have to master.
- Take your time.
- Shading is a great way to cover up any mistakes you or a previous tattoo artist may have made. You can even shade over previously made shadow mistakes.


