Author:
Frank Hunt
Date Of Creation:
14 March 2021
Update Date:
1 July 2024

Content
- To step
- Method 1 of 3: Freeze-dry plums
- Method 2 of 3: Pack plums in syrup
- Method 3 of 3: Freeze whole plums
- Necessities
If you're left with an abundance of plums this summer, freezing is a great way to preserve these fruits for 12 months, so you can enjoy them until the next crop is ready to be picked. Sweet, cold plums are delicious and can be eaten straight from the freezer. However, you could also use them to make a fruit or plum cake. Read on to learn how to freeze-dry plums, freeze them in syrup, or freeze whole plums.
To step
Method 1 of 3: Freeze-dry plums
 Pick or buy ripe plums. Select plums that have a good shape and are free of blemishes, wrinkles, or unsightly spots. Plums should be frozen when they are at their peak of ripeness, when they are deliciously sweet and full of flavor. Do not freeze plums that are still slightly green in color or overripe, as such plums will not taste well and will not have the desired texture when you thaw them.
 - Do a taste test before freezing a batch of plums. Put your teeth in one of the plums. Then, if a purplish-red juice runs down your chin and the plum is sweet and full of flavor, the remaining plums will most likely be suitable for freezing. However, if the plum tastes slightly sour and the texture is crumbly, the batch of plums is probably unsuitable for freezing.
- If the plums are a little too hard, you can choose to let them ripen at room temperature for a few days. Freeze the plums as soon as they are ripe.
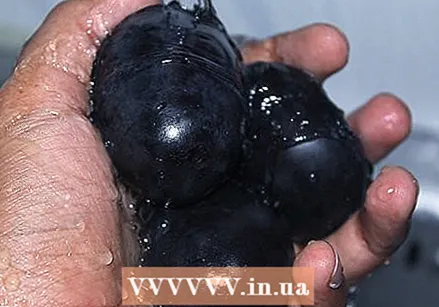 Wash the plums. Run the plums under cold water and gently rub the skin with your fingers. Rinse them well and make sure all the dirt disappears.
  Cut the plums into wedges. Using a sharp knife, cut the plums into wedges about 1 inch thick. Remove both the seeds and the stems. Keep cutting until you've cut the entire batch of plums into wedges.
 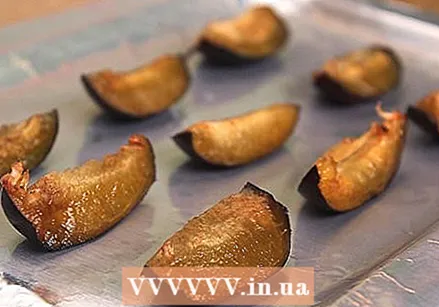 Place all wedges on a baking tray. Spread the wedges out over the baking tray, making sure they don't overlap so they don't stick together during freezing. Cover the baking tray with clear foil.
 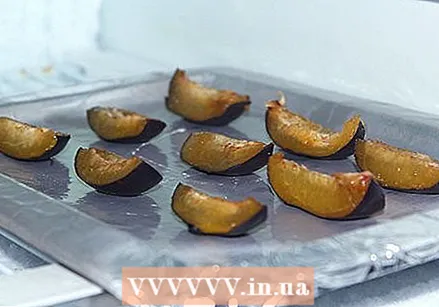 Freeze the plums until they have hardened. Place the baking tray with plums in the freezer and leave it in the freezer until the plums are hard and dry, so no longer sticky. It takes about an hour for the plums to reach this stage.
  Then put the wedges in a freezer bag and put it in the freezer. Fill the freezer bag until it is almost full, leaving about an inch of space at the top. Try to remove as much air as possible from the bag. You could use a vacuum machine, this device sucks the air out of the bag. Sucking the air out of the bag with the help of a straw before closing it is also an option. Any remaining air in the freezer bag can cause the plums to experience freezer burn more quickly.
 - Freeze-dried plum wedges can be stored in your freezer for up to six months.
- If you plan to store the plums for more than six months, wrap them in syrup to avoid freezer burn.
 Return the plums to their original state. Frozen plum wedges are perfect for adding to smoothies, fruit tarts or other desserts. They are also ideal as a decorative addition to cocktails or other fruit drinks instead of ice cubes.
Method 2 of 3: Pack plums in syrup
 Wash the ripe plums. Select plums that have a good shape and are free of blemishes, wrinkles, or unsightly spots. Test the flavor of one of the plums to determine if the batch is perfectly ripened and the plums are not too green or overripe. Rinse the plums well with cold water to remove dirt and grime.
 - If the plums are still slightly green in color, you can leave them on the counter for several days to ripen.
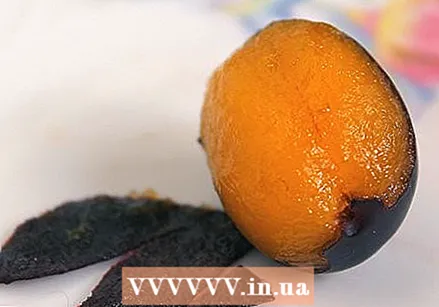 Skin the plums. Packing and freezing plums in syrup and then returning them to their original state affects the skin of the plums. As a result, the skin of the plums loses its pleasant texture and becomes a bit mushy. You can skip this step if you want to keep the skin, but it may be worth the extra effort in the long run. You can remove the skin from plums using the same technique that you use when skinning tomatoes:
 - Bring a large pot of water to a boil.
- Fill a large bowl with ice and water.
- Use a knife to carve an "x" into the skin on the end of each plum.
- Place the plums in the boiling water and blanch them for half a minute.
- Then remove the plums from the boiling water and place them in the bowl with ice for half a minute.
- Remove the plums from the bowl with ice and skim each plum by pulling away strips of skin. Blanching the plums ensures that the skin loosens, making it easy to skin them.
 Cut the plums in half and remove the stone. Use a sharp knife to cut the plums in half, try to work around the stone. Pull the two halves apart and then remove the wick. Continue this until you have cut all the plums in half and removed all pits.
 - You could also cut the plums into smaller pieces if you prefer this. However, the plums will retain their texture better if you cut them in half only once.
- If you are concerned that the plums will darken in color in the freezer, you could submerge them in a bowl of lemon juice, this will provide the pieces with a protective layer. The citric acid ensures that the plums retain their color. You could also buy a product that you can sprinkle over the plums to achieve the same effect.
- If you'd rather not cut the plums in half, you still need to remove the core. Buy a drill (similar to an apple corer) to remove the core of the plum without cutting further into the pulp.
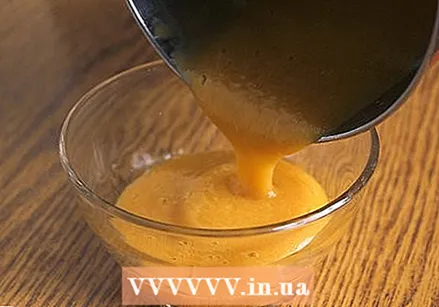
 Mix the plums with a sugar solution. Preserving plums in a sugar solution improves their flavor and keeps them fresh for longer (up to twelve months). Place the plums in a bowl and pour in just enough solution so that the plums are completely submerged. Here are some options for a sugar solution:
 - Light syrup. To make this solution, add three cups of water and one cup of sugar to a saucepan. Stir the mixture until the sugar has dissolved and then let it cool completely before pouring it over the plums.
- Heavy syrup. If you want to make a very sweet solution, add three cups of water and two cups of sugar to a saucepan. Stir the mixture until the sugar has dissolved and then let it cool completely before pouring it over the plums.
- Fruit juice. Use plum, grape or apple juice. There is no need to heat these juices; pour enough over the plums to submerge them completely.
- Plain granulated sugar. Some people use plain granulated sugar to extract the juices from the plums. This is a tasty, yet extremely sweet and sugary choice. To do this, sprinkle white granulated sugar over the bottom of your freezer container. Then add a layer of prunes. Sprinkle a layer of sugar over the plums. Keep adding layers of prunes and sugar until the container is completely full.
 Put the plums in freezer bags. Pour the plums and sugar solution into freezer bags, fill each bag, leaving about an inch of space at the top. Use a vacuum machine or straw to remove excess air from the bags. Then close the bags well. Label the freezer bags and then place them in the freezer. You can safely stack the bags in your freezer to save space.
  Defrost the plums. When you're about to use the plums, simply take them out of the freezer and let them thaw in the fridge or on the counter. The plums are edible straight from the bag. The plums wrapped in syrup are delicious as a topping for ice cream or simply with a little whipped cream.
Method 3 of 3: Freeze whole plums
 Wash the ripe plums. Especially if you are going to freeze whole plums, it is imperative that you select fresh, ripe plums that are sweet and juicy. The better the plums taste before you freeze them, the better they will taste after you thaw them. Rinse the plums well with cool water to remove dirt and grime.
 - If the plums are still slightly green in color, you can leave them on the counter for several days to ripen.
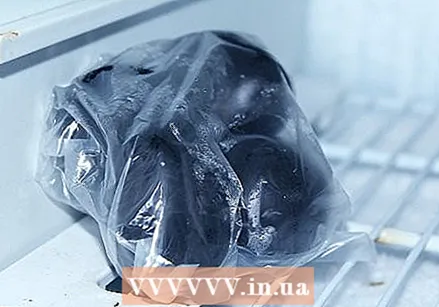 Place the plums in a freezer bag. You can place the whole, fresh plums in a freezer bag. Fill the bag until it is nearly full. Use a vacuum machine or straw to remove as much air as possible from the bag. Then label the bag and put it in the freezer.
  Eat the frozen plums. When you crave an explosion of icy, sweet deliciousness, simply grab one of the plums from the freezer and eat it right away. The texture of a frozen plum is surprisingly delicious, especially on hot days. You could also let the plum thaw on the counter for a few minutes if you prefer this.
Necessities
- Freezer
- A suitable freezer container, long and flat
- Knife and cutting board
- Date the freezer container with a marker


