Author:
Morris Wright
Date Of Creation:
24 April 2021
Update Date:
1 July 2024

Content
- To step
- Method 1 of 4: Configure Gmail
- Method 2 of 4: Yahoo! configure
- Method 3 of 4: Configuring Hotmail (Outlook.com)
- Method 4 of 4: Configuring Comcast
Tired of webmail? It can be difficult to organize and manage all your emails from a browser interface. If you are an active e-mail user, you may find Outlook a lot more convenient and powerful. You can quickly enter your email account information and start sending and receiving emails.
To step
Method 1 of 4: Configure Gmail
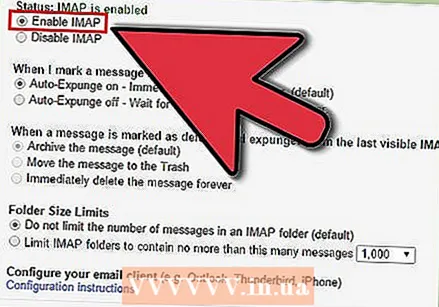 Activate IMAP in Gmail. IMAP offers two-way traffic and is less prone to message loss. IMAP is also better for checking messages from multiple devices, which is becoming more common. Messages you read in Outlook will also be marked as read in Gmail, and vice versa.
 - Log into Gmail by clicking the gear in the top right corner.
- Click Settings.
- Click on the "Forwarding and POP / IMAP" tab.
- Select the "Enable IMAP" radio button.
- Click on "Save Changes".
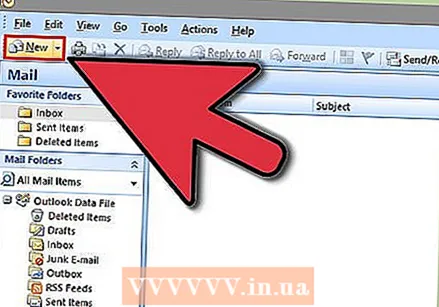
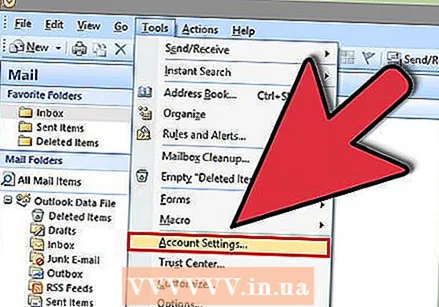 Open Outlook. Click on Tools and select "Accounts or Email Accounts" and then click on Add. If you are using Outlook 2010 or 2013, click File and select Info. Click on "+ Add Account".
 - Select "Manually configure server settings or additional server types".
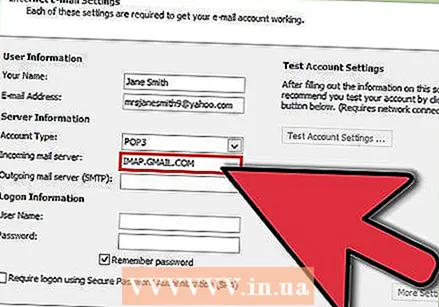 Enter the information for the incoming mail (IMAP) server. You must enter the following information to successfully connect to your Gmail account and receive email:
 - Server: imap.gmail.com
- Port: 993
- Requires SSL: Yes
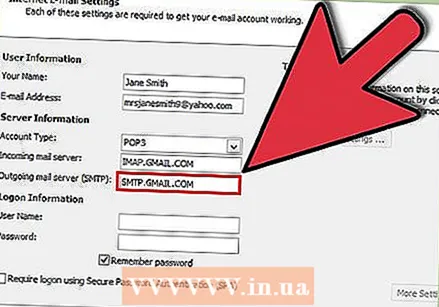 Enter the following information for your outgoing mail (SMTP). You will need to enter the following information to successfully connect to your Gmail account and send email:
 - Server: smtp.gmail.com
- Port: 465 or 587
- Requires SSL: Yes
- Requires authentication: Yes
- Use the same settings for incoming email.
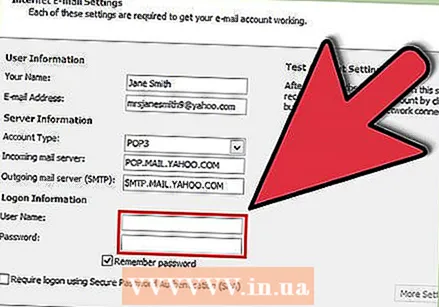
 For your account information. In addition to the details of the server, you will also have to enter the account details. This allows Outlook to log into Gmail at your request and mark messages appropriately:
 - Name: This is the name you want to show to people you message.
- Account or username: Your Gmail address ([email protected])
- Email address: Your Gmail address again.
- Password: The password for Gmail.
 Sending and receiving e-mails. Once you have configured Gmail, you can start using Outlook to email via your Gmail account. Start your life more organized by making the most of Outlook.
Method 2 of 4: Yahoo! configure
 Activate POP mail in Yahoo. Yahoo Mail only supports POP mail for remote clients, except for mobile devices. As far as Outlook is concerned, this means that you will have to use POP. With POP, email read in one client will not be marked as read in another client. This means that your Yahoo webmail mailbox and Outlook mailbox will not always be synchronized.
 - Log in to Yahoo Mail and click the gear icon in the top right corner.
- Click on Settings.
- Click Edit.
- Select POP. This option can be found to the right of "Access your Yahoo Mail elsewhere".
- Choose your POP spam option by clicking on the drop-down box. You have 3 options:
- Don't download spam email - Only your Inbox messages will be forwarded to your email client.
- Download spam with no special indicators - Spam messages will be forwarded without special indication.
- Download spam, but prefix the word "Spam" - Spam messages will be forwarded without and marked as "Spam" in your Outlook inbox.
- Click Save.
 Open Outlook. Click on Tools and select "Accounts or Email Accounts" and then click on Add. If you are using Outlook 2010 or 2013, click File and select Info. Click on "+ Add Account".
 - Select "Manually configure server settings or additional server types".
 Enter the information for the incoming e-mail (POP3). Fill in the connection settings so that Outlook can retrieve the Yahoo inbox.
 - Server: pop.mail.yahoo.com
- Port: 995
- Requires SSL: Yes
 Enter the information for the incoming mail (SMTP). Complete the following so that you can forward mail to Outlook via your Yahoo email address.
 - Server: smtp.mail.yahoo.com
- Port: 465 or 587
- Requires SSL: Yes
- Requires Authentication: Yes
 Enter your account information. In addition to entering the data from the server, you will also need to enter your account information. This allows Outlook to log into Yahoo and mark messages appropriately:
 - Name: This is the name you want to show to people you are messaging.
- Email address: Your Yahoo email address ([email protected])
- Password: Your Yahoo password.
 Click on Advanced. You will now have to choose how you want to handle downloading emails. You can either delete the mail from the Yahoo server after downloading it in Outlook, or leave a copy on Yahoo.
 - Messages deleted from the Yahoo server cannot be recovered.
 Sending and receiving e-mails. Once you have configured Yahoo, you can start using Outlook to email via your Yahoo account. Start your life more organized by making the most of Outlook.
Method 3 of 4: Configuring Hotmail (Outlook.com)
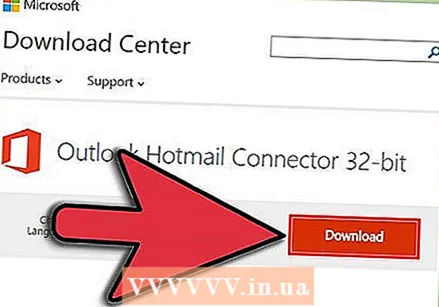 Download Outlook Connector. This program makes it possible to establish a connection between your Outlook.com (formerly Hotmail) account and Outlook. This gives you two-way communication between both clients, so that messages, contacts and calendars, among other things, are synchronized.
 - Outlook Connector is free and required to make this connection. It works with all versions of Outlook. If you have a 64-bit system, make sure to download the 64-bit version.
- Launch Connector after downloading. Follow the prompts to install the program.
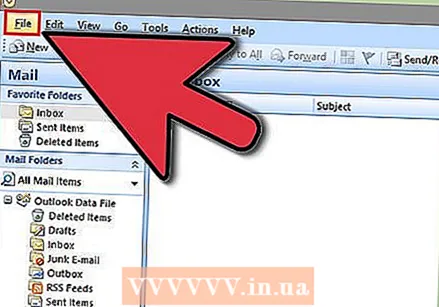 Open Outlook. Click File and select "Add Account".
  Feed your Outlook.com data. Make sure "E-mail Account" is selected. Enter the following information:
 - Your name: This is the name you want to show to people you message.
- Email address: Your Outlook.com or Hotmail email address.
- Password: Your Outlook.com or Hotmail password.
 Click Next. If you had not installed Connector yet, you will be prompted for it now. If the Connector is installed correctly, your Outlook.com account will be synchronized with Outlook.
 - If you ever change the Outlook.com password, make sure to change it in Outlook as well. You can do this via Account Settings in the File tab.
 Start using Outlook. Now that your Outlook.com account is linked, all your emails, contacts and calendars will be synchronized. You can add and remove items via the web interface or from the Outlook client.
Method 4 of 4: Configuring Comcast
 Open Outlook. Click on Tools and select "Accounts or Email Accounts" and then click on Add. If you are using Outlook 2010 or 2013, click File and select Info. Click on "+ Add Account".
 - Select "Manually configure server settings or additional server types"
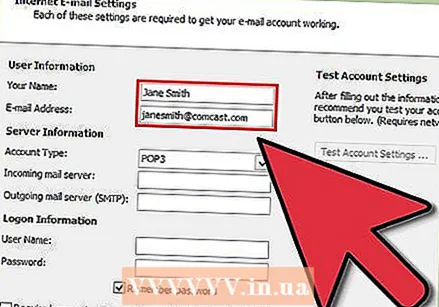 Enter your display name and your account information. The display name is the name people will see when they receive an email from you.
 - In the address field, enter the following: [email protected]
 Enter the information for the incoming e-mail (POP3). Fill in the connection settings so that Outlook can retrieve the Comcast inbox. Check the Advanced tab to be able to find all fields.
 - Server: mail.comcast.net
- Port: 995
- Requires SSL: Yes
 Enter the data for outgoing mail (SMTP). Enter the following information so that you can send email via Comcast with Outlook. Check the Advanced tab to view all fields.
 - Server: smtp.comcast.net
- Port: 465
- Requires SSL: Yes
- Requires Authentication: Yes
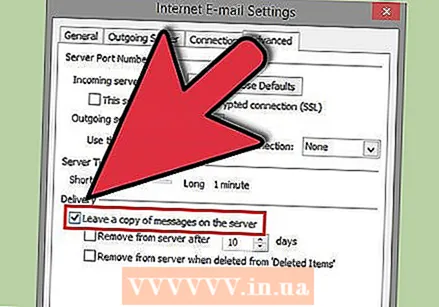 Click on Advanced. You will now have to choose how you want to handle downloading emails. You can either delete the mail from the Comcast server after downloading it in Outlook, or leave a copy on Comcast.
 - Messages deleted from the Comcast server cannot be recovered.
 Sending and receiving e-mails. Once you have set up Comcast, you can start using Outlook to email through your Comcast account. Start your life more organized by making the most of Outlook.


