Author:
Roger Morrison
Date Of Creation:
24 September 2021
Update Date:
1 July 2024

Content
- Ingredients
- Home version
- Laboratory version
- To step
- Part 1 of 3: Setting up the experiment
- Part 2 of 3: Running the experiment
- Part 3 of 3: Adapting the experiment to run in a lab
- Tips
- Warnings
- Necessities
Making elephant toothpaste is an easy and fun science experiment that you can perform at home with your children or with students in a laboratory. This creates a chemical reaction that causes a large amount of foam to seep from your bottle or measuring cylinder. The movement of the foam is like squeezing toothpaste from a tube, and the amount of foam is usually enough for an elephant to brush its teeth with.
Know that concentrated hydrogen peroxide (a stronger solution than the 3% household solution) is a strong oxidizer. It can bleach the skin and cause burns. Only perform this experiment if you have taken proper precautions and have an adult help you. Have fun, but work safely!
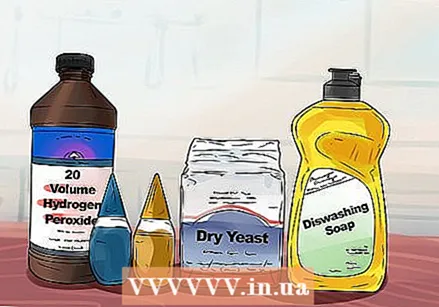
Ingredients
Home version
- 120 ml liquid hydrogen peroxide (volume 20, or a 6% solution, available at drugstores and hairdressers)
- 1 tablespoon of dry yeast
- 3 tablespoons of warm water
- Liquid dish soap
- Food coloring
- Bottles in all shapes
Laboratory version
- Food coloring (optional)
- Liquid dish soap
- Hydrogen peroxide with a strength of 30% (H.2O2)
- Saturated potassium iodide solution (KI)
- Measuring cylinder with a capacity of 1 liter
To step
Part 1 of 3: Setting up the experiment
 Check what supplies you have at home. You don't need to buy lab supplies to run this fun experiment, because most of the supplies you probably already have at home. Make a list of what you have at home and see how you can improvise if you don't have something. For example, if you don't have a 6% hydrogen peroxide solution, you can also use a 3% strength solution.
  Allow enough time to set up, run the experiment, and clean up and clean up. Remember, you can make a lot of mess in this experiment, so ask everyone who participates to help with the cleaning afterwards. Schedule enough time for everyone to participate and enjoy it.
 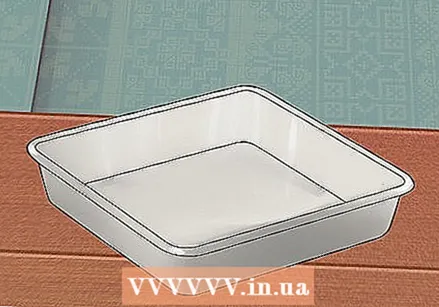 Protect the area where you are conducting the experiment. No matter how old you are, it can be a lot of fun to perform an experiment that produces a lot of foam. However, children can easily get carried away by it. Whether you want to run the experiment in a bathtub or in the garden, or use a large baking pan or a plastic container, protect your work area so that the foam only ends up in a specific area and you don't have to clean as much.
 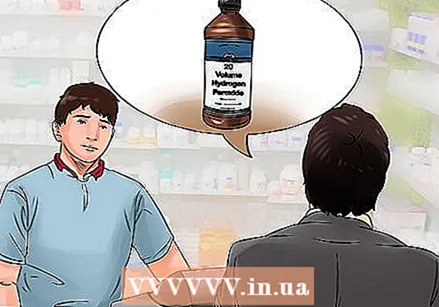 Look for hydrogen peroxide of the correct strength. The strength of the solution determines how much foam is formed. You may have a 3% hydrogen peroxide solution in your medicine cabinet, or you can go to a drugstore or pharmacy to buy a 6% strength solution. You can usually not buy a solution of this strength in the supermarket. Drugstores sell solutions containing 6% hydrogen peroxide for use as a bleaching agent.
Part 2 of 3: Running the experiment
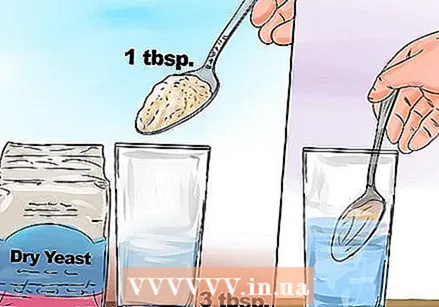 Mix 3 tablespoons of water with yeast and let the mixture stand. This step can be performed by children. Have them measure out the correct amount of yeast and mix the yeast with the correct amount of warm water. Let the children stir the mixture to break up all the lumps.
 - Depending on how old your child is, you can let him or her use a funny spoon and a stir stick. You can also have your child put on safety glasses and a lab coat. You can buy safety glasses for children at hardware stores.
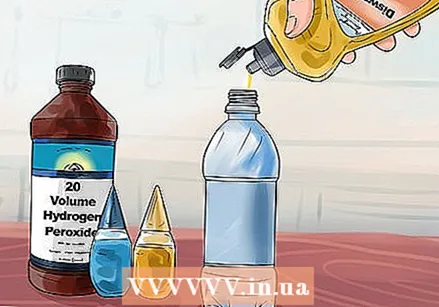 Pour dish soap, food coloring and 1 cup of hydrogen peroxide into a bottle. Make sure everyone wears gloves and goggles before working with hydrogen peroxide. Don't let the kids work with hydrogen peroxide unless you think they are old enough.
 - If your child is too young, have him or her pour the detergent and food coloring into the bottle. You can also add glitter to make it more fun. Make sure the glitter is made of plastic instead of metal, as hydrogen peroxide should not be used with metal.
- Stir the mixture yourself, or have your child do it if he or she is old enough. Be careful not to spill hydrogen peroxide.
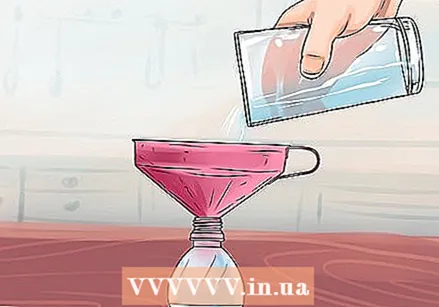 Pour the yeast mixture into the bottle through a funnel. Quickly remove the funnel and take a few steps back. You can have your child pour the yeast mixture into the funnel, but make sure he or she is far enough away from the bottle so that the foam from the bottle doesn't get on him or her. Use a low, wide bottle that remains stable. Make sure to choose a bottle with a narrow neck to enhance the effect.
 - The fungi in the yeast immediately ensure that the hydrogen peroxide is broken down and an oxygen molecule is lost. The yeast acts as a catalyst and causes a chemical reaction, namely that the hydrogen peroxide molecule loses an oxygen molecule. This loose oxygen molecule takes the form of a gas and causes soft foam bubbles to form when it comes into contact with the soap. The remainder of the mixture remains water. The gas searches for a way to escape and the foaming "toothpaste" pours out of the bottle.
- Make sure the yeast and hydrogen peroxide are well mixed for optimal effect.
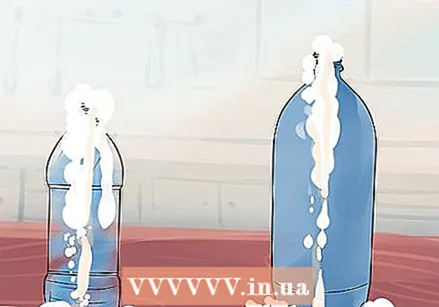 Use bottles in other sizes and shapes. If you use smaller bottles with a narrower neck, the foam will spray out of the bottle more vigorously. Experiment with bottles of different sizes and shapes to enhance the effect.
 - With a regular soda bottle and a solution containing 3% hydrogen peroxide, you will likely get a waterfall effect, just like a chocolate fountain.
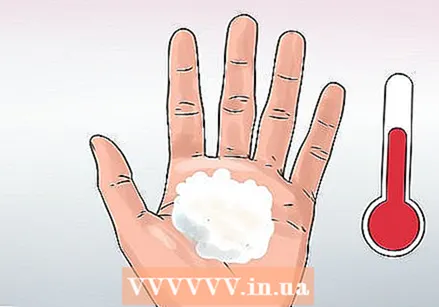 Feel the warmth. Feel the foam give off heat. This type of chemical reaction is also called an exothermic reaction because it releases heat. The heat isn't hot enough to do any damage, so you can definitely feel and play with the foam. The foam consists only of water, soap and oxygen and is therefore non-toxic.
 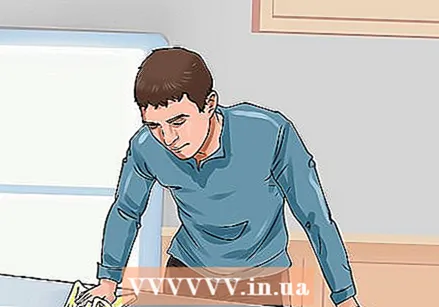 Clean up. You can clean your workplace with a sponge and throw the remaining liquid down the drain. If you used glitter, strain them out of the liquid and dispose of them in the trash before pouring the liquid down the drain.
Part 3 of 3: Adapting the experiment to run in a lab
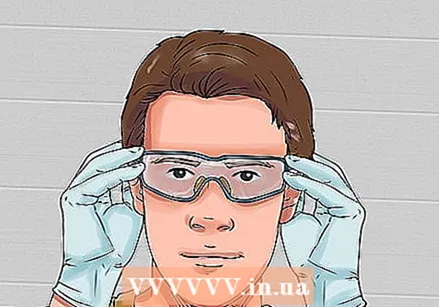 Put on gloves and goggles. The concentrated solution of hydrogen peroxide that you use in this experiment burns on the skin and in the eyes. It can also bleach fabrics, so put on old clothes.
  Pour 50 ml of hydrogen peroxide with a strength of 30% into a graduated cylinder with a capacity of 1 liter. This solution is stronger than hydrogen peroxide intended for household use. Make sure you are careful and that you place the measuring cylinder on a stable surface.
 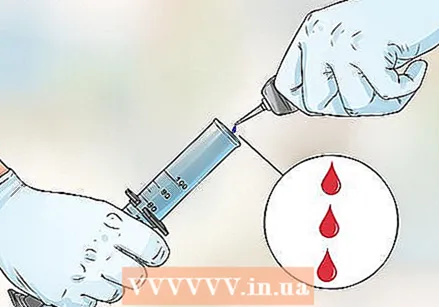 Add 3 drops of food coloring. Experiment with food coloring to create fun effects. Make fun patterns and color variations. To make striped foam, tilt the measuring cylinder and let food coloring drip down the sides.
 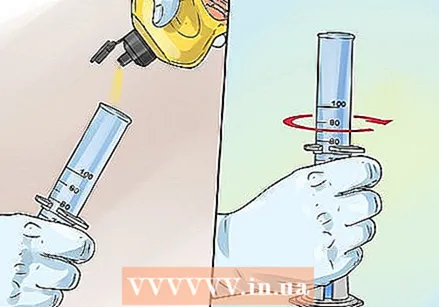 Pour about 40 ml of dishwashing liquid into the measuring cylinder and stir to mix everything. Add a small amount of liquid dish soap by pouring it down the side of the cylinder. You can also use powdered dish soap, but make sure to mix everything well.
 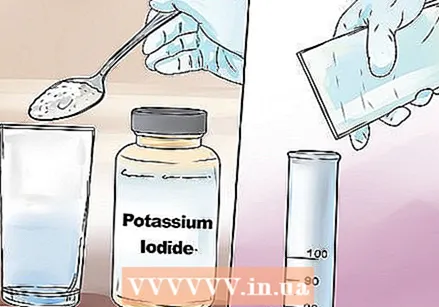 Add the potassium iodide and quickly take a few steps back. Add the potassium iodide using a spatula to create a chemical reaction. You can also dissolve the potassium iodide in an ampoule in water before adding it to the mixture. A lot of colored foam will come out of the measuring cylinder.
 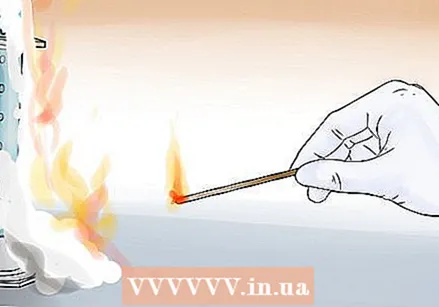 Test for oxygen. Hold a glowing wood splinter near the foam and watch the wood burn again as oxygen is released from the foam.
 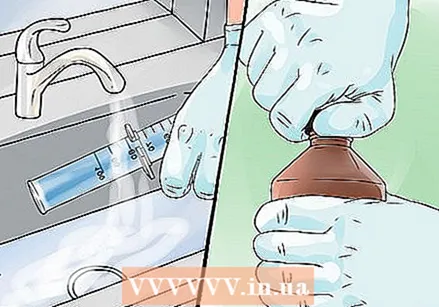 Clean up. Flush the remaining liquid down the drain along with a lot of water. Extinguish the glowing wood splinters and make sure that no more wood burns. Seal and store the hydrogen peroxide and potassium iodide bottles.
Tips
- You may notice that the chemical reaction releases heat. That is because it is an exothermic reaction, or a reaction in which energy is released.
- Keep your gloves on when disposing of the elephant toothpaste. You can pour both the foam and the liquid down the drain.
- Hydrogen peroxide (H.2O2) is broken down by itself over time, so that water (H.2O) and oxygen remains. You can speed up the process with the help of a catalyst. When a lot of oxygen is released from the hydrogen peroxide at the same time and you have mixed the hydrogen peroxide with detergent, a lot of small bubbles will quickly form.
Warnings
- Elephant toothpaste can stain.
- The foam that comes out of the bottle is only called elephant toothpaste because it is very similar to toothpaste. Do not put the toothpaste in your mouth or swallow it.
- You can only safely perform this experiment if you wear safety glasses and gloves.
- The foam will suddenly and quickly flow out of the bottle, especially with the lab version. Make sure to run the test on a washable surface that is resistant to stains. Also, avoid standing near the bottle or measuring cylinder when the foam is pouring out.
Necessities
- Safety glasses
- Disposable gloves
- A clean half liter plastic soda bottle
- Small cup
- High graduated cylinder with a capacity of at least 500 ml
- Ampoule
- Food coloring (optional)
- Liquid dishwashing liquid or powdered dishwashing detergent
- Solution with 30% hydrogen peroxide (H2O2)
- Saturated potassium iodide solution


