
Content
- To step
- Method 1 of 3: Aerate the soil in your lawn or garden
- Method 2 of 3: Add soil dryers to garden soil
- Method 3 of 3: Treat building soil quickly with lime
- Warnings
- Necessities
- Aerate soil in your lawn or garden
- Add drying agents to the garden soil
- Treat construction site quickly with lime
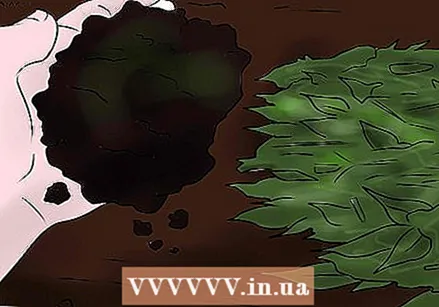
Wet soil is not only an annoying inconvenience - too much moisture in the soil can even lead to dead plants, crop failure or stability problems in the surrounding structures. The best way to dry a large amount of soil is to aerate it thoroughly and mix in natural corrective materials that do not interfere with its natural pH and composition. However, if you're in a hurry, a heavy application of a chemical drying organic supplement like lime can get the job done as well.
To step
Method 1 of 3: Aerate the soil in your lawn or garden
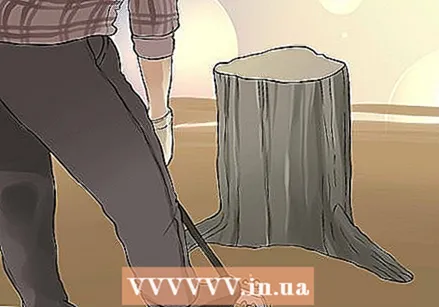 Remove large pieces of debris from the surface of the soil. Check the area you want to dry and pick up or relocate any rocks, bushes, or other ground cover on top of the ground. Removing these materials will improve the site's exposure to air and sunlight, both of which have a natural drying effect on wet soil.
 - It is especially important to remove absorbent plant debris. Dead leaves, old mulch, and rotting plant stems tend to retain water, which will only keep your soil soggy.
- If you don't clear your work area first, you also run the risk of unintentionally working the debris into the ground when you turn it up, making the problem worse.
- You can further improve air circulation and access to sunlight by pruning away sources of deep shade, such as overgrown shrubs and tall branches with thick foliage.
 Allow standing water to dry naturally. Aeration will not help dry up your soil when it is completely saturated. If there are visible puddles or pools on the surface, you should either allow the excess moisture to dissipate on its own, or resort to another more direct method, such as adding organic drying agents or lime.
 - You know your soil is ready to aerate when it feels solid. It may still be wet, but it should not be so soft that it easily loses its shape.
- As mentioned, good exposure to sunlight and air is key to quickly drying boggy soil. For this reason, it is best to plan your project for a clear, dry period when no further rainfall is expected.
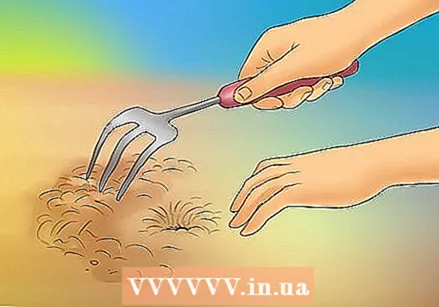
 Choose an aeration tool suitable for the size of your job site. A simple staircase aerator works best for small gardens and isolated areas of debris. A long-tined spade fork or lawn spike, rake, and strappy aerator shoes are another useful option. Each of these tools is inexpensive, intuitive, and easy to clean and maintain.
 - If you need to work more soil, it may be worthwhile to invest in a manual or motorized rotary aerator.
Tip: There are even ground aerators that you can attach to a lawn tractor or similar vehicle to toss large areas with minimal time and effort.
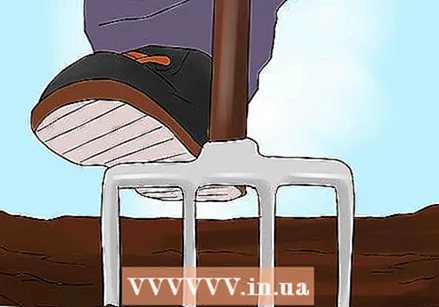
 Loosen the surface of the soil with your aeration tool. Start on one side of the site and work your way to the other. Then turn and go back in the opposite direction, using the tines of your tool to toss over a new piece of untouched soil. Continue in this manner until you have churned the entire area that you want to dry. As you work, the teeth of your aerator will open many small holes in the soil, allowing more air and sunlight to enter.
 - To use a manual soil aerator, place the tines in the ground at a 90 degree angle and place your full weight with one foot on the head of the implement to push it into the dirt.
- If you're using a rake or fork, push the tines into the ground like a spear and wiggle the long handle back and forth to loosen the soil.
- If you've opted for a pair of aeration shoes, simply tie them to your feet and walk back and forth across your work area. This way you also get a little exercise as a bonus!
- Operating an aeration machine is usually as simple as pushing a lawn mower over your work surface, but check the manufacturer's instructions to make sure you are using the attachment safely and effectively.
 Keep the aerated soil clear for the next few days. Once you are done, collect any leftover debris that your aerator has exposed. Then try to keep stones, fallen branches, extensive plant material and other material together while the elements do their thing. As long as the weather stays dry, the soil should be workable in about a week.
 - Removing large clumps of loosened dirt can give the soil more room to expand, which in turn will improve its ability to drain completely.
Method 2 of 3: Add soil dryers to garden soil
 Clear all possible obstacles that make work difficult. Start raking up shrubs, leaves, old mulch, and other dense or absorbent debris. These materials can block air and sunlight from reaching the ground below. As a result, your soil will not benefit from natural drying processes and will stay wet longer.
 - If you don't remove unwanted debris, it can end up in the ground as soon as you make the desired changes, making the ground even more soggy than before.
 Let the soil dry as much as possible overnight. After clearing your work area, leave it undisturbed for about 8-12 hours. This will give the surrounding air and sunlight some time to work their magic on the ground before you start improving it. There's no need to wait for the soil to dry completely as that would basically overshoot the mark - just make sure that any stagnant water that is present starts to recede.
 - Moisture adds a lot of weight to the soil, so it is much easier to work additives into the soil when it is partially dry.
- When time is short, it is good to start working the soil when it is still a bit soggy. Just be aware that you will have to do a lot more work.
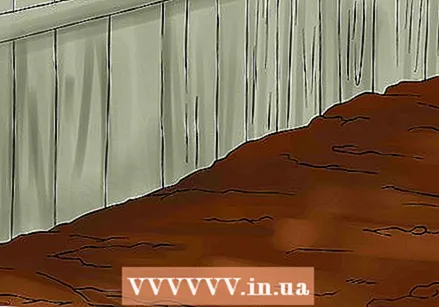
 Spread gravel over the surface of the soil. Pour one or more bags of fine (pea) gravel over your work area and spread it with a shovel or rake to an even thickness. By working a small amount of gravel into the soil, you create some non-absorbent space between the individual particles, allowing more air to enter and the soil to retain less water.
 - You can find pea gravel in a variety of sizes at any garden supply store, or in the lawn and garden department of a well-stocked hardware store.
- You can also use sand instead of gravel, provided it is not a clay soil. If you add sand to wet clay, it can become as hard as concrete.
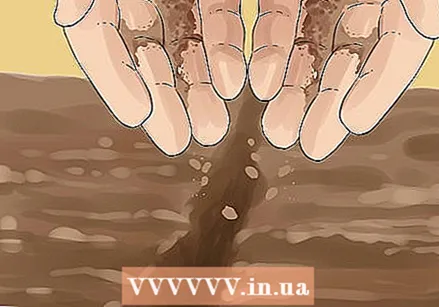
 Apply a 5-8 cm layer of the organic mixture of your choice. Scoop some balanced topsoil, compost, humus, or some other kind of nutritious material directly on top of the gravel. Spread the material evenly over your work area. You are now ready to start processing the two layers of drying materials in the bottom.
 - Adding gravel or sand to soil increases the amount of space occupied by non-nutritious components. Your organic mixtures will compensate for this effect by increasing the total nutrient content of the soil.
- You can skip this step if you don't plan on growing anything in the soil you are drying.
Tip: A good rule of thumb when working with clay soil is to use roughly 1 cubic meter of drying material for every 9 m of soil. You can get away with using a slightly lower ratio on naturally drier types of soil.
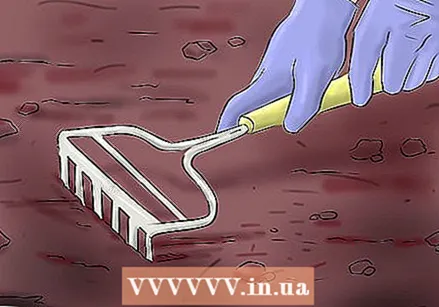
 Mix the aeration material into the soil with a shovel, rake, or hoe. Use your implement to thoroughly toss the soil over the area you want to dry. In this way, the material of the mixture is absorbed into the wet soil. For best results, work the material to a depth of at least 20 cm}} and ensure that no crowded spots or clusters are left behind.
 - Once you've worked the wet soil, the water left in the top areas should drain faster than usual. The soil will likely have less of a problem retaining moisture for a few weeks or months afterward.
Method 3 of 3: Treat building soil quickly with lime
 Buy one or more bags of quicklime or hydrated lime. There are different types of agricultural lime, each with its own unique chemical composition and practical application. It is best to use quicklime or hydrated lime to dry out saturated soil. Both products are available at most major garden and hardware stores.
 - The supplement known as "quicklime" is actually calcium oxide, while hydrated lime is more commonly known as calcium hydroxide. Both products have the same function, but quicklime is generally the faster of the two products.
- Avoid using standard agricultural lime. This type of lime is simply pulverized limestone, and will not be more effective than drying agents such as gravel or sand.
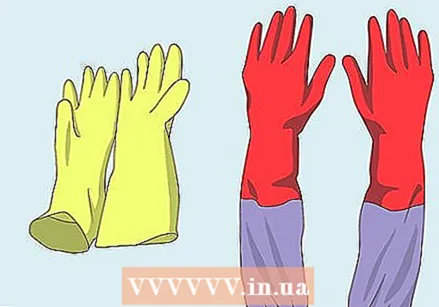 Before getting started, put on a pair of gardening gloves. Choose a pair of gloves that are made of thick, durable, layered material with no holes or excessive wear. Both quicklime and hydrated lime will cause severe chemical burns if they come into contact with bare skin.
 - While you're at it, it's a good idea to put on a face mask to avoid inhaling dust that irritates your airways.
- Long-sleeved work clothes are also highly recommended. Be careful not to touch the lime with an unprotected part of your body, especially if your skin is wet or damp.
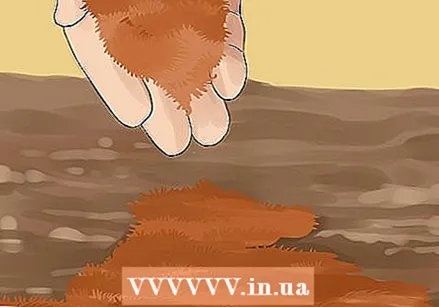
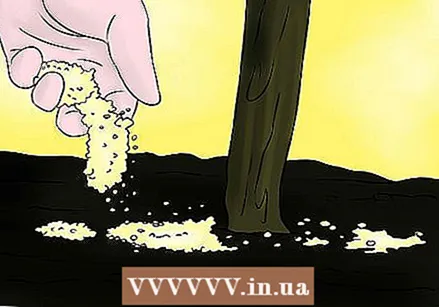 Spread at least 5 cm of lime over the surface of the soil. You can use a shovel to distribute the lime or apply it by hand exactly where you need it. If you're dealing with a large, open area, such as a cleared job site, it can help to use a pushable spreader or a pneumatic bulk truck. Cover any area you want to dry completely.
 - Try to spread the lime in an even thickness all over the job site.
- If necessary, you can apply extra lime in places with standing water or particularly muddy soil.
 Let the lime sit for 1-2 hours before continuing. During this time, the lime will begin to evaporate the excess surface water. This gives it a great advantage over slower drying methods, such as aeration and soil adjustment.
  Use a shovel, rake, or hoe to work the lime into the soil. Chop, twist and dig into the damp dirt to break it up and process the lime particles that are still on it. Try to mix the lime to a depth of at least 6 inches. The deeper you can get it, the faster and more thoroughly it will dry out your soil.
 - You may need to work the lime into the soil to a depth of 25-30 cm, if your work area is completely saturated.
- You should be able to notice a significant difference in the moisture content of your soil within about an hour of the treatment.
Warning: Keep in mind that adding lime to your soil will increase its pH level, making it more alkaline. This can negatively affect growing conditions if you plan to use the site for plant or edible crops.
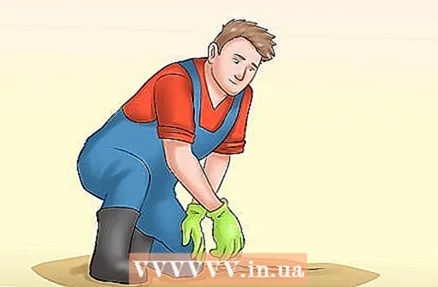 Compact the soil if you are going to build on it. Go over the entire surface with a lawn roller or hand pusher, pressing down on the treated dirt until it is firm to the touch. The soil compaction not only makes the job site more structurally stable, but also helps keep the lime in place. This should keep the soil relatively dry, even after heavy rainfall.
 - Walking back and forth over small areas of the ground has the same effect, without the need for additional tools.
- Efficient compaction of large areas may require the use of an industrial rolling device such as a sheeps foot or flat wheel.
Warnings
- The methods described here allow wet soil to dry faster than normal, but there is no guarantee that they will be good for the structural or chemical makeup of the soil, especially if you plan to use the site for cultivation of crops.
Necessities
Aerate soil in your lawn or garden
- Scoop
- Manual aeration tool (stair aerator, garden fork, rake with spikes, aeration shoes, etc.)
- Rotary aeration machine (optional)
Add drying agents to the garden soil
- Scoop
- Fine (pea) gravel
- Organic material (top soil, compost, humus, etc.)
- Sand (optional-for non-clay soil)
- Rake or hoe (optional)
Treat construction site quickly with lime
- Quicklime or hydrated lime
- Scoop
- Garden gloves
- Face mask
- Lawn roller or hand rammer
- Rake or hoe (optional)
- Industrial roller or more compact / compactor (optional)


