Author:
Frank Hunt
Date Of Creation:
14 March 2021
Update Date:
1 July 2024

Content
- To step
- Part 1 of 3: Cleaning and testing the area
- Part 2 of 3: Treating the spot
- Part 3 of 3: Protect the area and the shoes
- Tips
- Warnings
- Necessities
Leatherette shoes are a cheap and attractive alternative to real leather shoes. While they are typically more durable than their animal-based siblings, they are not immune to damage and can look ugly from scrapes or scrapes. Luckily, with a little DIY magic, you can keep your shoes looking like new.
To step
Part 1 of 3: Cleaning and testing the area
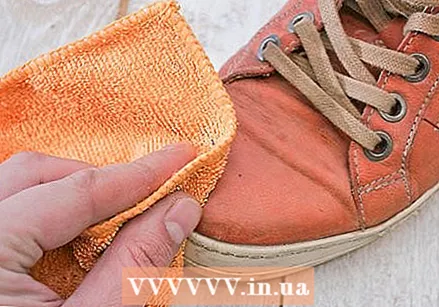 Wipe the area with a soft cloth and warm water. Then dab it with a little distilled white vinegar. Treat a small part of the damaged area with vinegar.
 - Put some distilled white vinegar on a paper towel and apply it to the area around the scratch.
- The vinegar may cause that part to swell slightly. The faux leather will cover some scratches. The vinegar cleans the area and also removes any stains, such as salt stains.
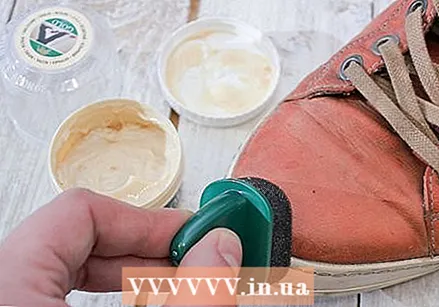 Polish the area with colorless shoe polish. After you've cleaned the shoes and applied the vinegar, wait for the area to dry. Then polish it with clear shoe polish.
 - Apply the shoe polish in a circular motion so that it is evenly distributed over the area. Use moderate pressure to distribute the shoe polish evenly without damaging the shoe.
- The transparent shoe polish does not affect the color of the shoes. By brushing with it, the affected and unaffected areas are made even.
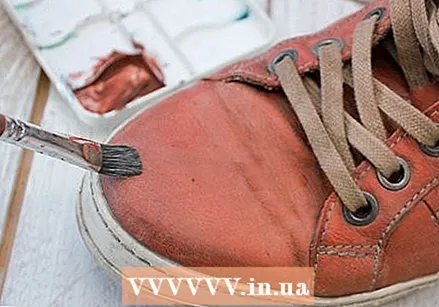
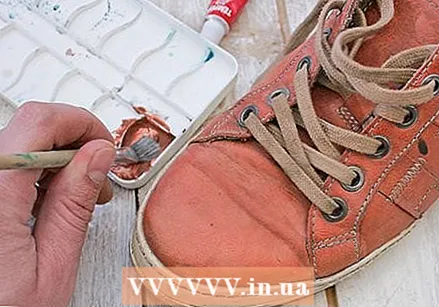 Get some acrylic paint in the same color as the shoes. Take the shoe or boot to a DIY or hobby store and match the color of the paint to the shoe color.
 - You can buy paint in a variety of finishes. Try to match the shine of the shoe with a matte or glossy paint as best you can. Acrylic paint is the best material to paint scrapes and scratches with.
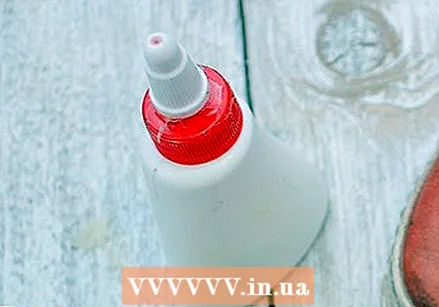 Buy a bottle of Modge Podge and / or Shoe Goo from a hobby store. Again, try to match the shine of the shoes as best you can by using matte, satin, or gloss Modge Podge.
 - Modge Podge is a kind of all-in-one glue, sealant and finish. You can use it for various craft projects and it works well for treating leatherette shoes too.
- Shoe Goo is a similar product that can be applied to shoes in a variety of ways. Shoe Goo can also be used for gluing, sealing and finishing. Shoe Goo is essentially rubber in a tube. Once applied and dried, it becomes a strong and flexible rubber-like material. Once dry, it is also translucent.
- Which of the two is better depends on the damage you are going to repair. You may want to use them both.
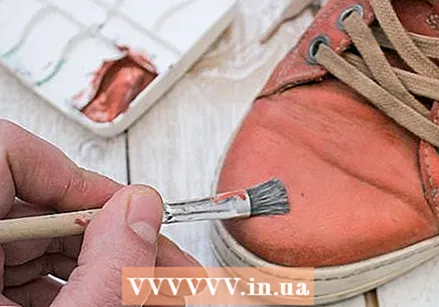
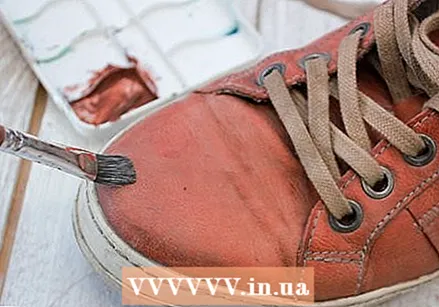 Apply a little bit of paint to the scratch. Once the polish has dried, you should dab a little paint in a less visible area to test how the paint will look on your shoe.
 - By dabbing a little bit of paint to test, you can make sure that the paint color is a good match for the shoe color.If so, then you are ready to proceed.
Part 2 of 3: Treating the spot
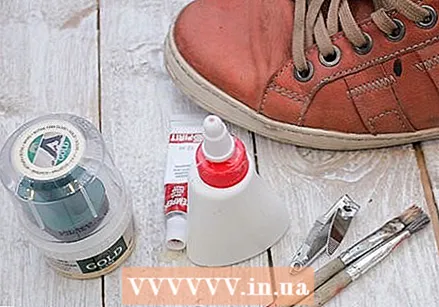 Get all repair materials. You now need the following: Modge Podge and / or Shoe Goo, paint, paint brushes, a small container for the paint, kitchen paper, shoe polish, shoe spray and a nail clipper or fine-grain sandpaper.
 - Use a small brush so that you only paint the scratches and not the larger area around the scratches.
- You can use nail clippers or fine-grit sandpaper to remove loose material around the scratches. You can work more accurately with a nail clipper. Sandpaper may be better for larger areas closer to the sole of the shoes or boots.
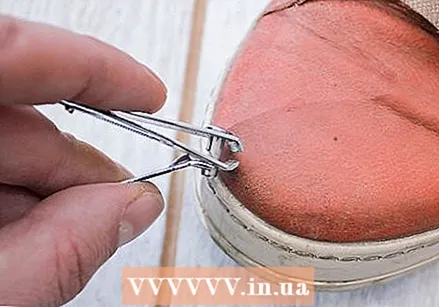 Use nail clippers to trim any material sticking or hanging from the shoe. Leatherette shoes or boots may have small flakes around the scratches. Remove these loose pieces so you can cover the scratch and not just press down on the broken spots. The zone should be as smooth as possible.
 - Again, with nail clippers or even tweezers you can remove any material on a particular area. However, if you need to fix a larger area, the sandpaper will smooth out these larger areas more effectively.
 Paint gently over the parts to be repaired. With the shoes wiped clean again and free of any excess material, it is time to paint the scratches.
 - Dip the tip of the brush in the paint. You don't need much. Less is better so that the paint doesn't apply unevenly.
- Paint the scratches with smooth strokes. Let the paint sit for a minute. Wipe the brush with a paper towel to remove any clogged paint.
 Let the paint dry and add another coat if necessary. Repeat the process adding another coat using just a little bit of paint at a time.
 - Keep applying new coats until you've painted the scratches to your liking.
- Only use a little paint with each coat. This is to prevent the paint from clumping and leaving paint bubbles on your shoes and making the affected areas look uneven.
Part 3 of 3: Protect the area and the shoes
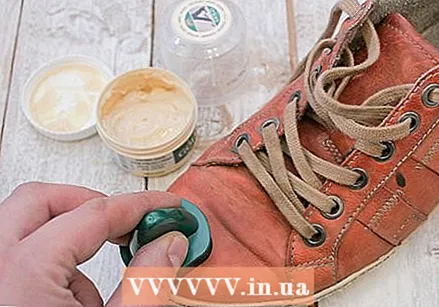
 Apply the Modge Podge or Shoe Goo. After the paint dries completely, use a very thin coat of Modge Podge or Shoe Goo and paint over the area to seal it.
 - It is best to use a different paintbrush when applying the Modge Podge or Shoe Goo. If you're only using one brush, rinse it well and wipe off any paint with a paper towel before using it.
- After applying the Modge Podge or Shoe Goo, wipe the paintbrush on a paper towel to get all the excess off. Then use the brush to gently soften the edges of the painted area so that you don't have visible lines.
- Shoe Goo is usually translucent and Modge Podge white. Don't worry if the treatment comes across as colored when painting. Once it dries it will be translucent.
 Polish your shoes with shoe polish. When everything is dry, polish your shoes or boots well with the right color polish that matches your shoe.
 - By polishing your shoes, all parts of the shoes will merge nicely. The areas that are still visible around the scratches are smoothed by the shoe polish and also give your shoes a fresh look.
- Depending on the severity of the scratches, you can apply the shoe polish after painting, but before sealing the spots. By brushing the scratched area with shoe polish and then sealing it, the shoe polish under the seal is retained longer.
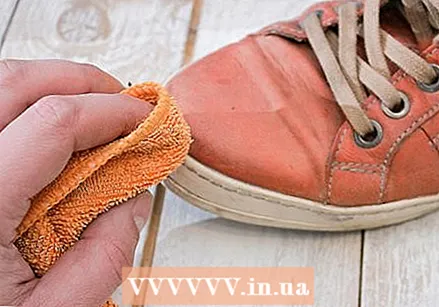 Clean all other parts of the shoes or boots. After treating the scratches, you should clean any other areas that may still be dirty or need work on. If you need to wipe the shoes almost entirely, do this before you polish them all over with shoe polish. Clean the other parts of the shoes in the same way as before, with a clean cloth, water and a little white vinegar if you need to remove salt stains or dirt.
 - Admire your great work by completely cleaning your shoes so they look like new.
- Let your shoes dry completely before putting them on. Wearing your shoes or boots before allowing them to soak and dry can cause cracks and scratches.
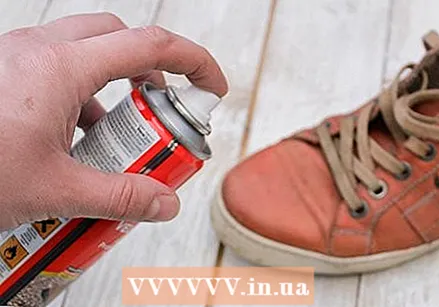 Spray and protect your shoes with a waterproof spray. Take it a step further and give your shoes or boots another piece of protection.
 - Use a waterproof spray and / or lubricant to protect your shoes from salt stains, water and dirt.
- With this extra protective step you prevent the treated areas from becoming visible again. It also prevents new spots from getting damaged.
- If you spray your shoes, do it in a ventilated area.
- Make sure the spray or lubricant used is suitable for leatherette shoes.
Tips
- Instead of paint, you can use a felt-tip pen or highlighter, depending on the sheen of the shoe and the size of the scratch.
- Work in a ventilated area when handling these types of materials. It's also a good idea to lay down newspaper so that nothing gets on the floor or any other surface.
- This method of repairing scratches works best on those parts of the shoe that do not bend. Bending can crack the paint and the Modge Podge.
- First, test the paint or shoe polish in a small hidden spot. Make sure it is the same color and blends well.
Warnings
- Make sure that no fluff or hair gets stuck in the Modge Podge during drying. Once it dries, it is permanent.
Necessities
- Paint in matching color
- Modge Podge or Shoe Goo
- Small brush (s)
- Kitchen paper, newspaper
- Nail clippers or fine-grain sandpaper
- Shoe polish and protective lubricant or spray


