Author:
Christy White
Date Of Creation:
8 May 2021
Update Date:
1 July 2024
Content
- Ingredients
- Boiled chickpeas
- Chickpeas from the slow cooker
- Roasted chickpeas
- To step
- Method 1 of 3: Boiled chickpeas
- Method 2 of 3: Chickpeas from the slow cooker
- Method 3 of 3: Roast cooked chickpeas
- Tips
- Necessities
- Boiled chickpeas
- Chickpeas from the slow cooker
- Roasted chickpeas
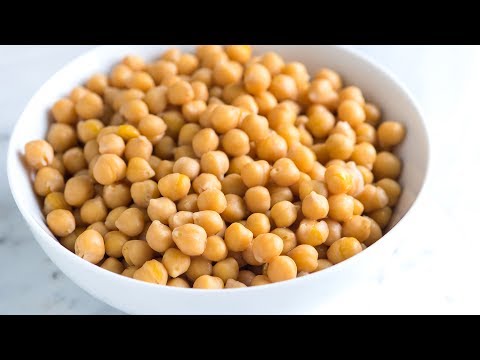
You've probably eaten cooked chickpeas before. But did you know that you can also prepare chickpeas very well in the slow cooker and even in the oven? Chickpeas are actually a round type of bean, and they are very versatile in use. They don't have much taste of their own. That is why they are a great base that you can supplement with all kinds of different flavors and spices. Of course you can make the well-known spread humus from well-cooked chickpeas, and if you let the chickpeas cook a little shorter so that they remain firmer, they are delicious in soups or salads, for example.
Ingredients
Boiled chickpeas
For 900 g of boiled chickpeas
- 450 g dried chickpeas
- 1 tablespoon of sodium bicarbonate (baking soda)
- Water
- Salt (optional)
Chickpeas from the slow cooker
For 900 g of cooked chickpeas
- 450 g dried chickpeas
- 1750 ml of water
- 1/4 teaspoon sodium bicarbonate (baking soda)
- 1 teaspoon of salt (optional)
Roasted chickpeas
For 2 persons
- 420 g canned chickpeas
- 1 1/2 tablespoons of olive oil
- 1/2 teaspoon of salt
- 1/4 teaspoon garlic powder (optional)
To step
Method 1 of 3: Boiled chickpeas
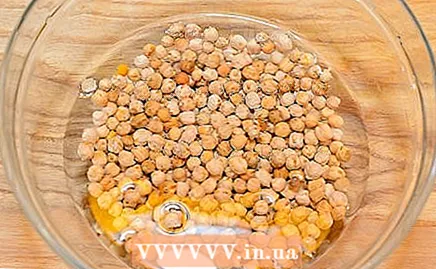 Soak the chickpeas in cold water for a week. Put the chickpeas in a stockpot or other large pan and pour water. The water should be between 8 and 10 cm higher than the chickpeas.
 - The chickpeas will absorb some of the water, so you may need to add a little more water during the soaking process. Chickpeas sometimes grow to double the size during soaking, so sometimes you need to use twice the water in relation to the amount of chickpeas you have.
- You have to soak the chickpeas for two reasons. Firstly, the chickpeas usually soften a bit during the soaking process, so you don't have to cook them as long. The other reason is that the steeping process ensures that much of the sugars in the legumes are broken down. Those sugars cause us the well-known flatulence after eating legumes. So if you soak the beans before cooking, your body can then digest them more easily.
 Add the baking soda. Now add 1 tablespoon of sodium bicarbonate aka baking soda to the water. Stir well until the baking soda is completely dissolved.
 - The baking soda is not an absolutely necessary ingredient, but adding sodium bicarbonate to the soaking water can have benefits. The molecules in the baking soda attach themselves to the sugars in the chickpeas that cause gas formation. These sugars are also called oligosaccharides. The baking soda binds to the sugars and can thus break down some of the sugars. In this way, the baking soda ensures that a large part of the substances that often cause you to feel bloated after eating peas or beans, disappear from the structure of the chickpeas.
- Be careful though, too much baking soda will add a salty or soapy taste to the water and chickpeas. So if you use baking soda, be careful with it.
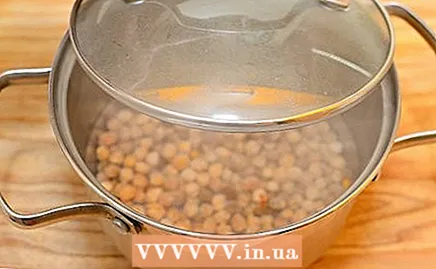
 Soak the chickpeas overnight. You should soak the chickpeas in the water for at least 8 hours.
 - Cover the chickpea pan with a clean tea towel or kitchen towel or with a lid during the soaking process. You can soak them at room temperature; you don't have to put the pan in the fridge.
 If you don't have time, you can also soak the chickpeas more quickly if you want. If you have about an hour, you can cook the chickpeas quickly and briefly in a large pot of hot water.
 - Put the chickpeas in a large saucepan and add enough water so that the water is between 8 and 10 cm higher than the chickpeas.
- Place the pan on the stove and bring the contents of the pan to a boil over high heat. Add the baking soda to the water in the pan and let the chickpeas boil quickly for 5 minutes.
- Remove the chickpea pan from the heat, cover it loosely, and soak the chickpeas in the hot water for an hour.
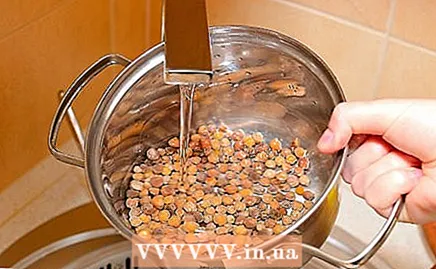
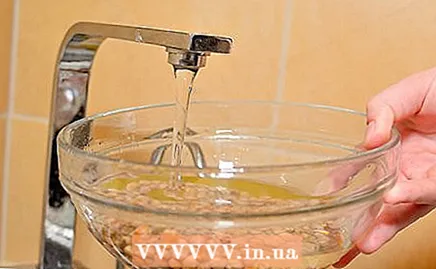
 Drain the chickpeas and rinse with cold water. Pour the water with the chickpeas into a colander and let the water drain. Then rinse the chickpeas in a strainer or colander under running water for 30 to 60 seconds. Shake them gently so that all the chickpeas are washed by the water.
 - During the soaking process, any dirt from the soaking water can settle on the outside of the chickpeas. That is why it is very important that you throw away the soaking water and then rinse the chickpeas well with clean water. It is also possible that the broken down sugars that have ended up in the water are still partly on the outside of the chickpeas, so that is also a good reason to throw away the soaking water and rinse the peas.
- Rinsing the chickpeas can also help reduce the possible aftertaste of the baking soda.
 Place the chickpeas in a large saucepan of clean water. Place the chickpeas in a clean, large saucepan and add enough water to cover the beans.
 - To give the beans a little more flavor, you can add 1/4 teaspoon of salt for every 2 liters of water in the pan. The chickpeas absorb the salt during cooking, which gives them more flavor both inside and out.
- As a general guideline, you can use about 1 liter of water for every 250 ml of soaked beans.
 Let the chickpeas simmer until tender: To do this, put the pan on the stove and bring the water to a boil over medium heat. Then lower the heat a little. The water should boil gently. Let the chickpeas cook like this for 1 to 2 hours.
 - For dishes in which you want to use hearty chickpeas, you only need to cook them for 1 hour. For dishes that require the chickpeas to be a bit softer, such as humus, you have to let them boil for about 1 1/2 to 2 hours.
 Drain the water, rinse the chickpeas and process it further in a dish of your choice. Are the chickpeas cooked enough? Then drain them again and, while still in the colander, rinse them under a cold tap for another 30 to 60 seconds. You can eat them right away, or you can use them further in a dish of your choice with chickpeas as an ingredient. You can also save the chickpeas and use it later.
Method 2 of 3: Chickpeas from the slow cooker
 Rinse the chickpeas. Place the chickpeas in a colander and rinse under cold running water for 30 to 60 minutes.
 - By rinsing the chickpeas before cooking, you can wash off any dirt from the dried beans. While rinsing, you can also check that there are not accidentally stones or smaller, dark brown peas between the chickpeas.
 Put the ingredients in a small slow cooker. Put the water, chickpeas and baking soda in a slow cooker with a capacity of about 2.5 liters. Stir gently to ensure that the baking soda is evenly distributed over the water. Make sure all chickpeas are submerged.
 - If you are going to prepare the chickpeas in the slow cooker, you do not have to soak them in advance. The chickpeas will be cooked so slowly that there is no need to soften them beforehand.
- It is advisable to use baking soda even if you prepare the chickpeas in the slow cooker. Because you skip the soaking process with this preparation method, the sugars do not have the same chance of being broken down as with the traditional cooking method. The baking soda will help break down the sugars that cause gas formation, which will make the chickpeas easier to digest once cooked.
- If you choose not to use baking soda, you can add 1 teaspoon of salt to the water instead. The salt will not break down the sugars, but it will give the chickpeas more flavor, because the peas will absorb the salt grains with the water. That way they get more flavor both inside and out.
 Cover the pan and let the chickpeas cook until they are soft. Let the chickpeas cook for 4 hours on the highest setting, or 8 to 9 hours on the lowest setting.
 - If you prefer slightly firmer chickpeas, you only need to let them cook for 2 to 3 hours.
 Drain the chickpeas and rinse well. Pour the contents of the slow cooker into a colander and drain the water. Rinse the beans in the colander under running water for 30 to 60 seconds.
 - The water in which you boiled the beans can contain a lot of dirt and sugars from the chickpeas. That's why you have to throw away the cooking water. You should also rinse the chickpeas as some of the dirt from the water may have stuck to the outside of the chickpeas.
 Serve the chickpeas or process them further in a dish of your choice. You can serve the chickpeas immediately, you can use them in a dish with chickpeas of your choice, or you can save them and use them later. In any case, it's good to know that in any recipe that uses cooked chickpeas, you can also use slow cooker chickpeas.
 - It is true that chickpeas from the slow cooker often become very soft. So it is more useful in a recipe with soft chickpeas than in a recipe for which the chickpeas still have to be a little firm.
Method 3 of 3: Roast cooked chickpeas
 Preheat the oven to 200 degrees. Grease a baking pan with some oil or cooking spray.
 - You can also use butter or even frying fat to grease the baking pan. You can also line the baking pan with aluminum foil or baking paper. Then you don't have to use any fat at all.
 Drain and rinse the chickpeas. Pour the contents of the can into a sieve or colander and drain the moisture. Rinse the chickpeas in the colander under running water for 30 to 60 seconds.
 - You can also drain the beans using the can lid. Open the can far enough for the moisture to run out, but not so far that the chickpeas fall out. Hold the can upside down over the sink and let the moisture drain out of the can through the opening. Drain as much water as possible before opening the can further.
- To rinse the chickpeas, you can also add some water to the drained beans in the can and then shake the can well. Put the lid on the can so that there is still a small hole open and pour the rinsing water away through this hole. Keep in mind that it is still best to really drain the chickpeas in a strainer or colander.
 Carefully peel the skin from the chickpeas. Spread the chickpeas between two layers of clean kitchen paper. Dry the chickpeas well by gently rolling them back and forth with the help of the top layer of kitchen paper. That way you also peel off the loose skins.
 - Just roll gently and try not to press too hard on the chickpeas. Don't force too much or accidentally crush the chickpeas.
 Roll the chickpeas in the olive oil. Place the chickpeas in a medium bowl and drizzle some olive oil over the peas. Gently shake the chickpeas with a spoon or with your hands (after washing them!) So that they are completely covered with the oil one by one.
 - The oil gives the chickpeas more flavor and also ensures that the peas get a nice color and a pleasant texture during roasting.
 Spread the chickpeas on the baking tray that you greased or lined beforehand. Spoon the oil-coated chickpeas onto the baking tray. Spread them out in a single, even layer.
 - Make sure there is only one layer of chickpeas on the baking sheet. It is therefore not the intention that they overlap. The beans should all have equal contact with the heating elements in the oven so that they roast evenly.
 Roast the chickpeas until golden brown and crispy. If you've already preheated the oven, this should take about 30 to 40 minutes.
 - While roasting, pay close attention to the chickpeas so that you can take them out of the oven right away if they threaten to burn.
 Season the chickpeas to taste and… enjoy. Sprinkle the salt and garlic powder over the roasted chickpeas and toss them gently with a wooden spoon or spatula so that they are evenly coated with the spices. Serve the roasted chickpeas as a tasty and healthy snack or snack.
 - You can of course also experiment with other herbs or herbal combinations. You can also flavor the chickpeas with paprika, chili powder, curry powder, garam masala (a spicy spice mixture from India) and even cinnamon.
Tips
- Chickpeas can make you feel less hungry at the end of the afternoon. If you supplement your daily lunch menu with a few tablespoons of chickpeas (for example in a salad or in the form of humus on bread), chances are that you will be less likely to reach for sweet, salty or fatty snacks later in the afternoon.
Necessities
Boiled chickpeas
- Stockpot or other large pan
- Tea towel or kitchen towel
- Colander or strainer
Chickpeas from the slow cooker
- Colander or strainer
- Slow cooker with a capacity of 2.5 liters
Roasted chickpeas
- Can opener
- Colander or strainer
- Baking tray
- Clean kitchen paper
- Oil or cooking spray
- Spatula


