Author:
Eugene Taylor
Date Of Creation:
7 August 2021
Update Date:
1 July 2024
Content
- To step
- Method 1 of 3: Determine how severe your injury is
- Method 2 of 3: Using a homemade splint
- Method 3 of 3: Using a commercially available splint
- Tips
- Necessities
Maybe you're exercising, lifting some boxes at work, or just having an awkward day - at least something went wrong. For example, you have fallen, and now you have bruised or broken fingers. Fingers need to be immobilized for a period of time, usually three to six weeks, to make sure they heal properly. Splinting the broken or bruised fingers will make them less likely to move. It will also increase the range of motion of all bent fingers and help extend them. You can buy finger splints from a retailer that sells medical supplies or make your own, but if your injury is too serious, you should seek immediate medical attention.
To step
Method 1 of 3: Determine how severe your injury is
 Seek immediate medical attention if any bones in your finger are visible or sticking out of the injured area. In severe cases, the force applied to a finger can be strong enough to break bones in that finger. Such an injury will require more intensive treatment than a splint.
 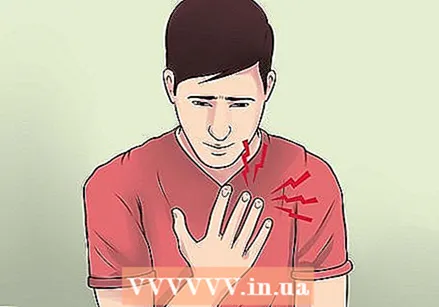 Get medical help if your finger is numb or tingly. These sensations are signs that the injured area is not getting enough blood and oxygen. You can also have nerve damage in your finger as a result of the injury.
  Have your doctor apply a splint if the injured finger appears deformed. Do not make a splint at home for such an injury. This is an indication that your finger is broken or dislocated. Part of your finger may also appear to be pointing in the other (wrong) direction and may appear shorter or longer than the other, healthy finger on your other hand. The finger is also likely to be swollen, painful, and stiff.
 - You may also have bruises on the finger due to broken small blood vessels and experience a sharp pain when you touch the finger.
- Your doctor will examine your broken finger and have it X-rayed. An X-ray is a non-invasive procedure and will help your doctor get a picture of the condition of the bones in your hands.
- Once your doctor has applied the splint, you should avoid disturbing the splint so that the injury can heal.
 Treat your injury at home if your finger is swollen and stiff, but no deformity is visible. These are all signs of a sprained finger that you can treat with a splint at home.
 - Typically, injuries to the finger occur at the distal interphalangeal joint (DIP) - these are the joints located near the fingertip - and the proximal interphalangeal joint (PIP) - these are the joints located in the center of the finger.
- Sprained fingers usually heal after 2-4 weeks. Do not apply pressure or strain on the injured finger to speed up the healing process.
Method 2 of 3: Using a homemade splint
 Clean the injured area before splinting it. Wash the wound with soap and water to prevent infections.
 - Put 3-4 drops of a solution containing povidone iodine (betadine) on a cotton swab and apply it all over the wound.
- Let it dry.
 Find two straight, sturdy objects such as two large paper clips, two popsicle sticks, or two long, sturdy pieces of cardboard. If you decide to use cardboard, make sure it is sturdy, not too thin, or soft pieces of cardboard.
 - If you can't find two similar objects, it is fine to use two different objects, as long as they are straight and sturdy and about 1 cm wide.
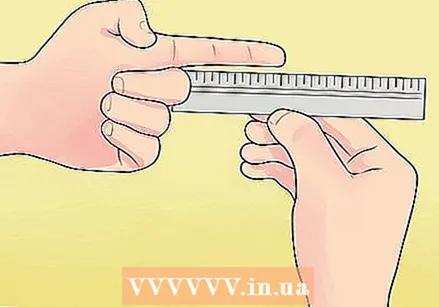 Measure the length of your finger to determine the size of the cardboard splint. If you're using two pieces of cardboard, make sure both pieces are long enough to cover your injured finger.
 - If the injury is on the distal interphalangeal joint or the joints near the fingertip, measure the length of your finger by placing the end of the tape measure on the fingertip and measure to the center of the finger.
- If the lesion is on the proximal interphalangeal joint or the joints in the center of the finger, start measuring from the fingertip to the base of the finger.
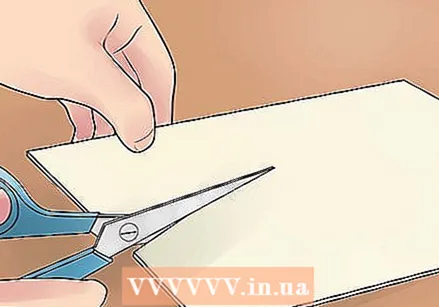 Cut the cardboard according to the length of your finger. Cut two pieces: one piece that will be on top and one piece that will be placed on the bottom of the injured finger. Make sure that both pieces of cardboard can cover the entire top and bottom of the injured finger.
 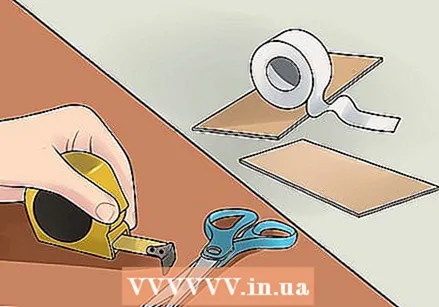 Gather your materials. You will need two straight, narrow objects (preferably two pieces of cardboard), a tape measure, a roll of medical tape, and a pair of scissors.
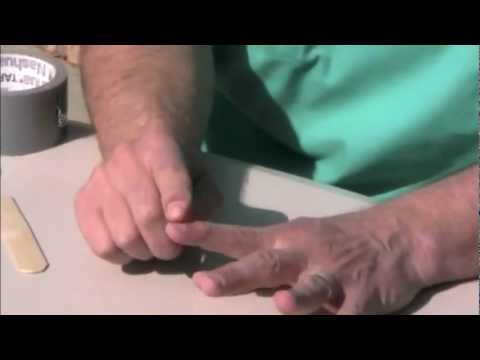
  Apply the splint. Place a splint on the top of the finger. Then put a splint on the bottom of the finger.
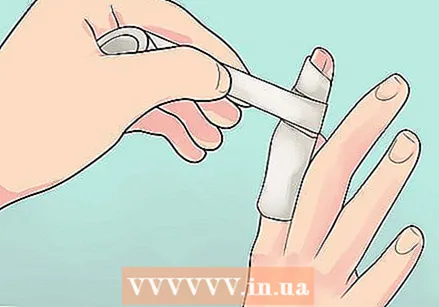
 - Wrap at least 2-3 layers of medical tape around the top of your finger. Then wrap at least 2-3 layers of medical tape around the bottom of your finger.
- Tape between the first and second knuckles of the injured finger.
- Be careful not to move or bend your finger when applying the splint, as movement can cause further injury. Keep your finger as straight as possible.
 Make sure the splint is on your finger. Do not wrap the medical tape on your finger too tightly or too loosely. If the tape is too tight, it will impede blood circulation to your finger. Your finger may turn slightly blue and the pain may intensify. If the tape is too loose, the finger will not stabilize properly, allowing the finger to move in the splint. Neither scenario will benefit your injured finger.
 - Squeeze the nail of your injured finger for three seconds to check blood circulation. The splinted finger has good blood circulation when it returns to its pink-hued appearance in less than three seconds. If it doesn't turn pink after three seconds, the splint is probably too tight and restricting blood flow. Remove and reapply the splint or adjust as needed.
 Use the finger next to your injured finger as a splint. Tape the two fingers together to give your injured finger more support.
 - Wrap at least 2-3 layers of medical tape around the top of the two fingers. Then wrap at least 2-3 layers of medical tape around the bottom of the two fingers.
Method 3 of 3: Using a commercially available splint
 Measure your injured finger. Ready-to-use splints are available in different sizes and have openings for good ventilation.If you can buy your own, applying the finger splint is easy, but if you can't buy it yourself and a friend or family member needs to do this for you, measure your injured finger so that the splint will fit properly.
 - Retail splints have size information on their packaging, such as small, medium or large.
- To measure your finger, determine the circumference of the injured finger using a tape measure. If the injury is on the distal interphalangeal joint, determine the length of your finger by placing the tip of the tape measure on the tip of the finger, toward the center of the finger. If the lesion is on the proximal interphalangeal joint, measure from the tip of the finger to the base of the finger.
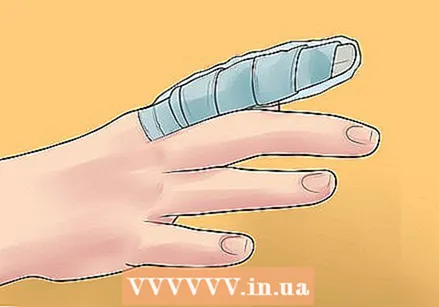
 Purchase a ready-to-use splint from a medical supply store or online. The most common splint available is the fold-out finger splint.
 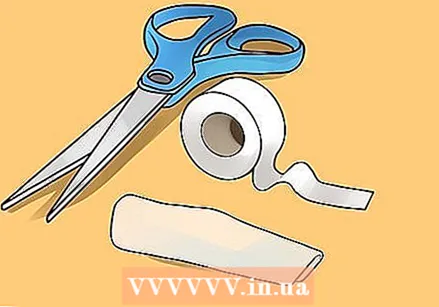 Prepare your equipment. You will need a ready-to-use splint, a roll of medical tape, and scissors.
 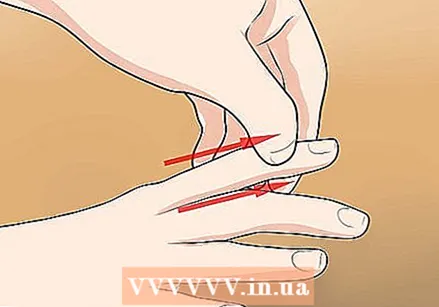 Support the injured finger with your other hand and gently straighten it. Then place the purchased splint on the injured finger until it sits perfectly and comfortably. Keep the affected finger in a straight position.
 - If you're using a fold-out finger splint, slide your injured finger into the bottom of the padded splint. The folded part of the splint should be at the tip of the finger.
- If the broken finger is at an odd angle and cannot be straightened, see a doctor immediately.
 Attach the finger to the splint by taping it around the base of the finger. Make sure the tape touches the skin so that the splint is secure.
 - Apply two layers of tape on the top of the finger and two layers of tape on the bottom of the finger.
- Once you are done wrapping the finger with tape, cut the tape with scissors.
 Squeeze the nail of your injured finger for three seconds. This will check the blood circulation of the splinted finger. The splinted finger has good blood circulation when it returns to its pink-hued appearance in less than three seconds. If it doesn't turn pink after three seconds, the splint is probably over-tightened and is restricting blood flow.
 - If the splint is too tight, remove and reapply until it is firm, rather than too tight or too loose.
 Avoid getting the splinted finger wet. This can make the skin around the injury moist and itchy, increasing the risk of skin breakdown and the development of wounds (which can become infected if they come into contact with the dirty surface of the splint).
 - While taking a bath, cover the splinted area with a double layer of plastic and tape the edges so that the splint does not get wet.
Tips
- Injuries to fingers, especially sprains, usually take about 4-6 weeks to heal.
- Once your finger has healed and the splint can be removed, make sure to move your fingers to avoid stiffness.
Necessities
- Solution with povidone iodine (betadine)
- Cotton wool
- Roll medical tape
- Scissors
- Two pieces of cardboard or two straight, narrow objects
- Bought splint
- Measuring tape


