Author:
Roger Morrison
Date Of Creation:
20 September 2021
Update Date:
1 July 2024
Content
Java is used by many programs and websites. It will not be automatically installed on your Ubuntu computer. The fastest way to install Java is to use the Terminal. You can install and use Java and the browser plug-in within minutes.
To step
 Open the Terminal. The Terminal icon can be found on your desktop or in the Applications folder. You can also click Ctrl+Alt+T. to press.
 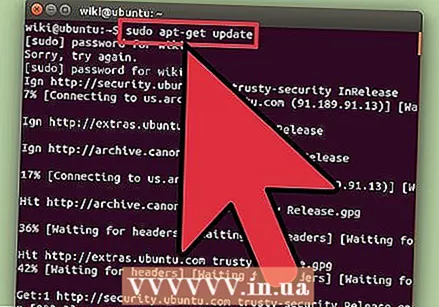 Update your software resources. Update your package manager to get the latest versions.
 - Tap sudo apt-get update and press ↵ Enter.
 Check if you already have Java installed. You can check if you already have an older version of Java installed.
 - Tap java version and busy ↵ Enter. If you have Java 6 or older, you must install the latest version.
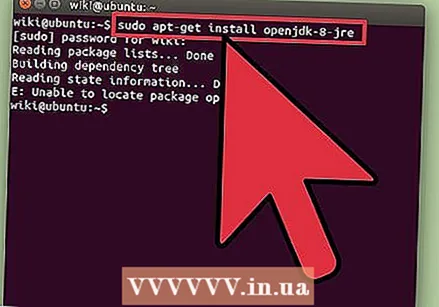 Install Java Runtime Environment (JRE). This is the software needed to run Java applications. OpenJDK is one of the best supported runtime environments.
 - Tap sudo apt-get install openjdk-14-jre and press ↵ Enter. This is how you install OpenJDK 14, which is the latest version for Ubuntu 16.04 and higher.
- If you need an older version, for example OpenJDK 8, then tap sudo apt-get install openjdk-8-jre. Unless you really need an older version, choose OpenJDK 14.
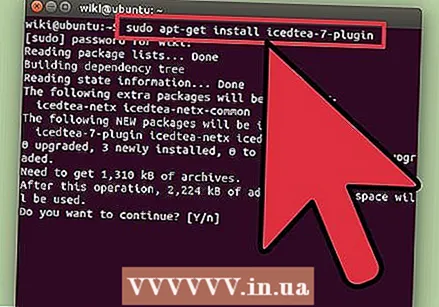 Install the Java plugin called IcedTea. You need this plugin to make Java work on websites. This plugin works in Firefox, Chromium, Chrome, Konqueror and Epiphany.
 - Tap sudo apt-get install icedtea-14 plugin and press ↵ Enter. You must restart your browser if you are currently using it.
- If you have OpenJDK 8 installed, tap sudo apt-get install icedtea-8 plugin.
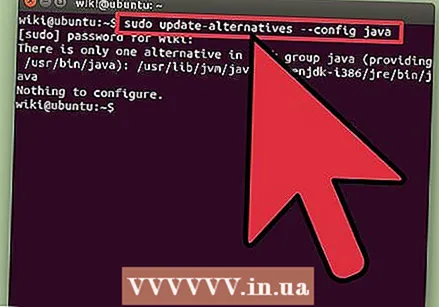 Choose which version of Java you want to use. If you have multiple versions of Java installed, you can indicate which version Ubuntu should use.
 - Tap sudo update-alternatives --config java and press ↵ Enter. Now you will see a list of all versions of Java you have installed. Use the number buttons to select the desired version. Press ↵ Enter to start using the selected version.
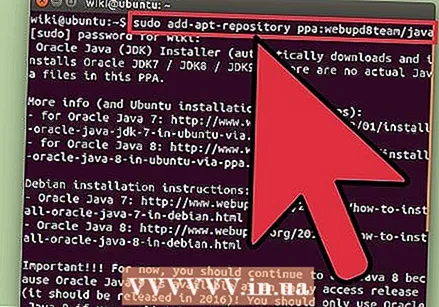 Install the latest version of Oracle Java. If you want to use the latest version of Oracle Java, you can install it yourself. For most users it is not necessary to do this. OpenJDK 14 is sufficient for almost all normal Java applications. Oracle Java is no longer in Ubuntu software sources due to licensing issues, so you will need to download and install it from another source.
 - Tap sudo add-apt-repository ppa: webupd8team / java and press ↵ Enter. This is how you add a software source from a reliable Linux website (webupd8.org). This is almost the easiest way to install the latest version of Oracle Java.
- Tap on sudo apt-get update and press ↵ Enter. Your package manager will be updated with the new software source.
- Tap sudo apt-get install oracle-java14-installer and press ↵ Enter. The latest runtime environment will be installed in this way. You will now need to read and accept the license agreement.


