Author:
Robert Simon
Date Of Creation:
23 June 2021
Update Date:
1 July 2024

Content
- To step
- Part 1 of 3: Installing a hydroponic system
- Part 2 of 3: Growing tomatoes
- Part 3 of 3: Creating ideal growing conditions
- Necessities
Hydroponic tomatoes are grown in a nutrient solution rather than soil, although they are usually placed in non-soil material that supports the roots and retains the nutrients. Growing tomatoes hydroponically allows the grower to grow in a controlled environment with less risk of disease, faster growth and a higher yield. However, growing hydroponically is much less labor intensive and sometimes a bit more expensive than traditional growing tomatoes, especially if you haven't installed or used a hydroponic based system before.
To step
Part 1 of 3: Installing a hydroponic system
 Decide what kind of system you will use. Several types of hydroponic systems exist, and tomatoes of any variety will thrive. The directions in this section will teach you how to build an "ebb and flow" system, which is relatively inexpensive and simple to set up. This system is also known as a flood and drainage system because it floods the plants with the nutrient solution and then drains the solution when it is about two inches from the top of the container.
"Alternatives":
"Deep water culture": a simple system for cherry tomatoes and other small plants.
"Multi flow": a larger version of the ebb and flow system that uses gravity. Difficult to build, but it will support more plants.
"Nutrient Film Technique (NFT)": Suspend the plants so that the roots touch the slope of dripping nutrients. A bit more expensive and finer, but some commercial growers opt for this system.- "Note": Hydroponics shops and home and garden centers often sell hydropony kits that include everything to set up a system. Alternatively, it is possible to buy each part individually. Often you can even find these things at home. Thoroughly clean pre-owned or previously used parts before installing the hydroponic system.
 Find a suitable place. A hydroponic system is only suitable for outside or in a greenhouse. It requires precise control to function properly, so it must be installed somewhere closed from the outside and from other rooms. This makes it possible to set the temperature and humidity so that they can be precisely controlled for optimal growth.
 - It is possible to grow hydroponically using natural light, but always keep the system under glass or under a polyethylene roof, such as a greenhouse roof, and never out in the open.
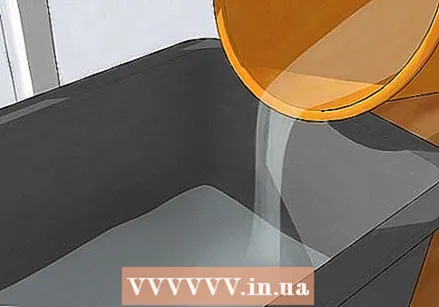 Fill a large plastic container with water to use as a reservoir. Use a plastic container that does not let in light to prevent algae from growing. The larger this reservoir, the more stable and better the hydroponic system will be. Each tomato plant requires approximately 10.5 liters of a nutrient solution. However, there are many factors that can cause the tomato plants to consume water more quickly. Therefore, it is recommended that you use a container that can hold "double" the minimum amount of water.
 - You can use a plastic bucket or a trash can for this. Use a new one to avoid possible contamination of the system. Otherwise, use one that has been used little and has been scrubbed and rinsed thoroughly with soapy water.
- Collected rainwater may be better suited for hydroponics than tap water, especially when it is particularly "hard" tap water with a high mineral content.
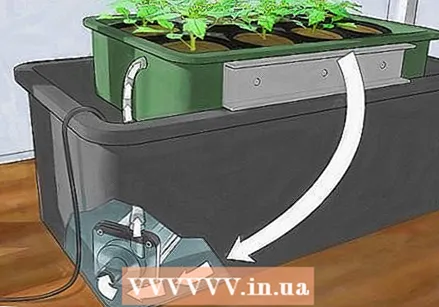
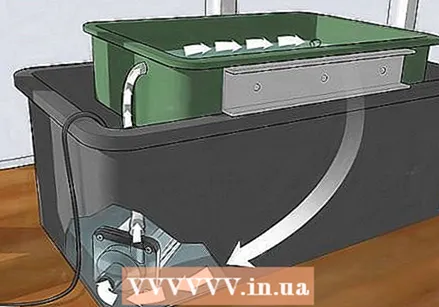
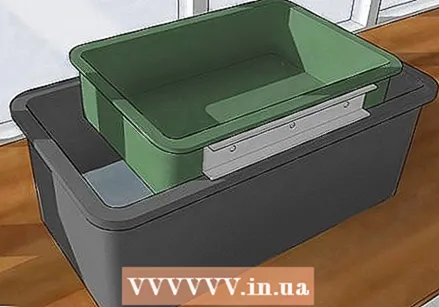 Install a bowl above the reservoir. This "ebb and flow" bowl will support the tomato plants and will occasionally be flooded with water and nutrients that will be absorbed by the roots. It must be sturdy enough to support your plants (or it must be placed on top of additional support) and it must be placed higher than the reservoir to allow excess water to drain into it. These are usually made of plastic rather than metal. This is to prevent rust from affecting your plants and wearing down the shell.
 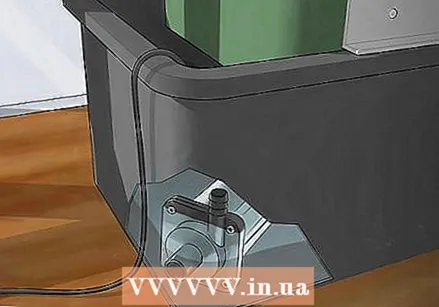 Install a water pump in the reservoir. You can buy one at a hydroponics store or you can opt for a fountain pump. Many pumps have a graph showing the water flow at different heights. You can use this to find a pump powerful enough to send the water from the reservoir to the bowl with the plants. However, the best way is to choose a powerful, customizable pump and experiment with the settings once you have the system installed.
 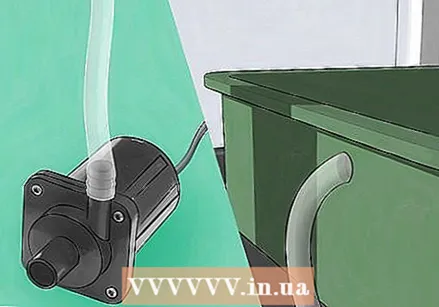 Install fill tubes between the reservoir and the bowl. Use 1/2 inch PVC tubing or the tubing that came in your hydropony kit. Connect the water pump to the bowl so that the bowl can overflow to the height of the tomato plants.
 - Place the incoming and outgoing pipes at opposite ends of the bowl to stimulate water circulation.
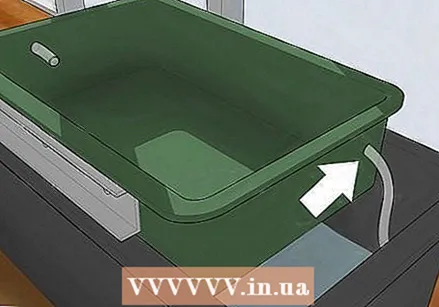 Install an overflow that leads back to the reservoir. Attach a second PVC pipe to the shell with an overflow at the level of the bottom roots. When the water rises above this level, it will flow back to the reservoir via this tube.
 - Remember that the overflow tube must be a larger diameter than the incoming tube from the pump. This is to prevent flooding.
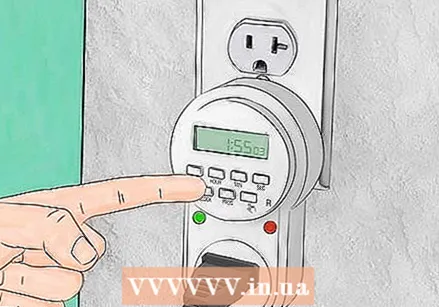
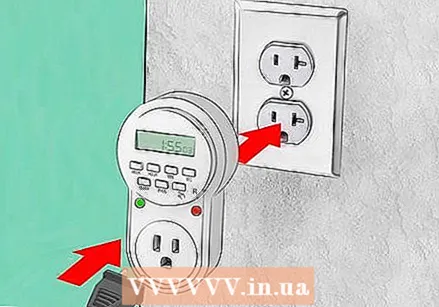 Install a timer on the water pump. A simple timer intended for lighting can be used to turn on the water pump at regular intervals. This should be adjustable so that you can increase or decrease the amount of nutrients supplied depending on the life stage of the plant.
 - Recommended is a heavy duty 15 amp timer with a water resistant cover.
- A timer can be installed on any water pump, if not already available, but the exact guidelines may vary by model. Contact the manufacturer if you have any problems with this step.
 Test the system. Turn on the water pump and see what happens to the water. If the water fails to reach the bowl or if excess water spills over the edges of the bowl, it may be necessary to adjust your water pump settings or drain pipe dimensions. Once the water is set to the correct power, you should check the timer to see if the pump turns on at the specific times.
Part 2 of 3: Growing tomatoes
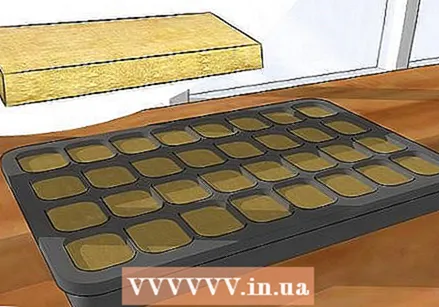 Grow tomato seeds in a special material. Grow your tomato plants from seed if possible. If you bring the plants indoors from the outside, you may introduce pests and diseases into your hydroponic system. Plant seeds in a seed tray with a special hydroponic growing material instead of regular soil. Soak the material in water with a pH of 4.5 before use. To do this, use a pH test kit from a garden supply store. Plant the seed below the soil surface and keep it under plastic domes or some other clear material to trap moisture and encourage the germination process.
"Growth materials:"
"Rock Wool": Excellent for tomatoes, but wear a mask and gloves to avoid irritation.
"Coconut Fibers": Excellent choice, especially mixed with small "growth stones". Low quality products may require rinsing due to the salt content.
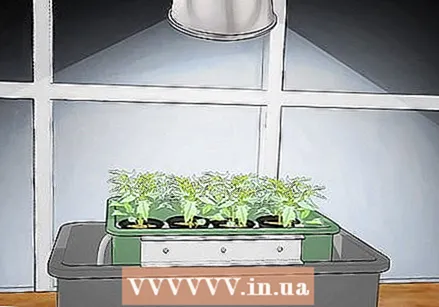
"Perlite": Cheap and moderately effective, but washed away by an ebb and flow system. Best mixed with 25% vermiculite.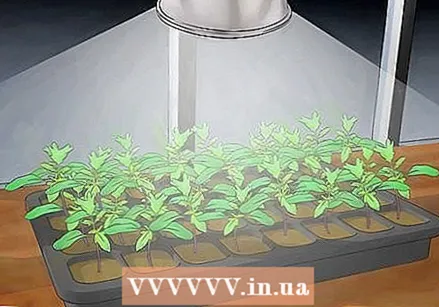 Once the seedlings have germinated, place them under artificial light. Once the plants sprout, remove the cover and place the seedlings under a light source for at least 12 hours a day. Only use incandescent bulbs as a last resort, as they produce more heat than the other alternatives.
 - See the section on installing a hydroponic system to learn more about lighting options.
- Make sure that no light shines on the roots as this can lead to damage. If roots bulge out of the starting material before they are ready to be transplanted, it may be necessary to soak and use additional starting material to cover these roots.
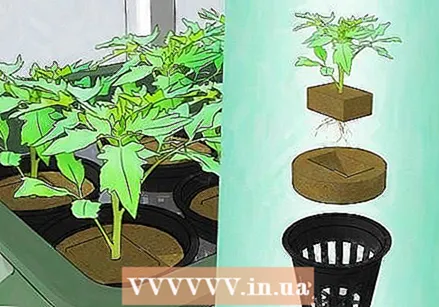 Move the seedlings to the hydroponic system. Wait until the roots start to emerge from the bottom of the seed tray and until the first "true leaf" is visible. This leaf is larger and looks different from the first few "seed leaves." Nap usually lasts 10-14 days. When moving them to the hydroponic system, place them 25 - 30 cm apart in a layer of the same material or move them to individual plastic "net pots" containing the same material.
 - If you are using the ebb and flow system described above, then you should put the plants on the tray. Other systems may require the plants to be placed in a tray, along a slope or anywhere where the water and nutrients can reach the roots.
 Set the timer of the water pump. Start by running the pump every 2.5 hours for 30 minutes. Run the pump at least every 2.5 hours. Keep an eye on the plants: you need to increase the frequency of watering when they start to wilt and decrease when the roots become slimy or drenched. Ideally, the material the plants are in should dry out a little when the next watering cycle begins.
 - Even when the watering cycle is established, it may be necessary to increase the frequency of watering once the plants flower and bear fruit, as this requires additional watering.
 Install your artificial light (if applicable). For ideal growing conditions, expose tomato plants to 16 to 18 hours of light per day. After that, turn the lights off and leave them in total darkness for about 8 hours. The plants will also grow when you use sunlight, but they are probably less likely to grow.
 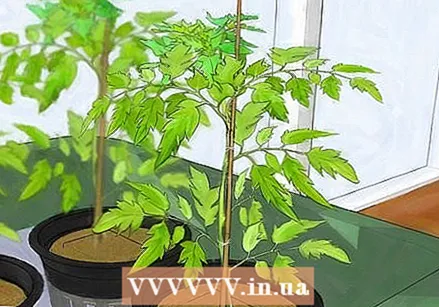 Support and prune large tomato plants. Some tomato plants are "fixed," which means that they grow to a certain height and then stop. Others keep growing and may require being gently tied to a stake in order to grow straight. Prune them by snapping off stems with your hands instead of cutting them.
 - Remember that certain tomato plants will also grow without support, but you run the risk of a small harvest if you don't support them. When the plants bear fruit, they can tilt, allowing the fruit to come into contact with the growing medium.
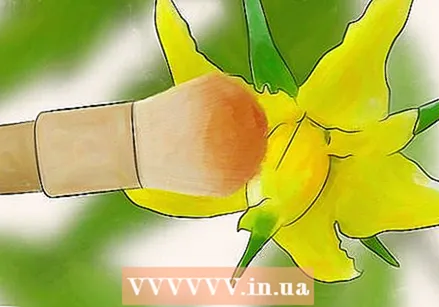 Fertilize the blossoms of the tomato plant. When tomato plants bloom you will have to fertilize them yourself, as there will be no insects in the hydroponic environment to do this. Wait for the petals to bend backwards to expose the round pistil and the pollen-covered stamens or the long thin rods in the center of the flower. Use a soft brush on each of the pollen-covered stamens, then touch the rounded end of the pistil. Repeat this every day.
Part 3 of 3: Creating ideal growing conditions
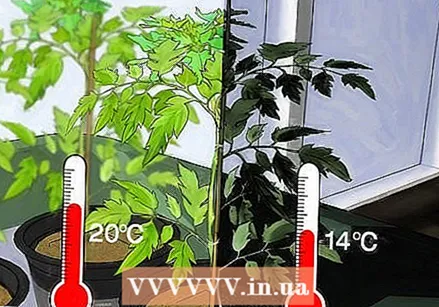 Check the temperature. During the day, the air temperature should fluctuate between 18 - 24 C °. Use temperature controllers and fans to regulate the air temperature. Monitor the temperature while the plants are growing, as this can change according to the climate or the life stage of your tomato plants.
 - Also pay attention to the temperature of the growing solution. This ideally fluctuates between 20 - 22 C °. However, you shouldn't keep this exactly between these values. It is okay if there is a small variation on it. However, avoid letting the growth solution cool to less than 15.5 C ° or allow it to warm to more than 26.5 C °.
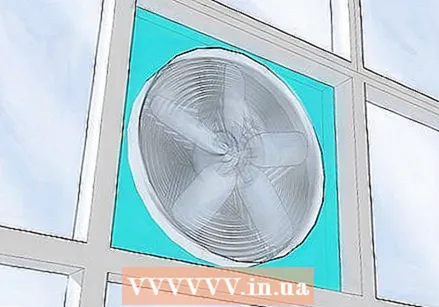 Run a fan in the room (optional). A fan with an outlet to another room can help keep the temperature in the room constant. The airflow it creates also facilitates pollination, although it is recommended to pollinate manually if you want to be sure of fruit.
 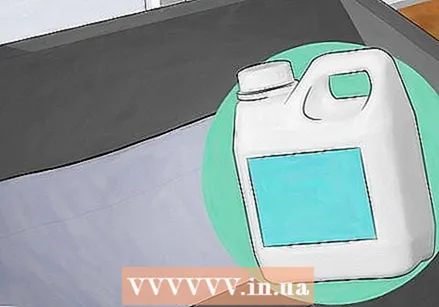 Add a nutrient solution to the water tank. Choose a nutrient solution for hydroponics instead of normal fertilizers. Avoid "organic" solutions, as these can decompose and complicate maintaining your system. Because the requirements of your system may vary depending on the tomato variety and mineral content of your water, you may need to adjust the amount or type of nutrient solutions you use. However, to begin with, you should follow the guidelines on the package to determine how much to add to the reservoir.
 - Nutrient solutions consisting of two parts ensure less waste and can be adjusted in case of problems simply by mixing them in different quantities, making them better than nutrient solutions made from one part.
- You can choose a growth-focused composition as your tomato plants grow and then switch to a bloom-focused composition once they start to bloom. In this way you meet the new need for nutrients.
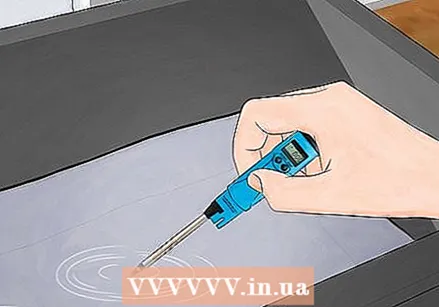
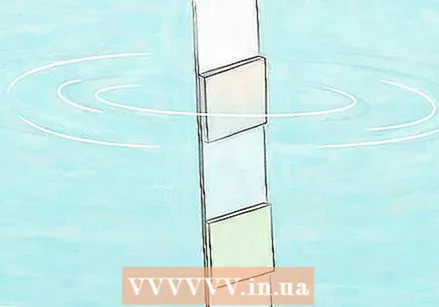 Use a pH test kit to check the water. Once it is time to get an even mixture, use a pH test kit or litmus paper to check the pH of your nutrient and water mixture. If the pH is not between 5.8 - 6.3, you can ask at a hydroponics shop which materials can be used to increase or decrease the pH. You can adjust the pH with acid or base additions to the reservoir.
 - Phosphoric acid can be used to lower the pH, potassium hydroxide is useful to increase the pH.
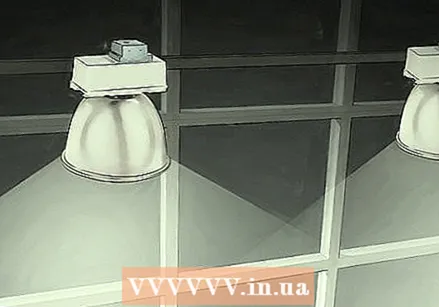 Install grow lights (recommended). Artificial "grow lights" allow you to simulate ideal growing conditions all year round, allowing tomato plants to receive many more hours of "sunlight" than if grown outdoors. This is one of the greatest benefits of an indoor growing system. However, if you are using a greenhouse or a place that receives a lot of natural light, then it is possible to accept a shorter growing season and thus save on your electricity bill.
 - Fluorescent lights most accurately simulate sunlight, making them a popular choice for hydroponic systems. Fluorescent, sodium and LED lights are also available, but these can cause slow or differently shaped growth. Avoid incandescent bulbs as they are ineffective and have a shorter life than the other options.
 Check the water regularly. An electronic conductivity meter or "EC meter" may be expensive, but it is the best way to measure the concentration of nutrients in the water. Results outside of 2.0–3.5 indicate that some or all of the water needs to be replaced. Testing with an EC meter works best when you use a two-part fertilizer. If you don't have an EC meter, watch out for the following signs on your tomato plants:
 - Leaf tips that curl down may indicate that the solution is too concentrated. Dilute with pH 6.0 water.
- Leaf tips that curl upward or with a red stem may indicate that the pH is too low. Yellow leaves indicate that the pH is too high or that the solution is too diluted. In each of these cases, you need to adjust the solution as described below.
 Regularly replace the water and nutrient solution. If the water level in the reservoir drops, you have to add more water, but not more nutrients. Every two weeks, or once a week if your plants look unhealthy, empty the reservoir completely and rinse the support material and roots of the tomato plants with clean water with a pH of 6.0 to flush away the mineral deposits that damage could cause. Fill the reservoir with fresh water and nutrient solution. Maintain a balanced pH and allow the mixture to distribute evenly before turning on the water pump.
 - You can use the rinse water for watering normal garden plants.
Necessities
- Large plastic container
- PVC pipes
- Plastic "ebb and flow" bowl
- Water pump
- Grow lights (e.g. fluorescent lights) (recommended)
- Two timers (one for the pump, one for the lighting)
- Tomato seeds
- Rock wool
- Net pots or other pots that allow water to pass through
- Nutrient solution
- pH test kit
- Potassium Hydroxide (or another substance that raises the pH)
- Phosphoric acid (or any other substance that lowers the pH)
- Temperature controllers
- Fans
- Brush
- Stakes and binding material


