Author:
Frank Hunt
Date Of Creation:
14 March 2021
Update Date:
1 July 2024
Content
Hydro dipping is a fun way to decorate 3D objects that can withstand water. There are companies that specialize in hydrographics for larger products (eg cars and sports equipment), but it is also possible to get creative yourself and get started at home. Buy a do-it-yourself hydrodipset online to decorate products with the design of your choice with minimal resources and experience. You can also use spray paint to hydro dip your products with your own unique designs!
To step
Method 1 of 2: Using a hydrodipset
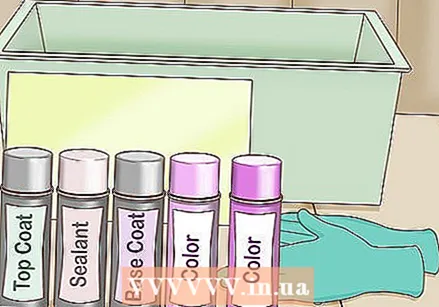
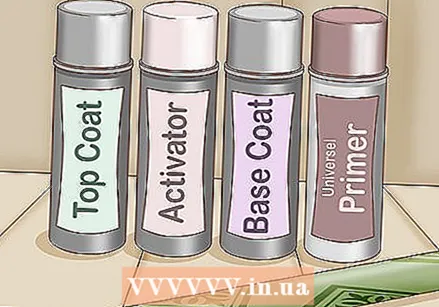 Buy a hydrodipset. Search online for do-it-yourself hydrodipsets that allow you to apply a specific print or design to a 3D object (which can be submerged under water without any problems) without any special equipment. Often times, companies that make these sets offer different designs from which to choose. A simple hydrodipset should contain at least:
 - Pattern foil
- Activator
- Varnish
- Primer
- Universal primer
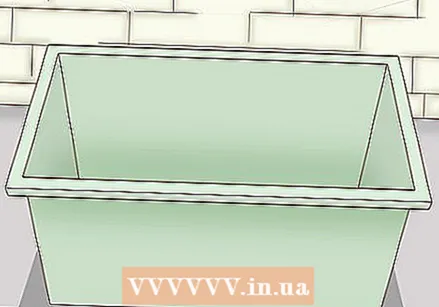 Choose a suitable container. Most DIY kits come without a tray to dip the object in. Choose a waterproof plastic, glass, or aluminum container that is deep enough to fully submerge the object of your choice. The box should be long and wide enough to keep 12-15 cm between the edges of the box and the object.
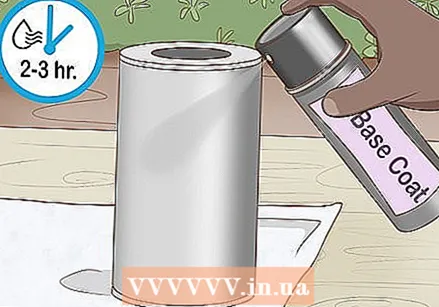
 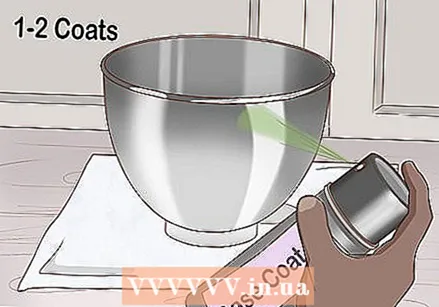 Prepare the object. Make sure the object you want to dip is clean. Spray the primer from the kit on the object. It is important that the entire surface is covered without the primer dripping. Apply 1-2 thin coats of the soil spray and let the object dry for one or two hours.
 - Use masking tape to tape off any parts of the product that you don't want an image printed on before applying the primer and undercoat.
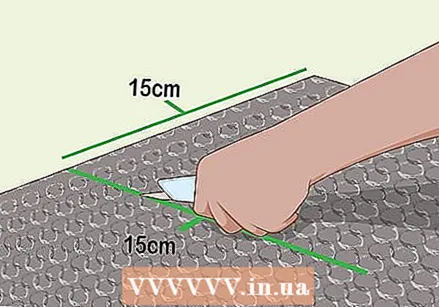 Measure the foil and cut it to the desired size. Measure the size of the object you want to cover and add 12-15 cm per side. Cut the foil to size. Make sure the foil stays dry during this process. If the film gets wet, it can warp the image.
 - Place masking tape on the edges of the foil to keep it from rolling up.
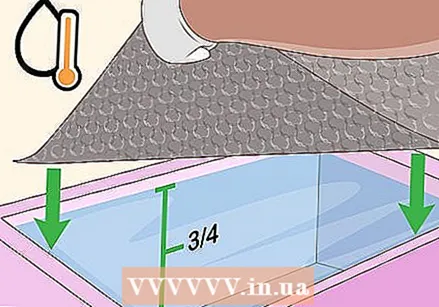 Prepare the container. Fill the container about 3/4 full with warm (not boiling) water. Gently pick up the foil and bring the ends together. Hold the foil as if it were a sling. Place the bottom of the sling in the center of the water surface and slowly lower the sides until the foil lies flat on the water.
 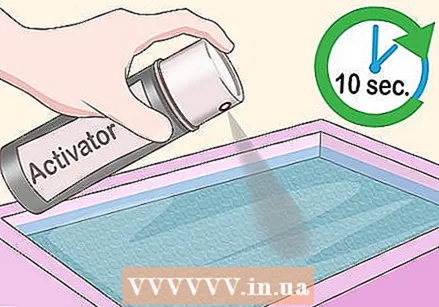 Let the foil moisturize and apply the activator. Use your phone or a stopwatch to allow the foil to dissolve in the water for sixty seconds. After sixty seconds, spray the activator from your set evenly over the foil. Once the film is covered with the activator, it takes 5-10 seconds for the film to turn into liquid ink.
 - When the foil is fully activated, it will look shiny and will expand over the entire surface of the tray.
 Submerge your object. Hold the object at a 45 degree angle and slowly submerge it. Once the object is completely submerged, push the object towards the ink until the project is flat under water. A smooth movement ensures the best results.
 - Put on gloves before dipping your object. If the set does not include gloves, purchase a set of gloves before starting the dipping process.
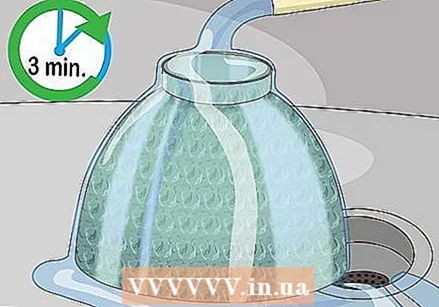 Clean the object. Slowly remove the object from the water. Hold the object gently and avoid rubbing the surface. Immediately rinse the object under cold water for about three minutes to remove any PVA residue.
 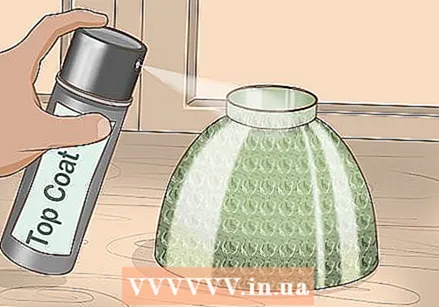 Apply the varnish. After air drying, apply an even coat of aerosol varnish. Let the product air dry before applying a second coat. Continue this process until the desired result is achieved.
Method 2 of 2: Hydro dipping with spray paint
 Gather all supplies. First determine what you want to paint, then choose the required paint colors and find a watertight container that is large enough to submerge the object. You can use one color of paint or choose to stir different colors with a wooden stick into beautiful curly designs. Purchase a varnish spray (available at art stores and hardware stores) to seal your colorful design on the object after hydro dipping. Also, don't forget to buy protective gloves.
 - The plastic container should be large enough that it does not overflow when you submerge the object. Buckets, large plastic storage bins, and cribs are good choices.
- If you want to keep the tray clean from paint, use a plastic sheeting to cover the tray before filling it with water.
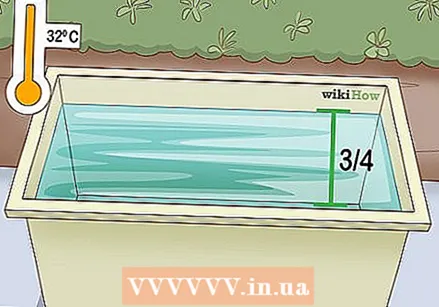 Prepare your paint station. If possible, set up your paint station outside (for example on your driveway or lawn). This will prevent your house from smelling like spray paint. Make sure all the products you need are within reach. The hydrodip process can go very quickly. Fill your container about three-quarters with lukewarm to warm water. The ideal temperature for spray paint is between 10 and 32 degrees Celsius.
 - If you need to set up your paint station indoors, make sure to open as many windows and doors as possible and cover furniture around the station with plastic wrap.
- Keep children and pets away.
 Apply a coat of primer. Choose a different color primer than the paint you want to dip your object in so that any spots that are not covered with paint remain visible during the dipping process. Use spray paint to cover the entire surface of the object. Let the paint dry for 2-3 hours before starting the hydrodip process.
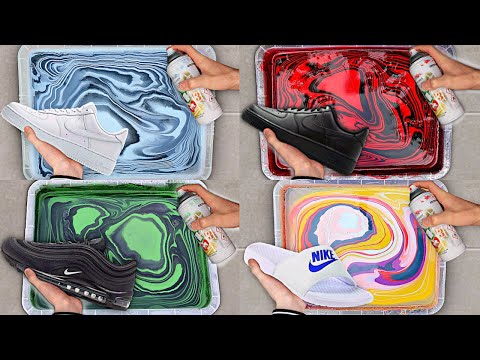
 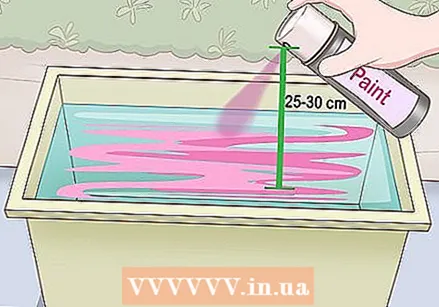 Spray paint on the water surface. Shake the spray paint well before applying it to the water. Hold the can 25 to 30 cm from the water surface and spray to your heart's content until the surface is completely covered. Alternate the colors as desired to make your own unique creation.
 - Different colors mix by themselves on the water surface. Use a clean wooden stick to blend colors into smaller curls until you have the design you want.
 Immerse your object in the container with paint and water. Put on gloves and make sure the object you want to paint is clean. Gently lower the object into the tray until it is completely submerged. Slowly remove the object from the water.
 - If you don't want the object to be covered with a second coat of paint when you lift it (something that could potentially alter the original design), push the paint on the water surface to the sides before lifting the object. It's helpful to ask for help for this step!
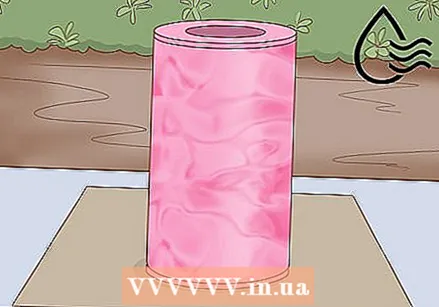 Let the object dry. Place the painted object on a plastic sheet or piece of cardboard to let it air dry. Leave it there untouched for several hours to make sure the object is completely dry. If you let the object dry indoors, make sure it is in a safe place out of the reach of children and pets.
 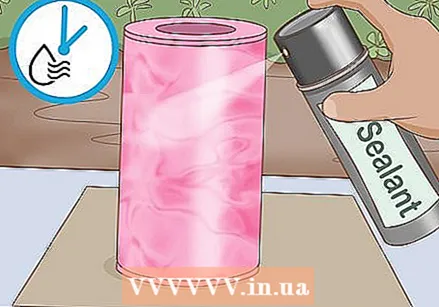 Use a clear varnish spray. Spray your object with varnish to keep your hydrodip looking fresh and clean. Spray an even coat over the object and let it dry for several hours. Only apply the varnish when the object is completely dry.


