Author:
Tamara Smith
Date Of Creation:
28 January 2021
Update Date:
1 July 2024
Content
Adobe Premiere Pro is a powerful video editing program with many features. The problem with professional commercial products is that they can sometimes be difficult for beginners to understand. Cropping a video is a feature that most users will sooner or later want to master. The screenshots in this article were taken in Adobe Premiere Pro CC.
To step
 Open Adobe Premiere Pro. If you have not started your project yet, you can do so after opening the program.
 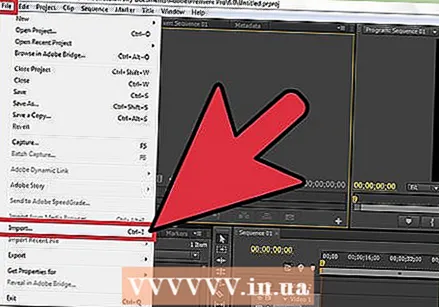 Import your media (your video). You only do this if you don't see your video in the program yet.
  Drag your video to the timeline. Once you have the video in your project tab, you can drag it to the timeline.
  Select Effects at the top center of your screen.
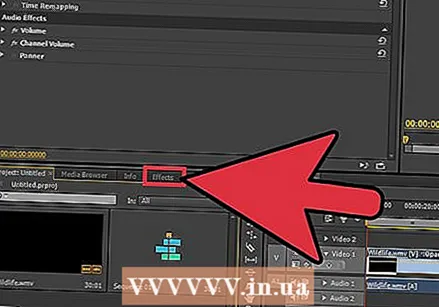 Go to the Effects tab. You can find this in the Project window.
 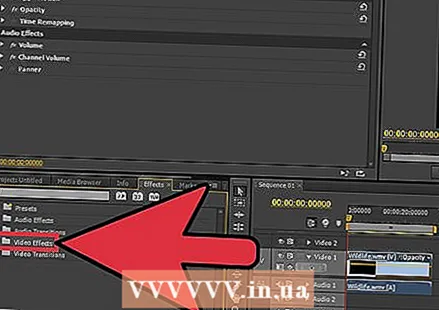 Go to Video Effects and press the arrow next to it. Scroll down to Transform.
 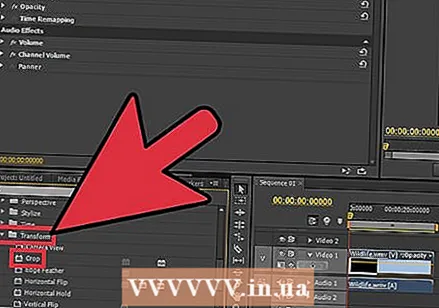 Select Transform and find the Crop effect.
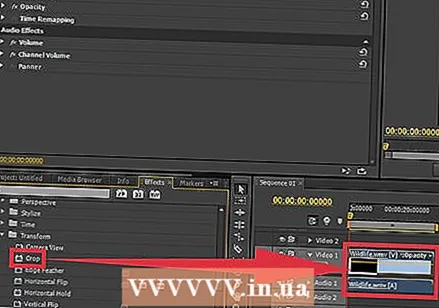 Click the Crop effect and drag it to the timeline. Now the buttons to adjust the effects become visible.
  Go to the place in the window where you see Links. Move the arrow cursor to get the left side where you want it.
 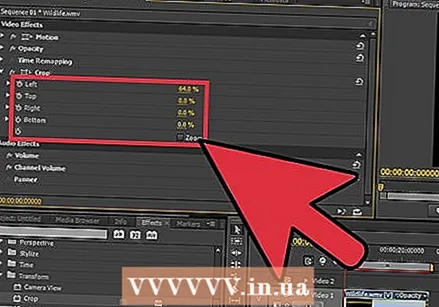 Repeat the process on all sides. Remember, it is better to choose the right frame when creating a video than to crop the video later.


