Author:
John Pratt
Date Of Creation:
14 April 2021
Update Date:
1 July 2024

Content
- To step
- Method 1 of 3: Recording a Minecraft game
- Method 2 of 3: How to take a Minecraft screenshot on a Mac
- Method 3 of 3: Taking a screenshot of Minecraft on a PC
- Tips
Many gamers want to be able to record a Minecraft game and upload it to YouTube, to show it to others, or as a tutorial. If this also applies to you and you want to share your Minecraft experience with the rest of the world, read the following guide to use video recording software to record a game and take screenshots. Just follow the steps below to get started.
To step
Method 1 of 3: Recording a Minecraft game
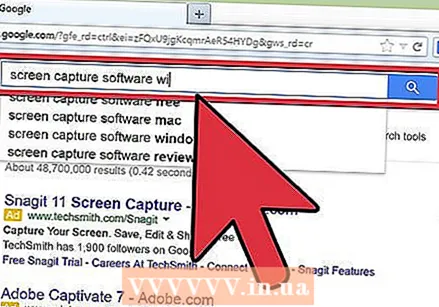 Investigate which different video capturing software is available. For example, type in your browser something like "video capturing software wiki." One of the first results is a link to Wikipedia where you will find a list of various video capturing programs.
 - Look for the differences in functions in the list. Some software is free; for others you will have to pay. A number of them have video editing capabilities. Go through the list and see if there is software that meets your requirements.
- Some good video capturing programs you could use are:
- Bandicam
- Ezvid
- Jing
- Screenpresso
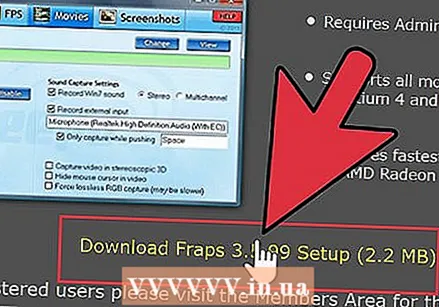 Download the software you want to use. As an example, in this tutorial we'll assume you want to try Bandicam - it's free, easy to use, and has the ability to record up to 10 minutes of gameplay per file.
 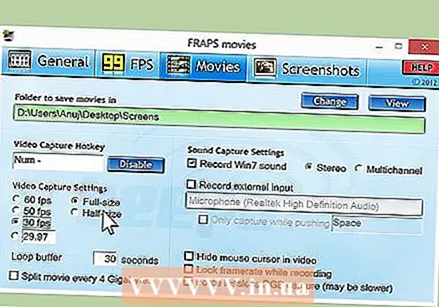 Experiment with the different functions of the software. Download and install Bandicam or an equivalent product. Start the program. You will see that there are various settings possible to adjust the capture of a video to your liking.
 - Here are a few of the settings for Bandicam:
- General: The General settings tab allows you to determine where you want your files to be saved after recording.
- Video: set the hot keys you want to use for recording, pause and stop; click on the settings tab and go to Sound to turn on the sound for your recordings; also set the FPS (frame rate) to a reasonable speed (30 is usually sufficient).
- Image: Provides the ability to take screenshots with a hotkey.
- Here are a few of the settings for Bandicam:
 Once you have adjusted all the settings to your liking, try recording a video yourself. Start recording the game. Live it up. Experiment with the settings. The more often you record something, the better you become at understanding what works and what doesn't.
 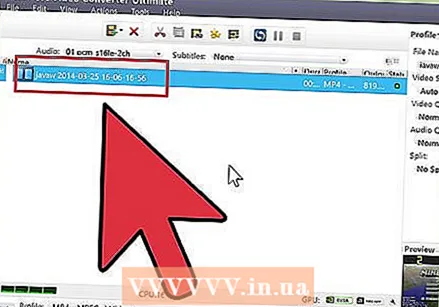 Edit the video after recording. If your free video software also offers the ability to edit a recording, you can use it with tools such as cut, splice, transition, and tweak. If your software does not have this capability, then you will have to download software to edit the video so that it is completely perfect.
Method 2 of 3: How to take a Minecraft screenshot on a Mac
 Press "fn + F2" to take a screenshot while playing Minecraft. "fn" stands for "function," and you can find it at the bottom left of your keyboard. "F2" is a function key and you can find it on the top left of your keyboard.
 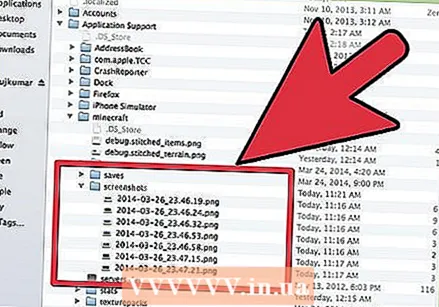 Find the screenshot you took by going to the following directory:
- / Users / * Your Username * / Library / Application Support / minecraft / screenshots /
 Hide the cursor and the inventory with F1. If you don't want the cursor or inventory to be visible in the screenshot, press F1.
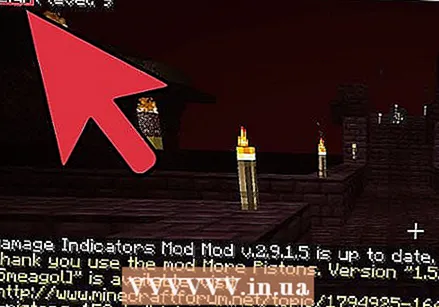
  Press "Shift + F3" to bring up the debugging screen before taking a screenshot. The debugging screen gives you the coordinates, number of creatures and other things.
Method 3 of 3: Taking a screenshot of Minecraft on a PC
 Press "F2" to take a screenshot while playing Minecraft. One push of a button and you have a screenshot.
 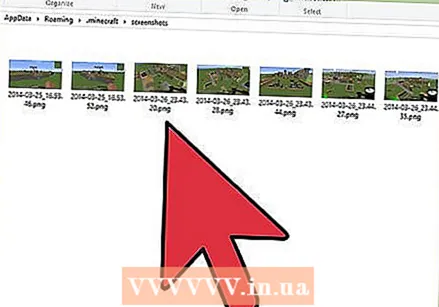 Find the screenshot you took by going to the following directory:
- C: Users * Your Username * AppData Roaming .minecraft screenshots
 Hide the cursor and the inventory with F1. If you don't want the cursor or inventory to be visible in the screenshot, press F1.
  Press "Shift + F3" to bring up the debugging screen before taking a screenshot. The debugging screen gives you the coordinates, number of creatures and other things.
Tips
- Do not move or resize Minecraft while recording.
- The AVI format offers the highest quality.


