Author:
Frank Hunt
Date Of Creation:
19 March 2021
Update Date:
1 July 2024
Content
- To step
- Method 1 of 7: The different colors
- Method 2 of 7: Windows 7
- Method 3 of 7: Other Windows
- Method 4 of 7: Defragment again
- Method 5 of 7: From the command line
- Method 6 of 7: Batch method
- Method 7 of 7: Apple Mac OS X
- Tips
- Warnings
When writing data, your computer does not always manage to put all the data in a file together. For example, it could be that part of a file is at the beginning of the disk and the rest at the end. This can cause programs to become slow, as it takes your computer time to match the fragments of a file. By defragmenting your disk, the correct piece of data is put back together so that a file can be read faster. There are several ways to defrag a disk, here are some different methods.
To step
- To begin: there are things you shouldn't do. It used to work differently, here is a list of things that are not necessary (anymore):
- In the past, you had to open Windows in Safe Mode. That is no longer necessary.

- It is not necessary to remove programs you no longer use. But of course it is always good to have a tidy computer.

- You don't have to close programs first.

- You don't have to delete the temporary files.
- In the past, you had to open Windows in Safe Mode. That is no longer necessary.
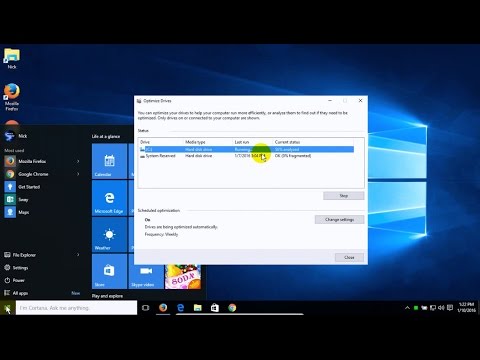
 When Windows tells you that your disk needs to be defragmented, you can simply click on "Defragment Disk". Easy!
Method 1 of 7: The different colors
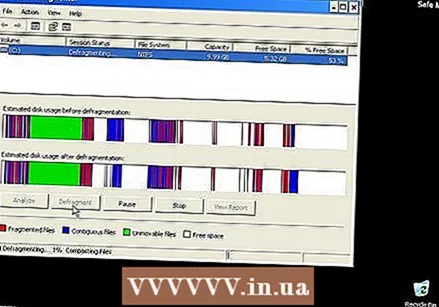
- Pay attention: different versions of Windows have different ways of indicating what is free and used space. But in general, the following colors are used:
| xxx | BLUE areas indicate which sections contain files whose data is contiguous. |
| WHITE areas are unused. | |
| RED areas indicate where fragments of files are located. By means of defragmentation these pieces are picked up and placed together in one or as few pieces as possible. |
Method 2 of 7: Windows 7
 In Windows 7, defragmenting is automatic, but you can follow these steps if you want to do it manually.
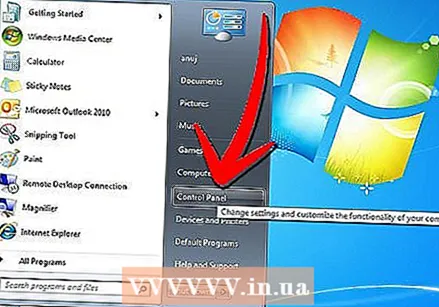 Open the Control Panel.
 Open "System and Security".
 Click on "Disk Defragmenter".
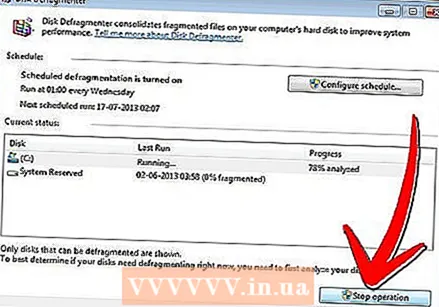
 Select the disk you want to defragment at "Current status".
- Click on "Analyze Disk" to see if the disk is in need of defragmentation. When Windows has analyzed the disk, you can check the fragmentation percentage of the disk in the column "Last start". If the percentage is higher than 10%, it is recommended that you defragment the disk.
- Click on "Defragment Disk". If you are prompted for the administrator password or confirmation, type the password or provide confirmation.
- The duration of the defragmentation depends on the size of the disk and the degree of fragmentation (the red areas).

- It is possible to continue working while the disk is being defragmented, but the system will be very slow. It is a good idea to do the defragmentation at night.

- If you have started defragmenting and you really need to work, you can choose to pause.
- The duration of the defragmentation depends on the size of the disk and the degree of fragmentation (the red areas).
- If you want to determine when the defragmentation takes place, you can set this. Change the defragmentation schedule as follows:
- Click on "Set schedule".

- Open the "Day" menu.

- Select a day (e.g. Sunday).

- Click on "OK".
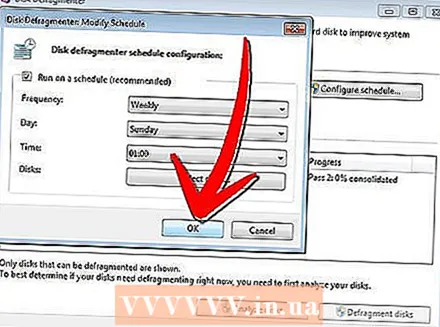
- Click on "Close".

- Click on "Set schedule".
Method 3 of 7: Other Windows
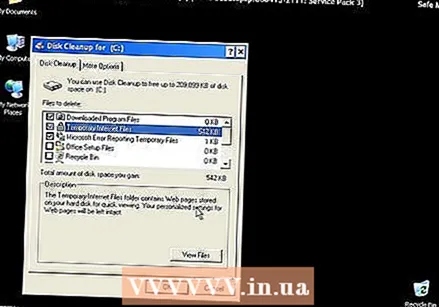
 Click on "My Computer". Right-click on the disk to be defragmented, for example "C:". Click on properties, a window will open.
  Click on "System Tools".
 Click on "Defragment Now".
Method 4 of 7: Defragment again
 Consider defragmenting again. Sometimes it can help to do it twice. Pieces of files that have been skipped the first time are often cleaned up the second time.
  View the overview. Check whether there are files with (more than) 20 fragments that you are using. There's no point in defragmenting files you never use!
  Defragment individual files if necessary. The program you can find here allows you to group pieces of data from individual files together. This is a "command line" program, so you start it from Start> Run.
Method 5 of 7: From the command line
 Start the disk defragmenter from the command line.
 Go to Start> Run and type (without quotes) "dfrg.msc. Or go to Start> All Programs> Accessories> System Tools> Disk Defragmenter.
  Click on "Analyze disk" and view the result. If necessary, click on "Defragment Disk".
  Please wait for the process to complete.
Method 6 of 7: Batch method
If you prefer words instead of the colors, you can use the following method.
 Create a new .txt application. Use Notepad to edit the document.
 - Enter the following code:
- "defrag"

- Type the letter of the drive you want to defragment. For example "defrag c:".

- Type "-v" if you want to see additional data.

- Type "-a" if you only want the data.

- "defrag"
 Save the document. Give the file the extension .bat. Your file is now a batch file. Click on this file.
 - Just wait! The computer will now start defragmenting, it may take a few minutes to a few hours.
Method 7 of 7: Apple Mac OS X
 There is no need to defragment on a Mac. OSX defragments files automatically so you never have to do this manually.
Tips
- It may be useful to place the browser cache on a different drive from the system files. A web browser is constantly writing data and that can get in the way of other data.
- The more you defrag, the faster it will go.
- There are defragmenters on the market, all claiming to defrag better than Windows. However, these programs do cost money.
- Linux systems are designed in such a way that they almost never need to be defragmented.
Warnings
- This process also affects other users of the drive.


