Author:
Christy White
Date Of Creation:
8 May 2021
Update Date:
1 July 2024

Content
- To step
- Method 1 of 3: Wrap a spherical gift
- Method 2 of 3: Fold wrapping paper for a spherical gift
- Method 3 of 3: Wrapping a cylindrical gift
- Tips
- Necessities
Wrapping gifts can be a fun activity, but also a difficult one when wrapping oddly shaped objects - especially circular ones. They have no corners, which makes it difficult to know where to fold the paper without creasing it or making the gift look weird and bulky. However, with some strategic folding and cutting, you can pack that round ball or cylinder like a pro!
To step
Method 1 of 3: Wrap a spherical gift
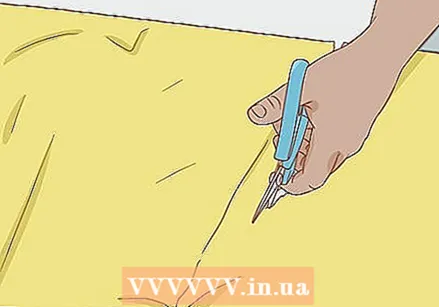 Cut a long piece of wrapping paper. You will need a piece of wrapping paper that is longer than it is wide, but wide enough to cover the gift completely. If the gift is in the center of the paper, there should be at least an inch or two of paper left on either side.
 - The exact paper size depends on the size of the gift. Better to be careful though, as you can always cut extra paper when you're done packing.
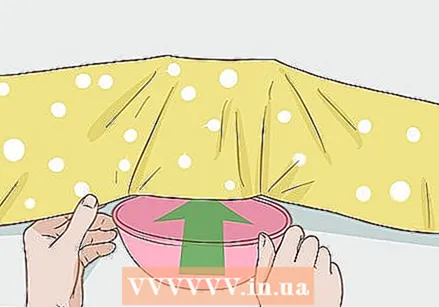 Slide a bowl under the wrapping paper and place the gift on top. If you place the gift on a bowl or a large roll of masking tape, it will have something to stand on. This will make packing easier. After sliding the bowl underneath, place the gift on top and slide it so that it is in the center of your paper.
 - The short sides should be on the left and right of the gift and the long sides should be in front of and behind it.
- Use a bowl or roll of tape that is small enough to hold the item up without it slipping through.
 Pull the wrapping paper to the top of the item. Reach over the gift with one hand and pull the long side of the wrapping paper towards you and bend it up and over the top. Make sure it reaches the center of the gift and let the excess paper stick out to the sides.
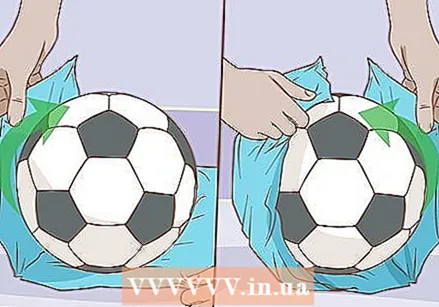
 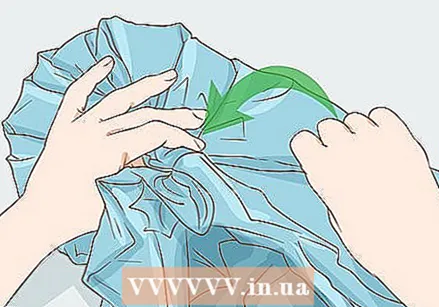 Gently fold the wrapping paper and go around the ball to cover it. Hold the edge of the wrapping paper against the top of the gift with one hand. With the other hand, start to collect the rest of the paper and gently fold it up. Grasp the paper in one hand as you move the gift.
 - You can make the folds large or small depending on the size of the gift and the look you want.
- When you get to the other side of the ball, switch your hands so that you fold with the hand closest to the unbent paper.
Tip: Pull the folds tight against the gift so that it looks neat.
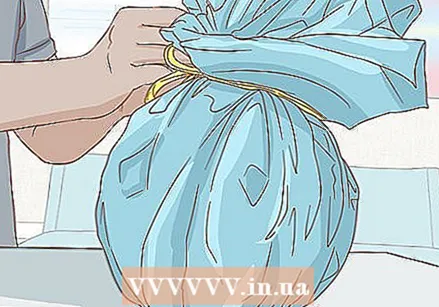 Close the excess paper at the top with a ribbon. Once you've gathered all of the wrapping paper at the top, use a ribbon to tie it in place. You can also apply some masking tape to make it extra secure.Then trim the excess paper at the top until it is a few inches long or whatever looks best.
 - Before you start wrapping, cut the ribbon so you don't have to hold the paper and cut the ribbon at the same time.
Method 2 of 3: Fold wrapping paper for a spherical gift
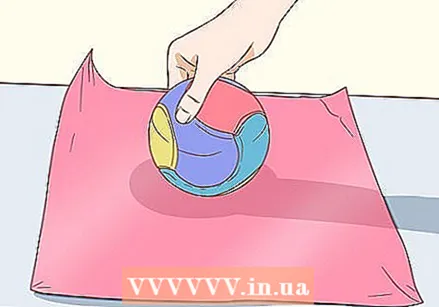 Place the item in the center of the wrapping paper. Cut the paper, but measure it out first to make sure the whole gift will fit inside. Then place the gift in the center so that the long sides are in front and behind and the short sides are on both sides.
 Tip: With this method you have to pretend that you are packing a box. The packaging is a bit looser, but you will be able to finish it faster and easier.
 Fold the long sides of the paper over the object and tape them in place. Take the long side furthest from you and pull it over the top of the gift and do the same with the other long side. Make sure they overlap and that there is no gap. Then use a 1 to 4 inch long piece of tape to hold them in place.
 - If the gift is larger, you may need a larger piece of tape, or even a few loose pieces. Use your common sense to see what works best.
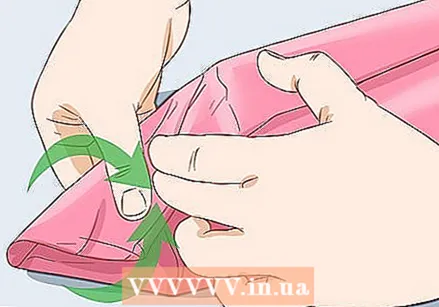 Make triangular folds on one end of the gift. On one of the open ends, pull the wrapping paper down so that it is flush against the gift. Then pull one side in to make a triangular fold towards the center. Repeat on the other side until a pointed flap of wrapping paper sticks out.
 - Retract the side flaps as tightly as possible to tidy up the packaging.
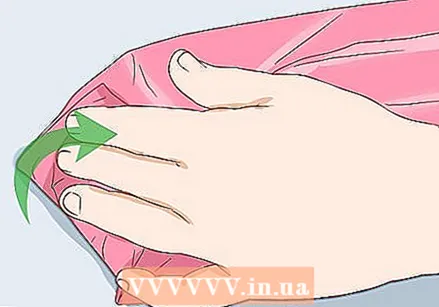 Pull up and tape the bottom flap. Continue to hold the side flaps firmly against the center. Then take the bottom flap and press it up against the gift. Use a small piece of masking tape to hold it in place.
 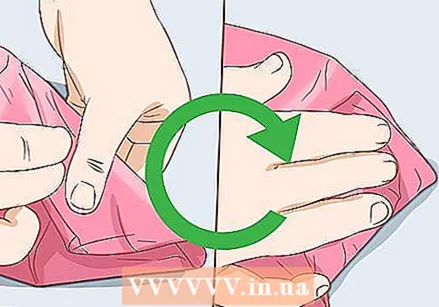 Repeat on the other side of the gift. Do the same hold, fold, and tape steps to the other side of the gift to complete wrapping. Gently pull wrinkles from the corners to make it look neater.
Method 3 of 3: Wrapping a cylindrical gift
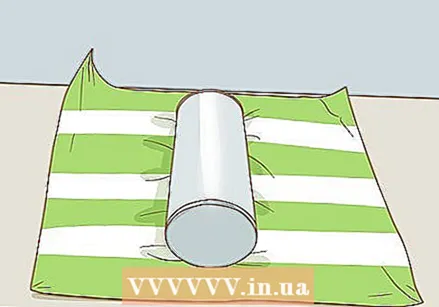 Place the cylinder on its side in the center of the wrapping paper. Place the gift close enough to the edge so that the paper is right in the middle when you bend it toward the flat end of the item. Make sure the paper is long enough to fully wrap the gift with at least an inch overlap.
 - The flat ends of the gift should face the long sides of the paper.
Tip: This method works for both cylindrical and round flat gifts.
 Roll and tape the short ends of the paper over the gift. Take one of the short ends and pull it up and over the curve of the cylinder. Hold it in place while doing the same with the other end. Then tape it in place with a strip of masking tape the same length as the overlapping side.
 - For a neater look, you can use double-sided tape. Before you pull the paper over the gift, place it at the bottom of one edge of the paper, roll the paper, and iron the tape in place.
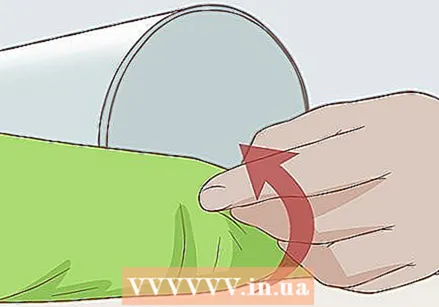
 Bend the top edge over a flat end of the gift. Make sure the gift is still in the center of the paper tube and gently fold the top edge of the paper over one of the flat sides. Fold it neatly and as close to the object as possible.
 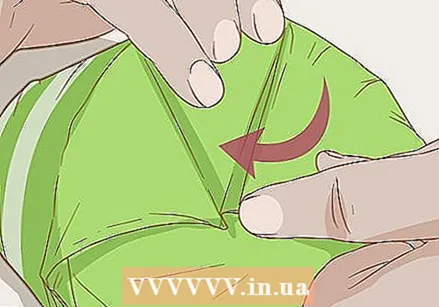 Fold a diagonal triangle towards the center. Hold the top of the paper in place. Then squeeze the paper slightly on one side and gently pull it in. Make a sharp and diagonal fold pointing towards the center of the flat rounded end.
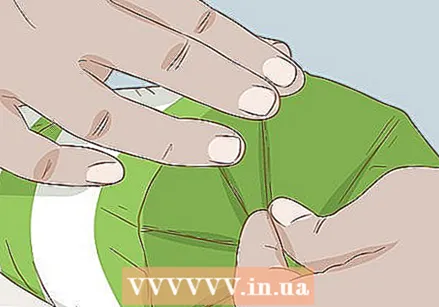
 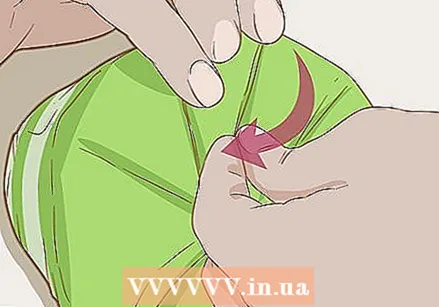 Make a second and overlapping diagonal fold. Pinch a little of the loose paper next to the fold you just made and do the same again. Make a neat and diagonal fold overlapping the fold just made.
 - Hold the two folds firmly in place with one hand.
 Repeat the pleats around the flat end. Continue to make overlapping folds across the flat side of the gift, eventually moving to the bottom half of the paper. Make them as tight as possible so that they stay in place as you move across the gift. When you are done with all the folds, the flat side of the gift should look a bit like a spiral.
 - You can roll the gift as you go to make folding easier.
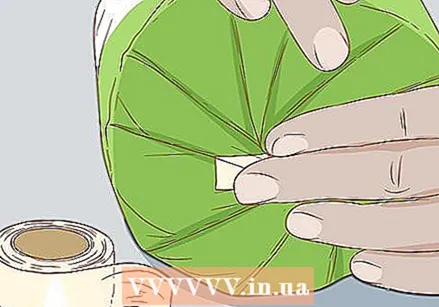 Secure the center with a piece of tape. Once all the folds are done, take a small piece of tape and place it right over the center of the flat side, where all the folds are pointing. Repeat on the second flat side of the cylinder to complete wrapping.
 - If you want to hide the center of the folds, tie or put a bow over it.
Tips
- Whenever possible, use a strong and durable wrapping paper in an intricate pattern that can cover up the mistakes you make while wrapping.
- Place the round or irregularly shaped object in a gift bag with tissue paper.
Necessities
- Wrapping paper
- Scissors
- Adhesive tape
- Ribbon or bow


