Author:
Charles Brown
Date Of Creation:
2 February 2021
Update Date:
1 July 2024

Content
- To step
- Part 1 of 4: Dig the bath
- Part 2 of 4: Applying the water filtration system
- Part 3 of 4: Sealing and filling the pool
- Part 4 of 4: Adding plants
- Necessities
Natural pools are a really good way to take a dip without having to swim in the chemicals. They use plants and other natural details to filter the water and balance the pool's ecosystem. They often also attract animals, making them a good place to relax and enjoy nature. With just a few steps and good planning, you can build your own natural pool.
To step
Part 1 of 4: Dig the bath
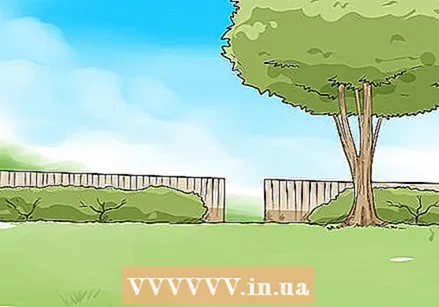 Choose a spot where the ground is flat and has plenty of shade. Avoid a place with stumps or shrubs that you need to move. A shady spot ensures that the pool is not exposed to direct sunlight. Sun can stimulate algae growth in your natural pool, forcing your filter system to work too hard to get the water clean and clear.
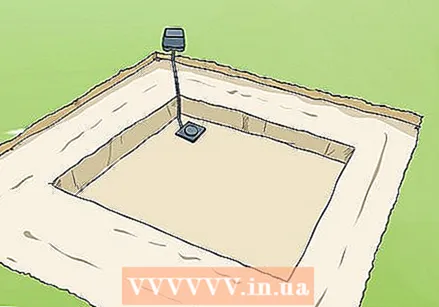
 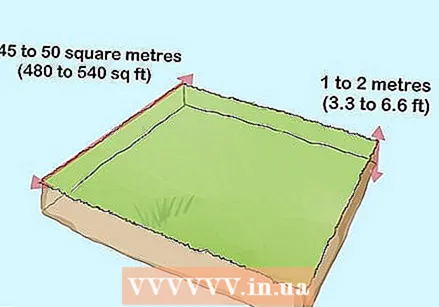 Mark a hole for the pool. The hole must be at least 45 to 50 m² and 1 to 2 m deep. Try not to make the pool too deep, as a deeper pool may need steel reinforcements. Make the pool a square or rectangle so that it is easy to cover and fill.
 - Use tape or chalk to mark the dimensions of the pool so that you have a target point when you dig.
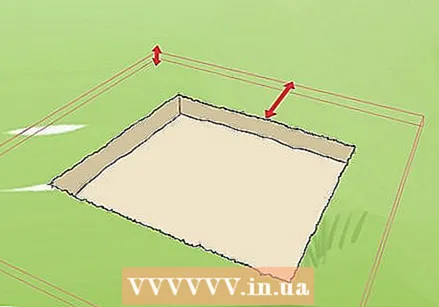 Make a connecting hole for the planting zone. The hole should be 10 to 20 m² and 1 m deep. This hole is for the plants and other natural elements that help filter the water in the pool. It should be right next to the larger hole for the pool.
 - The hole for the plants should be 30-50% in size of the main pool area.
- The plant zone is separated from the pool by black covering that you put in later. This allows the water from the plant zone to flow into the pool, but prevents the plants from floating into the pool.
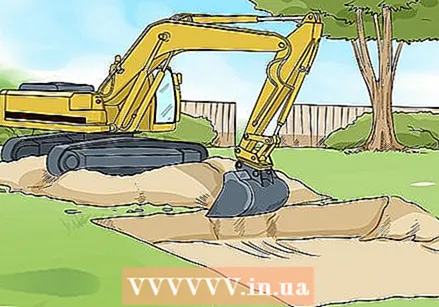 Dig the holes with an excavator. With an excavator digging the holes is much easier and faster. Dig the holes so they have sloping sides as that will prevent them from collapsing. The holes should also have a smooth, flat bottom to make sealing and filling easier.
 - Save any large stones you come across when digging, as you can use them later when you seal and fill the pool.
- You can rent an excavator for an hourly or daily rate. Digging the holes shouldn't take more than a few hours.
Part 2 of 4: Applying the water filtration system
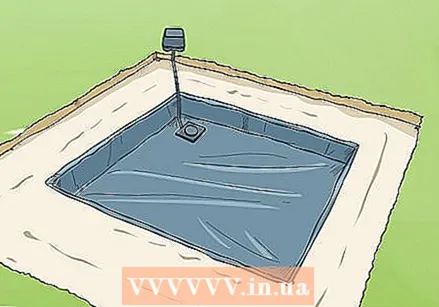
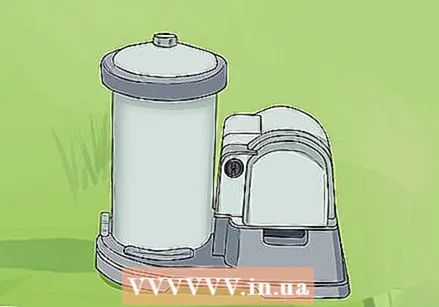 Place a small water pump at the end of the pool. Although the natural pool uses plants to filter the water, you need a small water pump to move the water to the plants. Buy a small water pump at the local hardware store or online. Place it at the end of the pool and connect it to the power.
 - You can bury the water pump in the ground if you don't want it to be visible.
- Running a water pump in or around water can be dangerous, so use caution when installing it and make sure the wires are safe from water. If in doubt, consider having an electrician install the water pump for you.
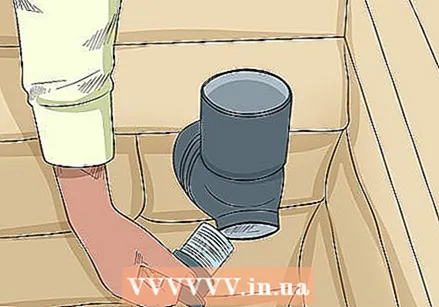
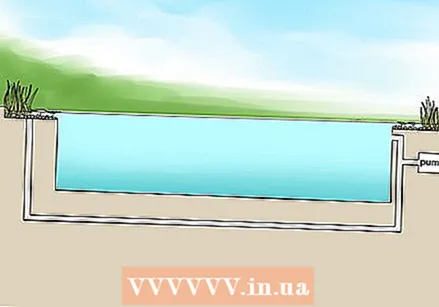 Run PVC pipes from the pump to the planting zone. Bury the pipes at least 18 inches deep in the ground when you put them from the pump to the hole for the plants. Run the PVC pipes underground under the entire pool from the end to the planting zone. Make sure the tubes touch the planting zone so that the water flows into this area.
 - If you are unsure how to do this you can hire a plumber or contractor to help you.
 Connect an underwater aerator to the pump to add oxygen to the water. Aerating the water ensures that the water has enough oxygen to feed the plants and other organisms in the pool. Place the aerator in the deepest part or a corner of the pool so that it is not disturbed. Make sure the aerator is properly connected to the water pump.
 - Underwater aerators can vary in price.
 Protect the pump and aerator with a skimmer. Place the pump and aerator in a plastic container or bucket with a skimmer. Then cover the bucket with a mesh filter to keep debris out of the equipment.
Part 3 of 4: Sealing and filling the pool
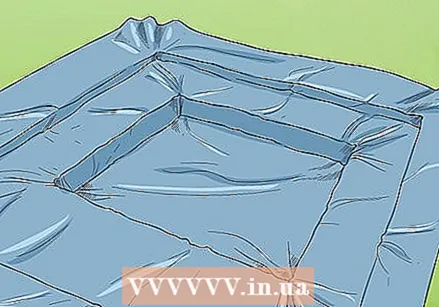 Use synthetic liner to smooth the bottom and sides of the pool. Place the liner snug against the bottom and sides of the pool. Cut the liner to fit snugly against the sides and make sure it is flush against the top of the pool edge. Do both the main pool and the hole for the planting zone so that they are protected.
 - The synthetic liner is a good way to prevent leaks or cracks in the pool from stones or other objects.
 If you don't want to use a synthetic liner, use bentonite. Another option is to apply a layer of bentonite over the holes for the pool and the planting zone. You need at least 28 kg of clay per square meter to seal the pool. Spread a 2- to 3-inch layer of clay with your hands. Wear gloves and a face mask to protect yourself.
 - If the ground is very sandy, you may need to double the amount of clay per square foot to make sure the pool is properly covered.
- Compress the clay with a tractor or a vibratory plate to really seal the soil.
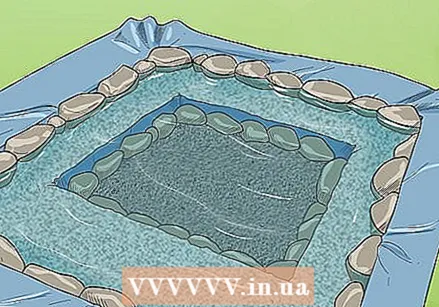
 Put black tarpaulin on the bottom and sides of the pool to reflect the sunlight. Use black synthetic tarpaulin over the base seal or the clay so it can trap the sun's heat and naturally heat the pool. It will also help prevent the pool from leaking.
 - Leave a piece of tarpaulin hanging between the pool and the plant area. Cut the piece so that it is 1 to 2 inches below the top edge of the pool. This piece of tarpaulin serves as a barrier between the pool and the plant area.
- Use scissors to cut the tarpaulin so that it hangs just over the sides of the pool.
 Place large stones on the sides of the pool to hold the cover in place. Use smooth slabs or stones to fix the tarp and create an extra barrier. Place them against the sides of the pool so that they are level with the top edge of the pool. You can fill any gaps between the large stones with smaller stones or tiles.
 - You can also use stone slabs cut to match if you want a smooth, even surface for the sides of the pool. The stone slabs are heavy to lift so you may need someone to help you get them in place.
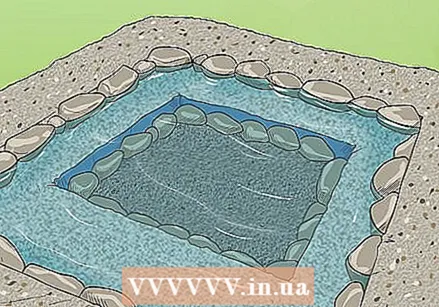
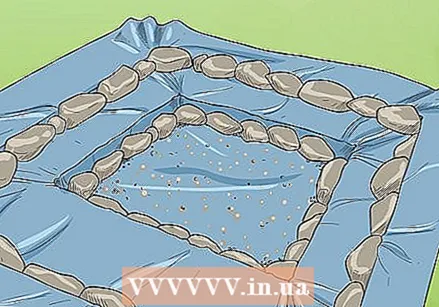 Fill the pool with 10 to 13 cm of gravel or pebbles. Cover the bottom of the pool with gravel or pebbles to create a good habitat for microorganisms. This will also keep the bottom soft and easy to walk on.
 - Make sure to use gravel or pebbles that have been washed to prevent dust or particles from entering the pool.
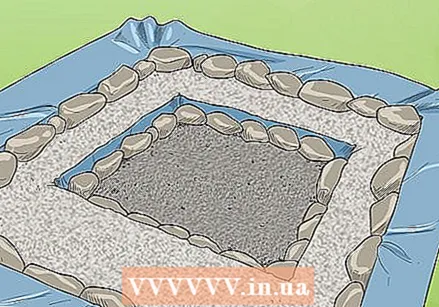 Cover the edge of the pool with stones or pebbles. Finish by placing small stones or pebbles on the edge so that they cover the black tarpaulin. Make sure the tarpaulin is completely covered and there is a clear outer edge of stones around the pool. Reinforce the stones with gravel and soil so that there are no leaks.
 - Make sure there is a clear path between the pool and the planting zone, as water must flow between these two areas.
 Put water in the pool and let it rest for a week. Use fresh water to fill the pool to the top edge. After that, let it rest and check the pool for leaks or problems. Test the water with a self-test kit to ensure readings are safe and not contaminated by chemicals or biological substances.
 - Do not fill the planting zone until you are ready to put plants in the pool.
Part 4 of 4: Adding plants
 Put three to six inches of pebbles or gravel in the planting zone. Use pebbles or gravel that has nothing added to it or that has not yet digested large pieces of organic material. Make sure the stones have not been in contact with animals, as you do not want germs or bacteria to get into the water.
 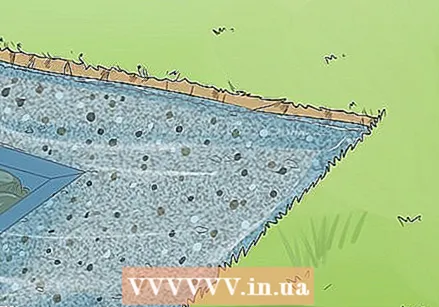 Fill the planting zone with water up to 30 cm below the top edge. Use fresh water to fill the planting zone. Make sure the water runs into the pool easily so that the plants can help filter the water.
 - Make sure the black tarp you are using as a barrier is upright in the water and prevents the plants from floating into the pool.
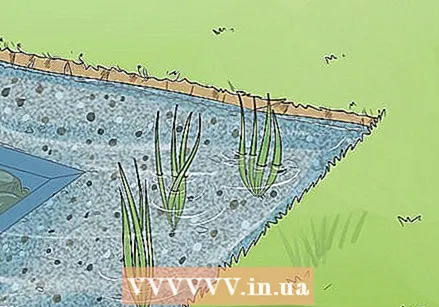 Place oxygen-enriching plants in the planting zone to keep the water healthy. Waterweed and hornwort are both very good options because they release a lot of oxygen in the water. You can also add aquatic plants like sedge and rus at the outer edge of the plant zone to keep the area oxygenated and contained.
 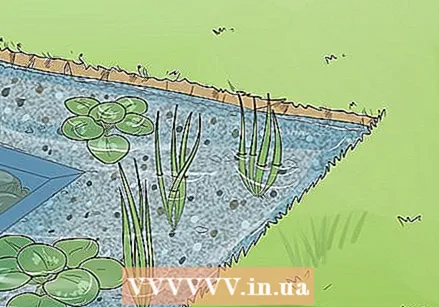 Add floating plants to shade the organisms. Water lilies and other floating plants are good options for the planting zone because they encourage the growth of microorganisms that keep the water healthy and clean.
 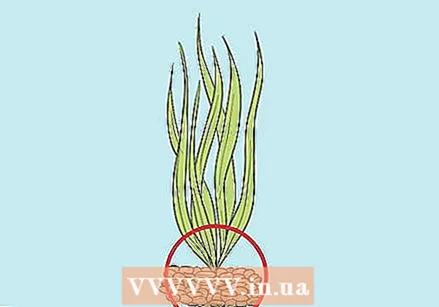 Secure the plants with gravel. If you are using plants that have roots, shovel gravel onto the bottom of the plants to keep them in place in the planting zone.
Necessities
- Excavator
- Water pump
- PVC pipes
- Water filtration system
- Synthetic lining
- Black pool cover
- Bentonite clay
- Big stones
- Gravel or pebbles
- Aquatic plants


