Author:
Morris Wright
Date Of Creation:
1 April 2021
Update Date:
19 June 2024

Content
With the advancement of computer technology, more and more is possible for a low budget. For example, it is possible to set up a simple recording studio at home for a reasonable amount of money, with your computer as the central point. Creating a low-cost recording studio at home requires an idea of your studio's purpose and sound quality. This article will give you an overview of the equipment to look for for each part of your studio.
To step
 Purchase a computer. If you don't already have a computer to use in your recording setup, you will have to buy one. Important considerations are processing speed and the size of the memory, as recording software often puts a lot of strain on your computer. Both Windows and Mac platforms work well; Windows machines are usually easier to upgrade, and so is the sound card. Factory-installed sound cards are usually not good enough to produce high-quality recordings, so upgrading is usually a good idea.
 - Choose the correct recording software. With recording software you can make recordings on your computer. There are several options for small budgets. In general, the more expensive applications offer more functionality and flexibility.
- If you have a very small budget, you can opt for open-source or freeware recording software. Audacity and GarageBand are two popular and good choices for a low budget.
- If you have a slightly higher budget, you can purchase semi-professional recording software, such as Ableton Live or Cakewalk Sonar. Both applications are also available as entry-level versions that are cheaper, but also less powerful.
 Purchase an audio interface. An audio interface is a piece of hardware that replaces the computer's sound card and to which you can connect instruments and microphones via a mixer. On a PC, you will usually install the audio interface in an empty PCI slot, or as an external device via USB. On a Mac, you may have to choose to purchase an interface that can be connected via a USB or FireWire cable.
 - Make sure that your audio interface has 2 outputs and 2 inputs. That way you can record in stereo. Choose an interface with 4 inputs for more flexibility.
- One of the best manufacturers of home audio interfaces is M-Audio. They produce both entry-level and high-end models.
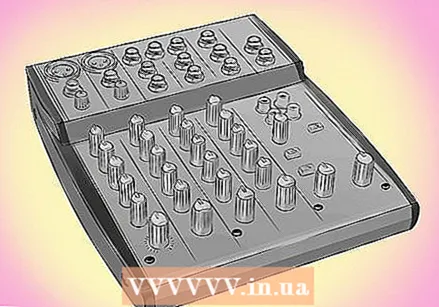 Buy an audio mixer. A mixer is essential equipment for the home studio. The mixer manages all inputs (such as microphones, guitar and keyboard), allowing you to adjust the settings of each input, and sends the output to your audio interface and into your computer.
 - The basic functions of a cheap mixer are usually sufficient for home recording. At the very least, each channel on your mixer should have controls for panning, volume and a 3-band equalizer. Four channels are more than enough for home recording.
- Popular entry-level mixer brands include Behringer, Alesis, and Yamaha.
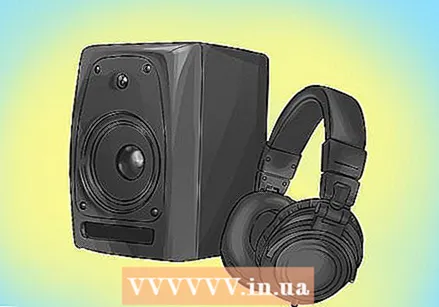 Choose studio monitors and headphones for your studio. The speakers you use to listen to your mix while editing are called studio monitors (sometimes referred to as reference speakers). Studio monitors differ from other speakers in that they are intended to deliver a perfectly flat frequency response. This means that you can hear your recording exactly as it was digitally stored, without any frequency adjustment.
 - When choosing studio monitors, it is important to look for "near-field" models. These are designed to be listened to from 1 meter, eliminating any effects due to the acoustics of your room.
- Studio monitors can be purchased secondhand online or at audio stores. The robust, simple construction of loudspeakers makes them ideal for buying used and saving money.
- In addition to or instead of monitors, you can buy headphones. Headphones offer the advantage of being cheaper, smaller and less likely to disturb a neighbor or roommate. Headphones can be used in conjunction with studio monitors to review those parts of your recordings that are very quiet.
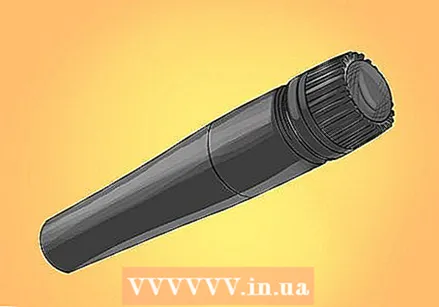
- Decide which microphone (s) you want to use in your studio. An inexpensive home studio can suffice with just one microphone if necessary.
- If you only buy 1 mic, make sure it is a dynamic microphone. These are more robust and versatile, and have their own power supply. An industry standard dynamic microphone is the Shure SM-57, which can be used for vocals and instruments.
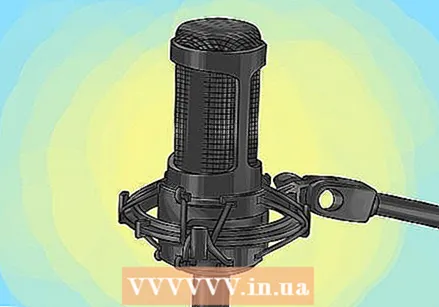
- If you want to record very quiet or expressive instruments, such as an acoustic guitar or piano, a condenser microphone will give better results. Condenser mics are not as robust or versatile as dynamic microphones, but they do have a more sensitive response. A cheap recording studio can easily do with 1 dynamic and 1 condenser microphone.
- If you only buy 1 mic, make sure it is a dynamic microphone. These are more robust and versatile, and have their own power supply. An industry standard dynamic microphone is the Shure SM-57, which can be used for vocals and instruments.
Tips
- Realizing a cheap recording studio often means working with what you already own. Using existing components, such as microphones and computers, even when not ideal for the job, will help you keep your expenses down.
- Additional equipment may be required depending on the needs of your admission. For example, if you want to start working with the "soft synth" instruments included with your recording software, you will need a MIDI interface and keyboard.
- If you don't have recording equipment, you can opt for the following setup, for a reasonably cheap but efficient setup:
- Apple Mac Mini
- 2.3GHz Quad-Core Intel Core i7 (Turbo Boost up to 3.3GHz) with 6MB L3 cache
- 1TB (5400 rpm) hard drive
- Intel HD Graphics 4000
- 4GB (two x 2GB) 1600MHz DDR3 memory
- M Audio Studiophile AV 30
- Focusrite Scarlett 2i2 USB 2.0 Audio interface
- Samson C01 Large Diaphragm Condenser
- Samson RH300 / Samson SR850 / Audio Technica ATH M30 or JVC Harx 700 headphones
Necessities
- Computer
- Recording software
- Audio interface
- Audio mixer
- Studio monitors
- Headphones
- Microphone
- MIDI keyboard


