Author:
Roger Morrison
Date Of Creation:
22 September 2021
Update Date:
1 July 2024

Content
- To step
- Method 1 of 3: Forming a felt cowboy hat
- Method 2 of 3: Form a straw cowboy hat
- Method 3 of 3: Forming a palm leaf cowboy hat
- Tips
- Warnings
If you've decided to start wearing a cowboy hat - be it for aesthetic or practical reasons - you need to shape the brim of the hat. The method of molding the hat depends on the material it is made of. Some straw hats have a wire in the brim that can be easily bent and shaped, while other hats require more work. Felt hats need to be steamed to shape, while palm leaf cowboy hats need to be soaked in water first.
To step
Method 1 of 3: Forming a felt cowboy hat
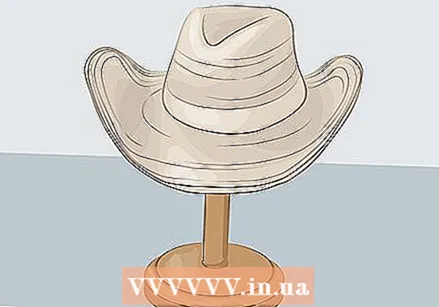
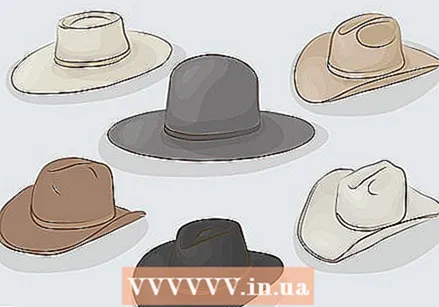 Decide which border you want. Many felt cowboy hats are made with flat brims, so you can create your own style according to your preference. You can design your hat based on aesthetics alone, to complement the shape of your face. As a rule of thumb, the narrower your face is, the higher you should bend the brims of your hat.
 - If you have a rounder face, the edges should not be folded up too far.
 Shape your rim according to the style of the competitive event. If you plan to participate in a competition, the specific event will also affect the shape of your hat. Riders in equestrian and show competitions must have an edge that curls up on both sides, without a downward dip in the front.
 - Cutting or reigning competitions are less strict with regard to hat shape, and hats often have a flatter brim.
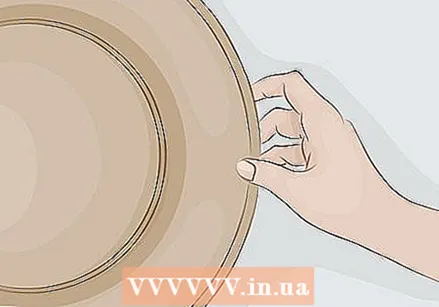 Check if there is a forming wire in the rim. If your felt hat has a thread sewn into the brim of the brim, it is cheap, lightweight wool felt. It is not intended for steam shaping. Instead, shaping the wire will help the brim keep the desired shape.
 - Steamed wool felt takes on a fluffy, irregular appearance.
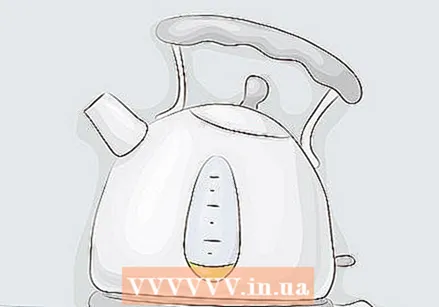 Boil water until it steams. Use a large pot or kettle with an open spout. Grab a pair of gloves or kitchen tongs while you wait for the water to boil. The brim of your hat gets hot during the shaping process and you don't want to burn your hands. Don't forget to put safety first when working with boiling water.
 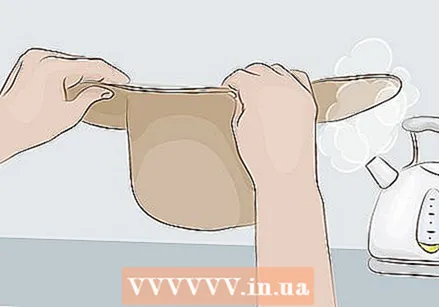 Gently hold the brim of the hat over the steam. Pick part of the felt edge to shape first, and hold this part over the steam from the boiling water until the felt softens. This part of the brim is now ready to be formed. Work one part at a time to keep the felt soft.
 - Always steam the brim with the crown side of the brim towards the steam. Never steam the brim from the bottom, as you risk permanently damaging the leather sweatband. Steam (and excess heat and moisture in general) will warp, wrinkle and shrink the brim.
- If you damage the inside of the brim of the hat, a professional hatter will need to remove and replace the sweatband, and it's not free.
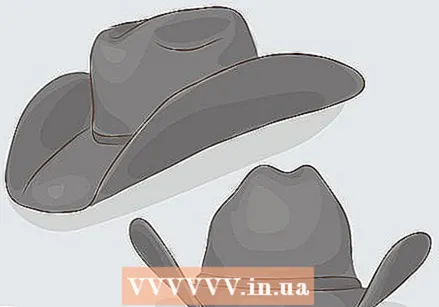
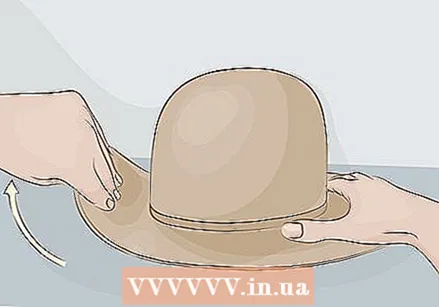 Shape the steamed portion of the brim. Bend the steamed portion of the brim gently with your fingers until it forms the desired shape. For a light roll, hold the edge with your fingers on the top and your thumb on the bottom and curl the edge with even pressure. For a tighter crease, press the steamed brim against your stomach, crown out, and use both hands to bend the brim sharply out.
 - Wear latex or vinyl gloves when shaping a light-colored felt cowboy hat to avoid stains from skin oils.
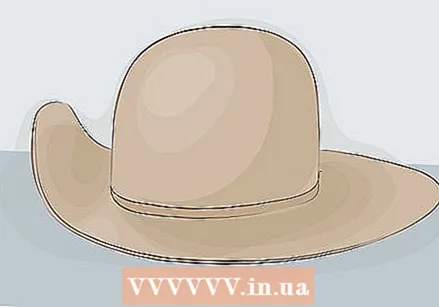 Let the shaped part of the rim cool. After you have formed the steamed portion of the hat brim, let it cool and set it in place. If you move to the next part of the brim prematurely, you may find yourself reshaping the part of the hat you've already formed.
  Steam and shape the next part of the brim. Repeat this process: steam part of the brim, shape the brim and hold the brim in place until the felt cools and hardens. Make sure the shape of each part of the brim is solid before moving on to the next step.
 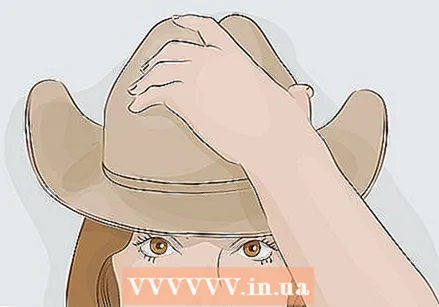 Place the hat firmly on your head. After you are done shaping the brim, but before the cowboy hat has completely cooled and taken shape, press the hat into place on your head. This will help the inside of the hat mold to the shape of your head and make it fit better.
 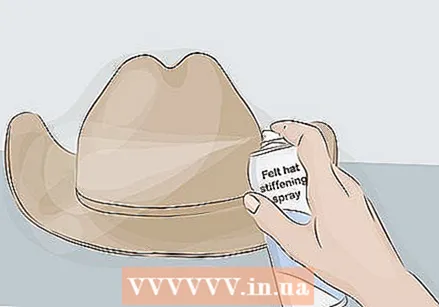 Spray the finished hat with a stiffener. As an optional finish to the shaping of the hat, you can spray the shaped brim of the hat with a stiffener. This product will help hold the molded brim in place, and is especially helpful if you have strongly shaped the sides of the brim.
 - Felt hat stiffener is available as a spray at hat stores or online.
Method 2 of 3: Form a straw cowboy hat
 Feel the formation thread. The forming wire is a thin, flexible wire that runs around the edge and is tied there. Straw cowboy hats are either preformed or made with a shaping wire. The thread can be woven into the straw or covered with a decorative border.
 - A preformed straw hat made without thread cannot be reshaped because the methods used for other materials will damage the straw.
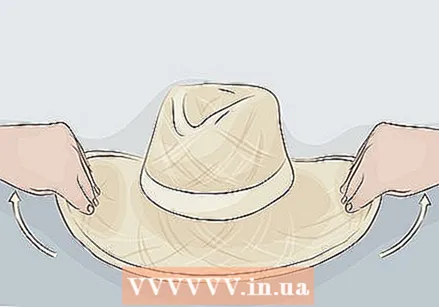 Shape the brim the way you want it to look. Bend the wire in the brim of the hat until it takes the shape you want.
 - The shaping wire is made to be warped more than once, so don't be afraid to experiment with other styles.
 Avoid reshaping the hat's crown. Straw cowboy hats are preformed by the maker. Normally you don't need to shape the crown unless you want to exaggerate a fold. Since there is no thread in the crown, attempts to change the shape will only damage the hat.
 - More complicated deformation or reshaping of a damaged crown should be done by a hatter.
Method 3 of 3: Forming a palm leaf cowboy hat
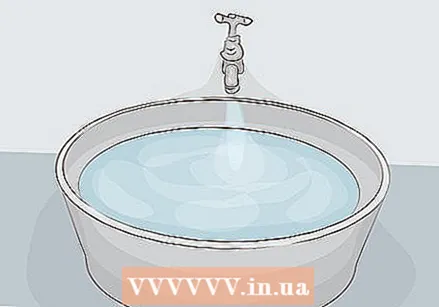 Fill a large container or bowl with lukewarm water. Avoid extreme water temperatures: Hot water can burn your hands, while cold water makes the brim of your palm frond hat more difficult to shape.
 - The container of water should be large enough to submerge the entire hat. Use your bathtub or a tub, if you have one.
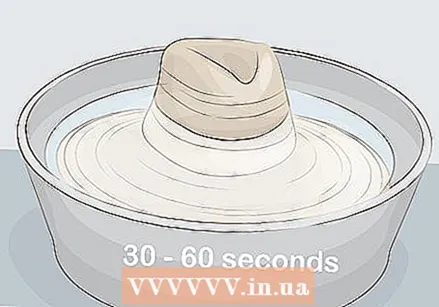 Soak the brim of the hat in the water for 30 to 60 seconds. Soak the submerged portion of the hat until the fibers have softened. If your sink is large enough, you can submerge the entire cowboy hat. This allows you to form large areas of the border without having to work in sections and re-soak each section.
 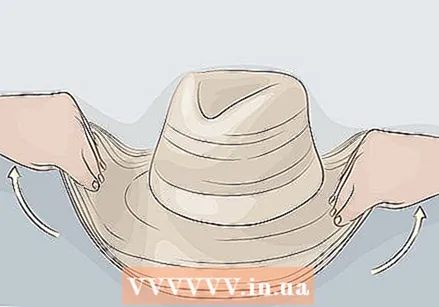 Shape your palm leaf cowboy hat. After the hat (or part of the brim) is soaked, pull it out of the tray and shape the brim. Slowly fold the brim until it is curved in the shape you want. If you want to change the shape of the crown, you can soak and shape that part of the hat as well.
 - If you have had the palm leaf hat for months and it starts to lose its shape, you can use these steps to change the hat to the shape you prefer.
 Let the hat dry to determine the shape. If you don't have time to hold the hat while it dries, put it on a hat stand or wig head while you're shaping it, and let it dry on the hat stand as well.
 - Repeat the warping and drying process as needed after wearing your palm frond cowboy hat in the rain.
Tips
- If you are still not sure how to shape the brim, study cowboy hat catalogs or online sites to see the many ways you can shape the brim. Edges can be rolled around on one or two sides. They can be folded softly or sharply.
- You can slightly adjust the crown of a felt or palm leaf cowboy hat. Use steam on a felt hat or dip a palm frond hat and gently pinch the sides of the fold together.
- Despite the depiction of cowboys in Westerns, the Old West cowboys wore their hats flat to keep out the sun. Rolled and folded edges didn't come into fashion until much later, when ranchers crowded into pickup trucks and couldn't take up too much space.
Warnings
- Never leave your western hat in a vehicle during the day. The heat from the sun will shrink the leather sweatband within 20 minutes, even on a cooler day.If this happens, take the hat to a hatter to professionally stretch it to its original size for a proper fit.
- Never put your felt cowboy hat on the brim as this will quickly ruin the shape. Hang it on a hat rack or place it with the crown down.


